Since I put my shingle out as a designer I've had a few inquiries about doing long-distance projects. With a couple such projects under my belt now, I can confidently say it works quite well! Today I am excited to show you a project where our primary communication was via e-mail. This client found me when my kitchen was featured on Apartment Therapy. They do live in-state, so I was able to visit the home once before the plan was presented, and again when the project was complete to take "after" photos.
The client provided measurements and photos of her kitchen. We discussed her wants and needs in depth through a series of questions and answers via e-mail. At that point we had the opportunity to meet in person before I finalized their plan.


BEFORE
The original kitchen in this late-century ranch home felt dark and closed in. It's single window faced north, and the built in florescent box light topped the hit list. The red sink dictated the color scheme and limited their decorating options. The cabinets were showing wear and many of the doors wouldn't close properly. Otherwise, the galley style layout worked well for them. They weren't interested in opening the wall (left) to the living room, however there was an unused back door at the other end that left some opportunity to add additional space. (There is also a sliding door in the dining room that provides access to the back yard.)
I provided two 3-D layouts to them to help them visualize annexing the back door and pantry space into the kitchen area. Both designs called for removing the short end walls on either side that were non-load bearing, eliminating the soffits and florescent light box and installing can lights.
The first layout involved removing the back door all together, removing all upper cabinets on the north wall, and adding extra windows to make the kitchen feel lighter and larger and maximize their beautiful mountain views.

A second option showed the dividing walls removed but the back door still in place. The old pantry closet was replaced with cabinets to unify it with the kitchen. The single window was maintained and open shelves were added to replace the lost storage of upper cabinets.
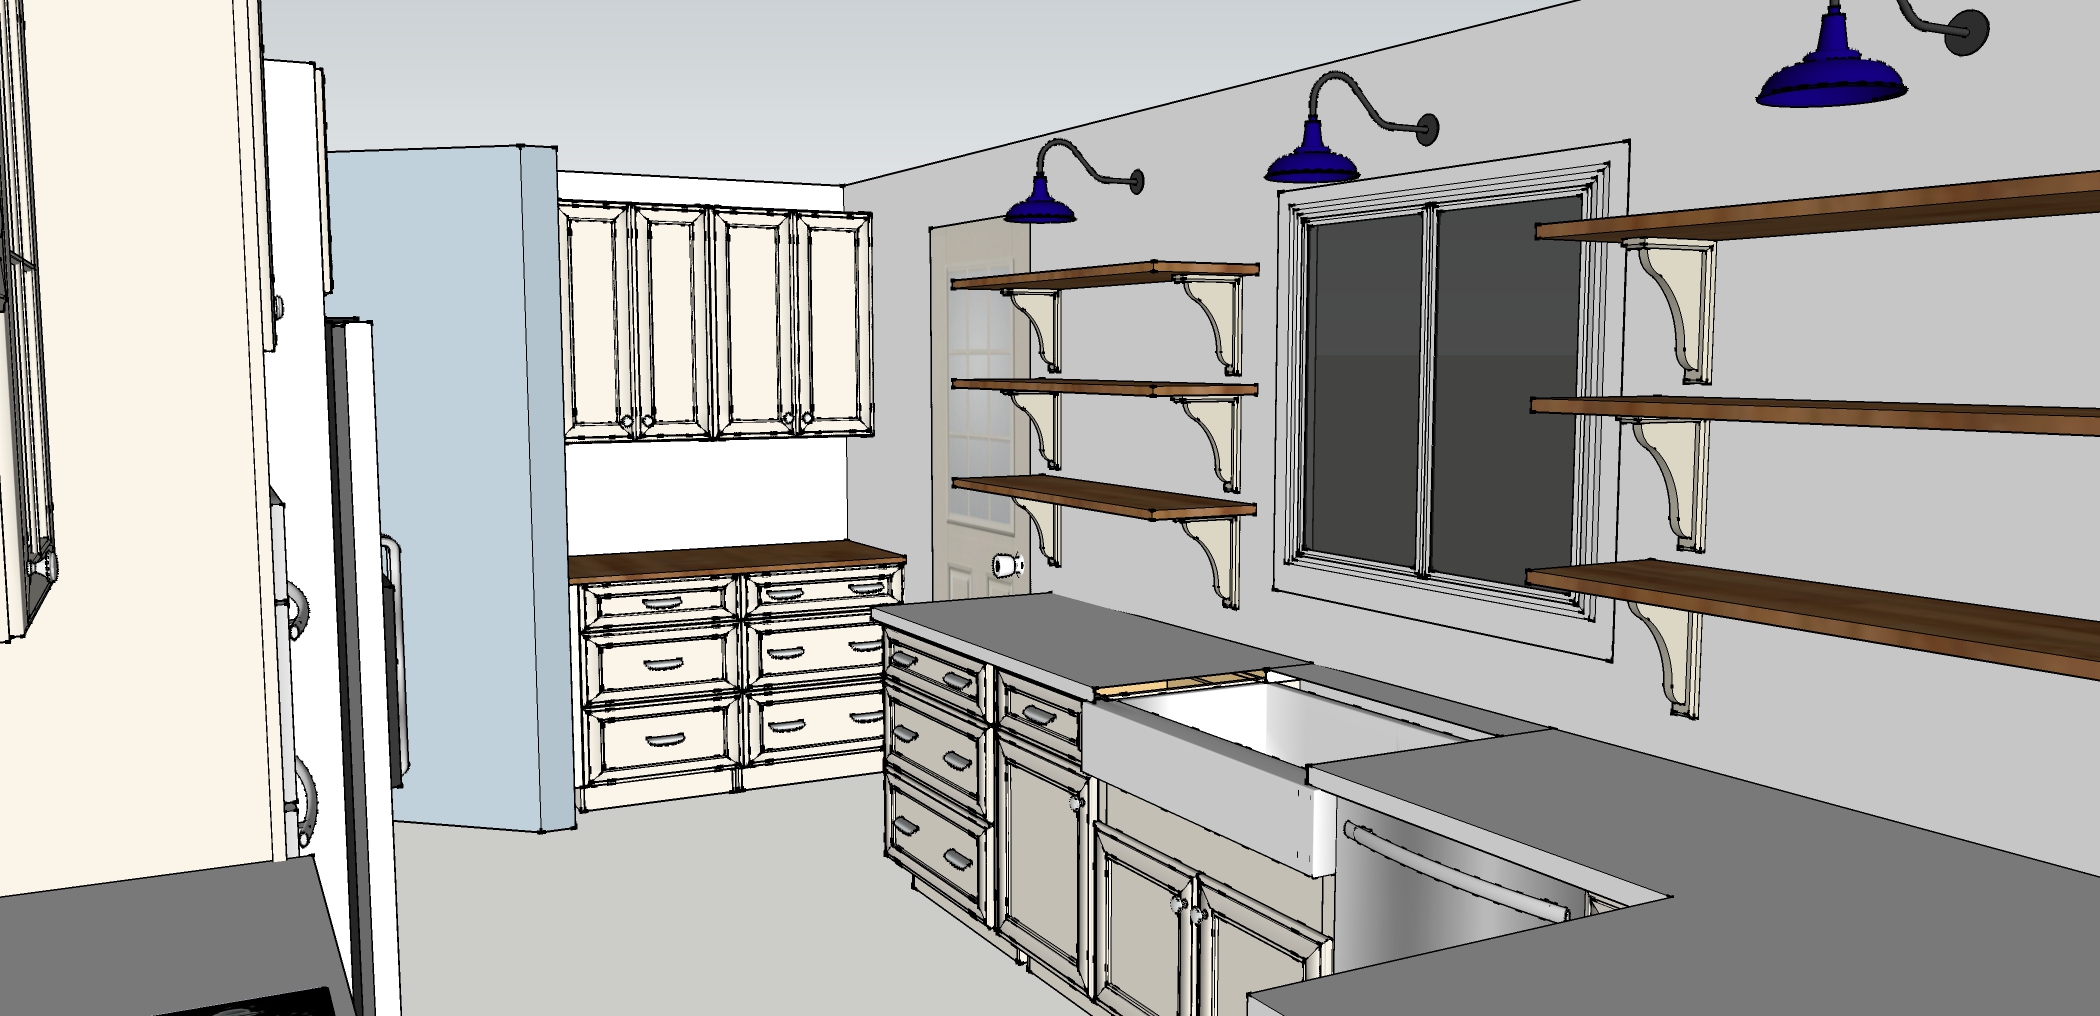
On the opposite side, the appliance locations were maintained to save costs. We also explored the idea of glass upper cabinets to increase the light and airy feel.

The renderings helped them visualize the end result and in the end they took the leap that would give them the biggest impact—removing the back door and expanding the window.
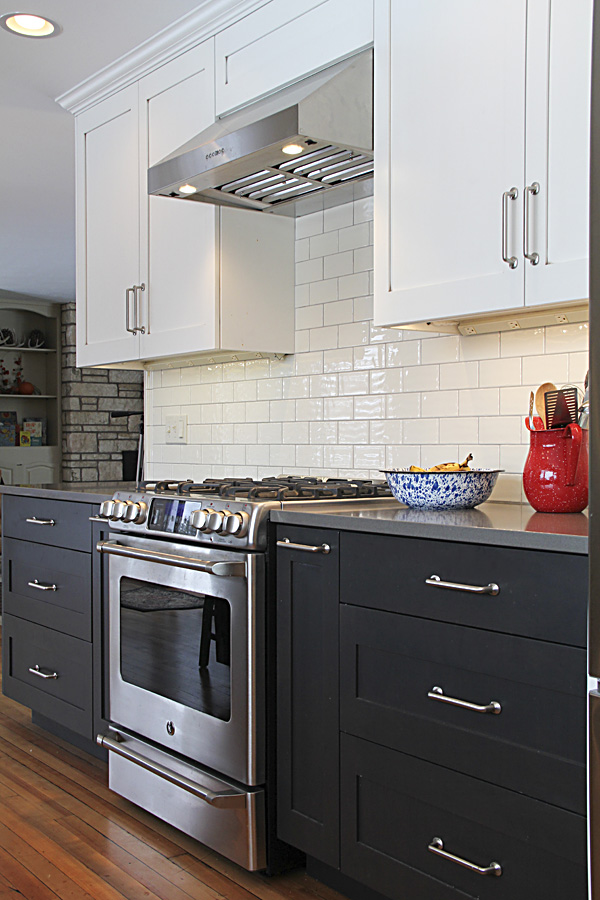
While their electric cooktop functioned okay, they eventually decided to make the switch to a gas stove. They opted for a range instead of a cooktop, adding a range above and eliminating the wall oven/microwave combo which provided them with extra counter space. They found a spot for their microwave by borrowing space from a coat closet and creating a niche just to the right of the refrigerator.
I also provided them with a mood board to help them make design selections since I was not involved in the shopping and sourcing portion of the project.
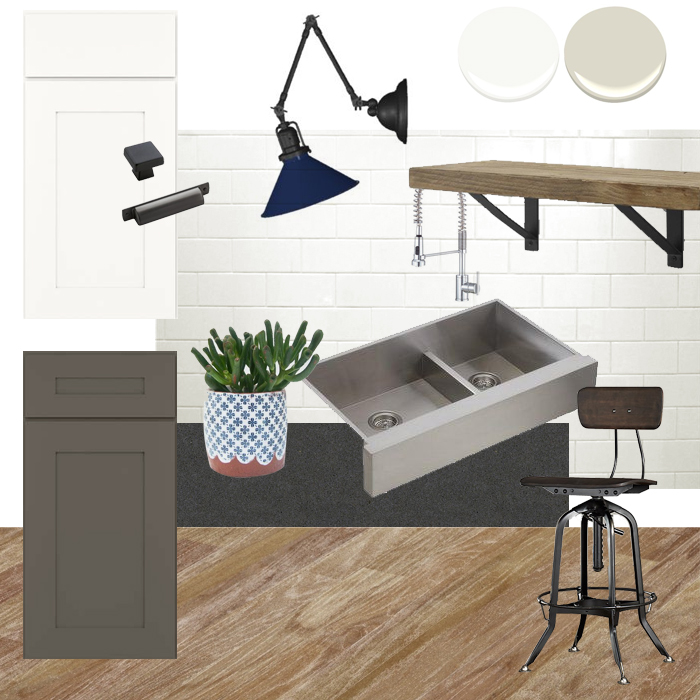
I recommended a two-tone cabinet color scheme with a warm white on top and gray on the bottom. The light color would keep things light and bright, and the gray would add variety and durability to the cabinets that get the most wear. The design also included white subway tile and beautiful feature sconces from Rejuvenation above the windows. She had expressed a love for cobalt and had an inspiration photo with a stunning cobalt gas stove. I suggested that lighting might be a great opportunity to bring the color in without making a permanent commitment. (Shades could easily be swapped out later). I was thrilled that they decided to adopt the lights in their design, though they did opt for a more classic and neutral option (also from Rejuvenation).
Because their kitchen footprint expanded, they would need to either match their existing oak and refinish the entire space or replace it with something new. Their contractor found them a deal on reclaimed wood from an old gymnasium, so they chose to replace it. I love the character and warmth the new floor brings to the space.
Now for the reveal:

BEFORE
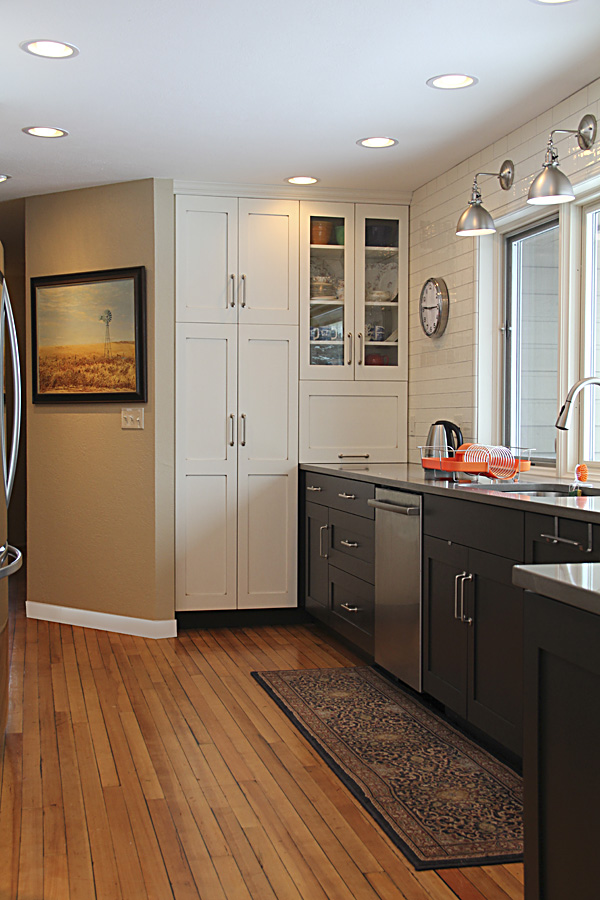
AFTER

BEFORE

AFTER

BEFORE

AFTER
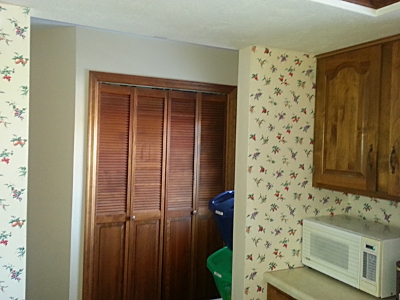
BEFORE

AFTER

BEFORE

AFTER

BEFORE
AFTER
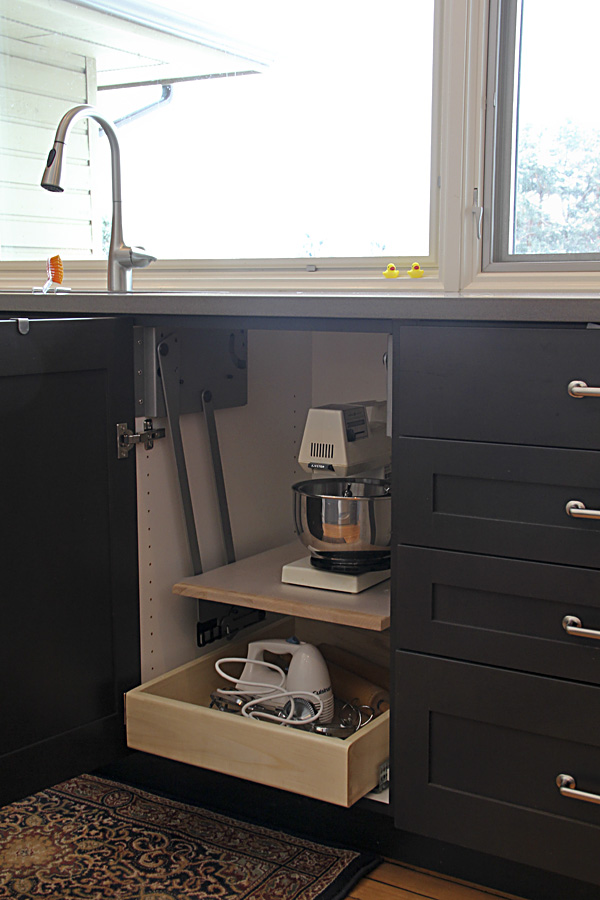
A few fun features in their new kitchen:


I hope you enjoyed this tour! I certainly enjoyed working on this project and seeing the transformation when it was finished. Do let me know if you have any questions about sources and I will try to track down the info for you.