Continuing on with our tour through this cute little cottage, let's mosey through the rest of the house. (As a reminder, the listing is here. Part 1 and Part 2, in case you missed it.) So as not to drag this reveal out any longer than necessary, this is going to be a long, photo heavy post.
The kitchen
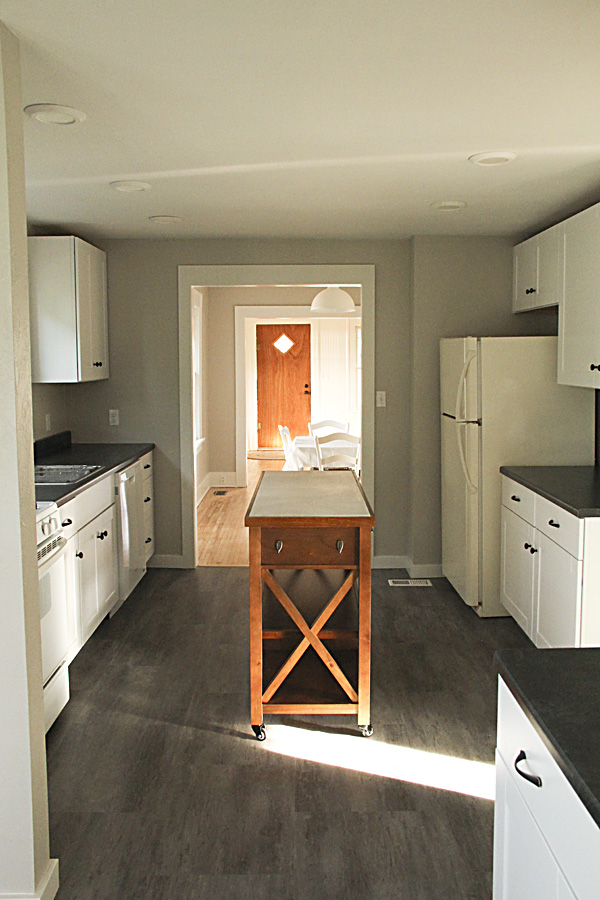
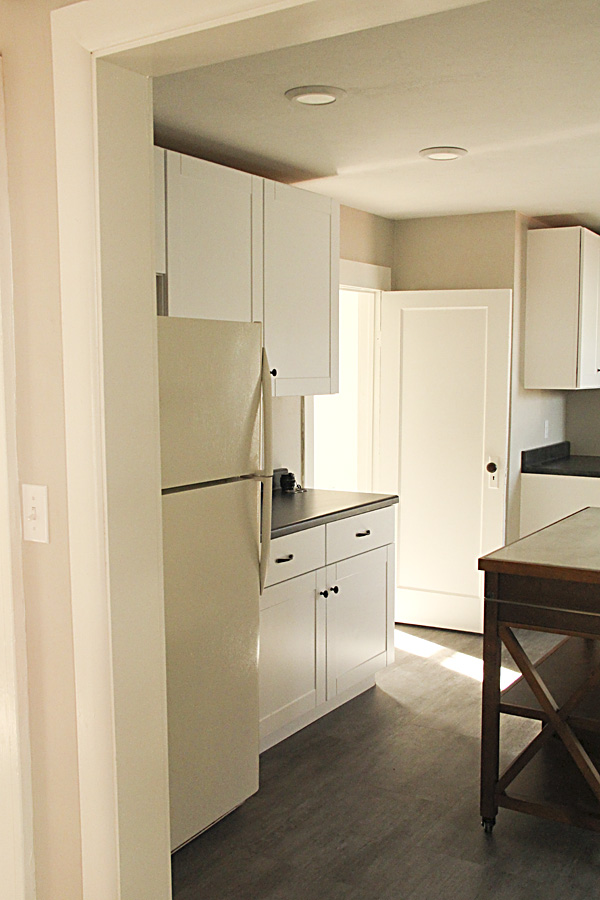
We probably spent less on this entire renovation than most people spend on the kitchen alone, so I am proud of what we were able to accomplish on our budget: new recessed lighting, a new window above the sink, all new cabinetry and hardware, countertops, sink, and faucet, durable luxury vinyl tile flooring, a new dishwasher and hood vent, a marble-topped rolling island, and a much improved layout. A new refrigerator would have been a nice addition also, but we did plan enough room for a full-sized fridge to be added. If I bought this house I would add a white subway tile backsplash and few well chosen accessories and this kitchen would be as cute as ever!
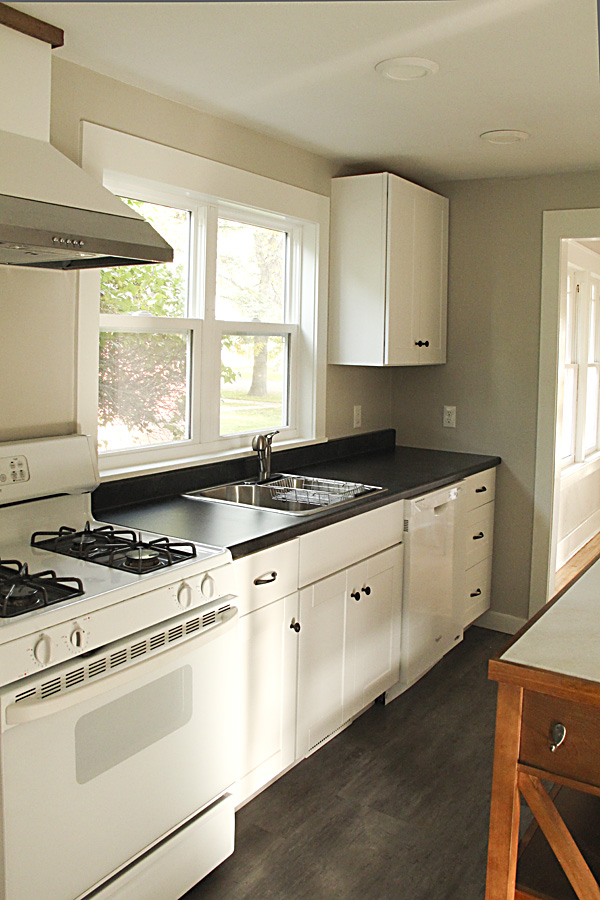
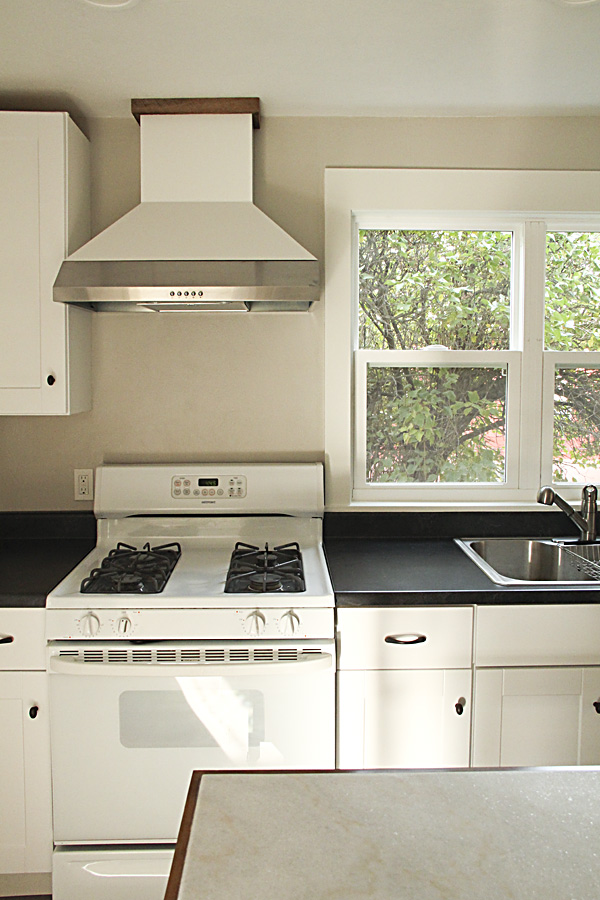
Instead of buying an expensive range hood vent, we used a traditional cabinet-mount version and asked the contractor to enclose the ducting with a custom wood box instead. I love how it turned out! And I love how the extra touch of wood ties in with the wood island and warms up the neutral space.
One of the best changes we made was to bring the laundry upstairs. Previously the hookups were in the deepest darkest corner of the basement. I don't love laundry in the kitchen, but we were able to separate the laundry area with the partial wall (beyond the stove). Now the laundry feels like a separate area that is within easy access to the bedrooms, a huge benefit to the new home owners.

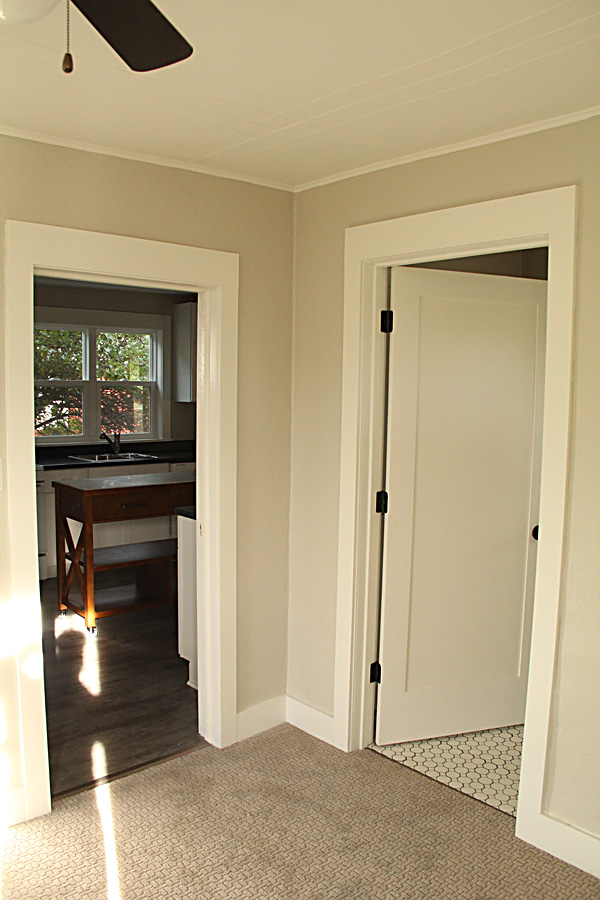
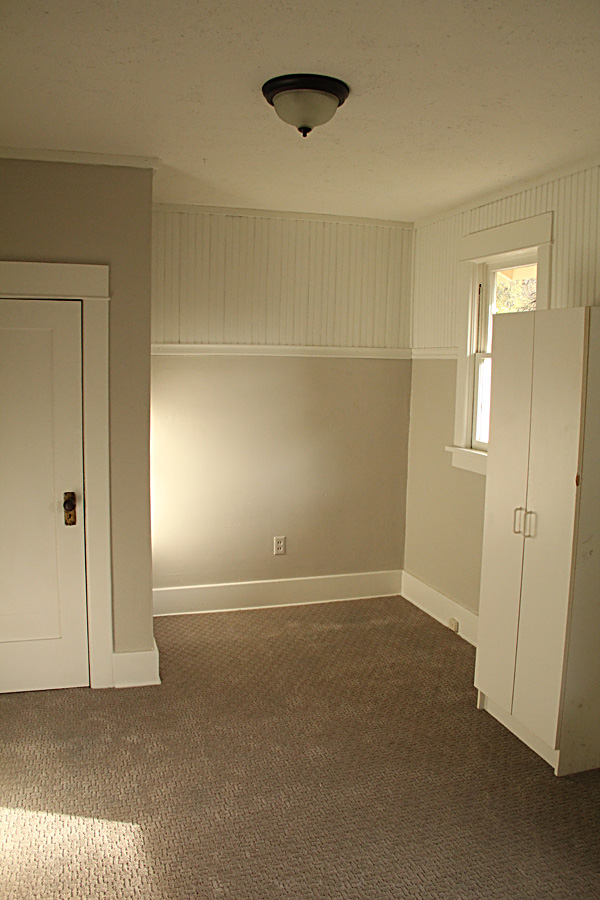
The door shown below leads into one of the two upstairs bedrooms:
And this is another look into the laundry area (the washer and dryer hookups are to the right, out of sight in this photo. The location accommodates both side-by-side or stackable units.) Beyond the laundry area is the mudroom leading to the back door and stairs to the basement.

The kitchen before:

This was a hot mess of mis-matched cabinetry, wallpaper, and weird electrical fixtures. I do kind of like the wood cabinet unit, especially the upper glass doors. I might have been inclined to find a way to reuse it, but as you can see by the photos, none of the drawers closed properly. And the homeowners had already gutted this kitchen at the point I was brought into the project.
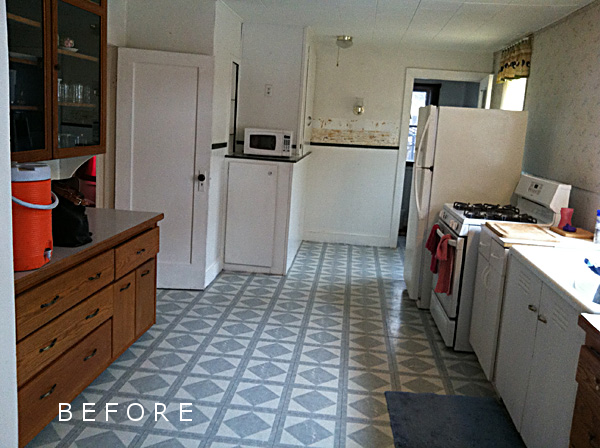
Gutting the kitchen gave us the blank slate we needed to reconfigure the layout and update the electrical.

bedrooms and bath
The upstairs has two bedrooms with gorgeous original wood windows and natural light. We just had to gussy things up with updated flooring, paint, and lighting. The ceiling in the Master bedroom featured a paneled design that we left alone. We added a smaller ceiling fixture to better fit the scale of the room (it matches the one in the living room. I'm all about continuity like that!) :)

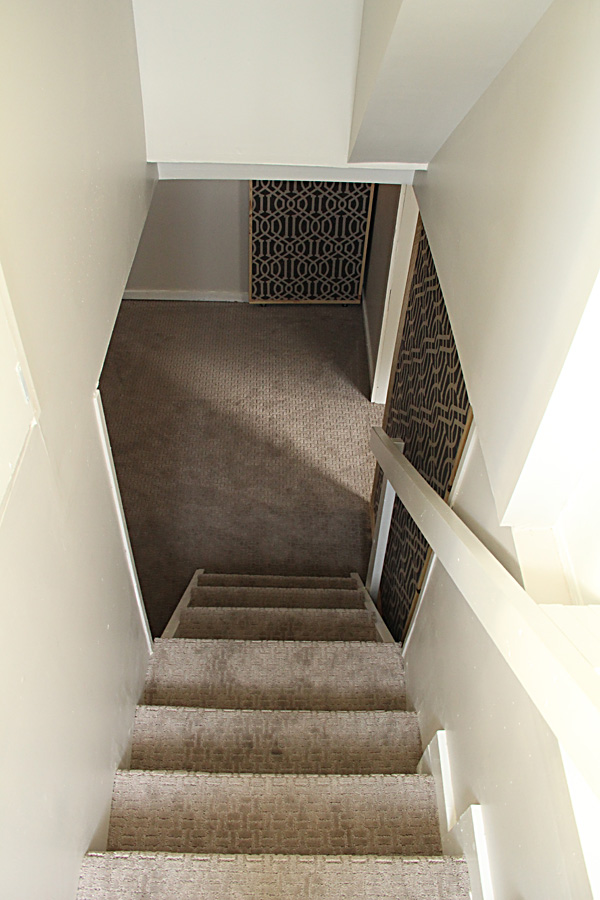
One simple thing we did that had a big impact was in the master closet. When it was added to the house, it was built out into the stairwell on the other side of the wall. You had to "shimmy" sideways around the big box just to descend the stairs. (Imagine doing that with a big laundry basket in hand!) You will see when I show you the stairway that this little slanted chunk we took out of the Master closet makes minimal difference here and much improved the basement access. We also widened the closet doors.

The Master before:

You may wonder why we didn't refinish the hardwood floors in this room, and I will tell you. We definitely considered it. But widening closet and bathroom doors left gaps in the floor that would have needed repairing, and in the end the homeowner liked the coziness of carpet in the bedrooms anyway. The wood in the second bedroom was in worse shape and the wood floor guy advised us not to try to refinish them.
The two bedrooms are joined by a Jack and Jill bath. The old doors into the bathroom were the funniest little elfish size. I loved the old doors in this house, but we found the closest match we could and replaced the bathroom doors with two new full-size doors.
Now check out this adorable bathroom! I don't have a true before photo, but believe me when I say this is a massive improvement.
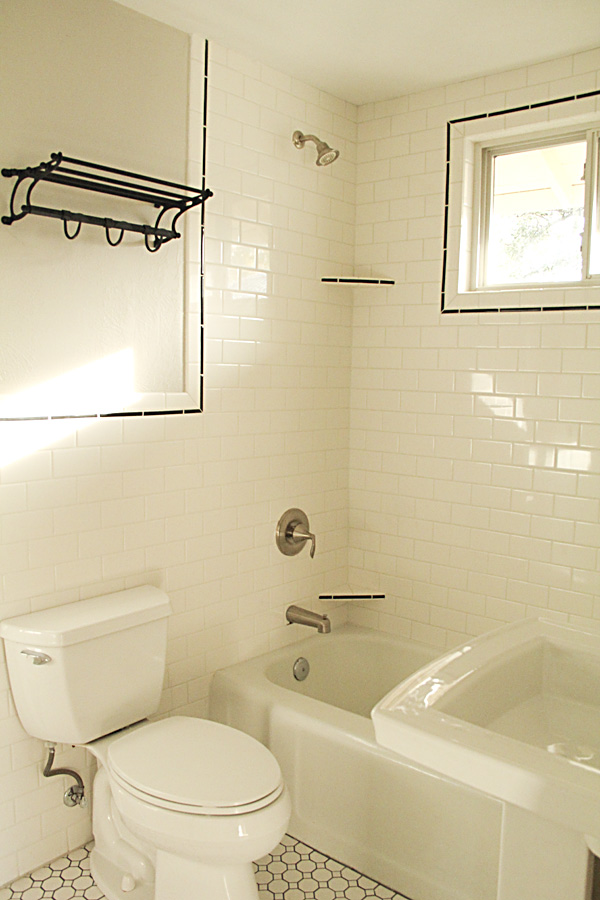
We cleaned up and reused the original tub, but everything else in this bathroom is new. I fought to do tile work in the bathroom and even though it costs a little more II think the money was well spent.

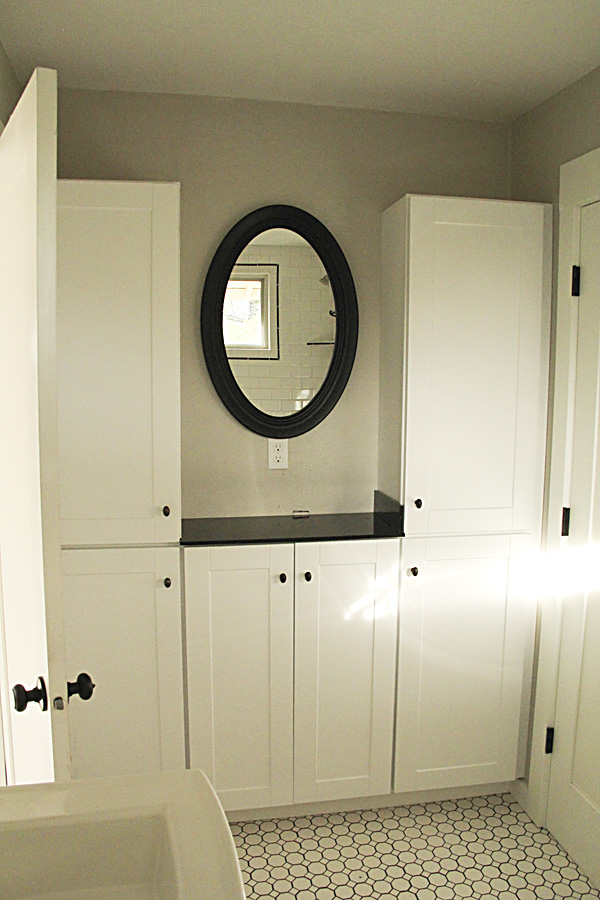
Using a pedestal sink opens up the room, but it is also a risky decision when there is only one bathroom in the house. There was empty space behind the two bedroom doors, so we took the opportunity to add storage here instead, and a black granite countertop provides an extra area to primp. (We were in the process of installing the backsplash when this photo was taken so it isn't quite finished.)
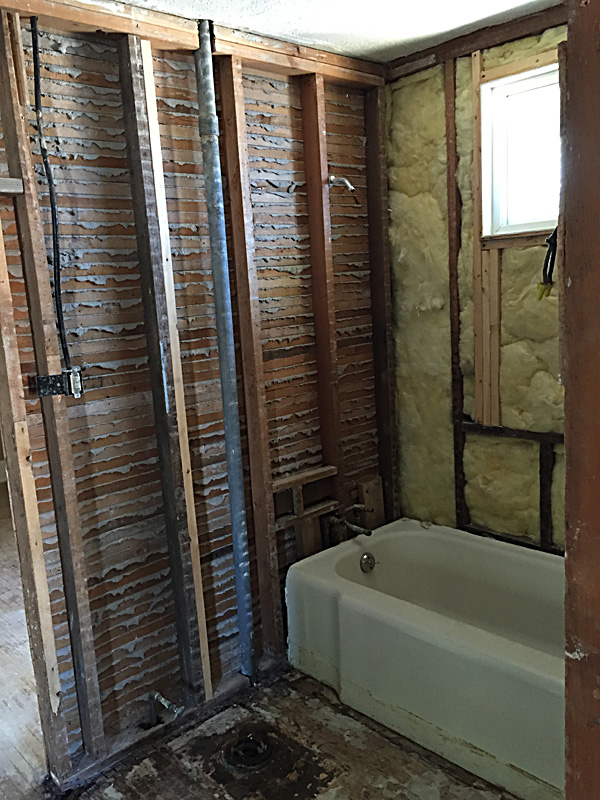
The bathroom gutted during construction:
The second bedroom is as cute as ever with bead board paneling on the upper third. (These photos were not shot with a wide-angle lens, and as such they look smaller in these photos than they are in real life.)
mudroom and basement
The back mudroom is sunny and bright, so we simply cleaned it up by painting, adding hooks, and replacing the back door.

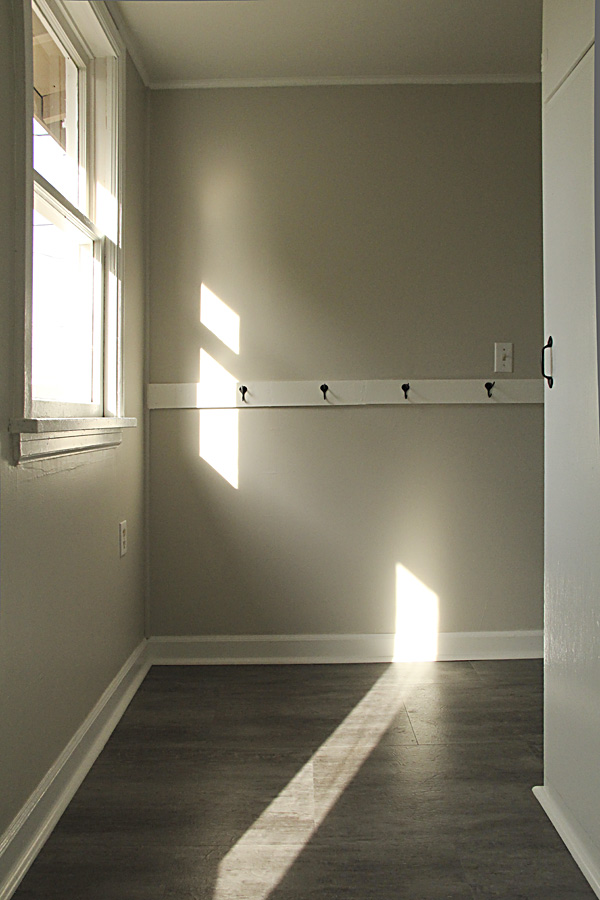

This is the door to the backyard and the closest entrance to the garage.

Heading down the stairs to the basement, this is where you had to make yourself very skinny and descend the stairs sideways. (Too bad I don't have a before photo!) The original construction work was very shoddy so our work in this area included lots of drywall repair, smoothing and leveling stairs, and of course, cleaning it all up with fresh coats of paint.
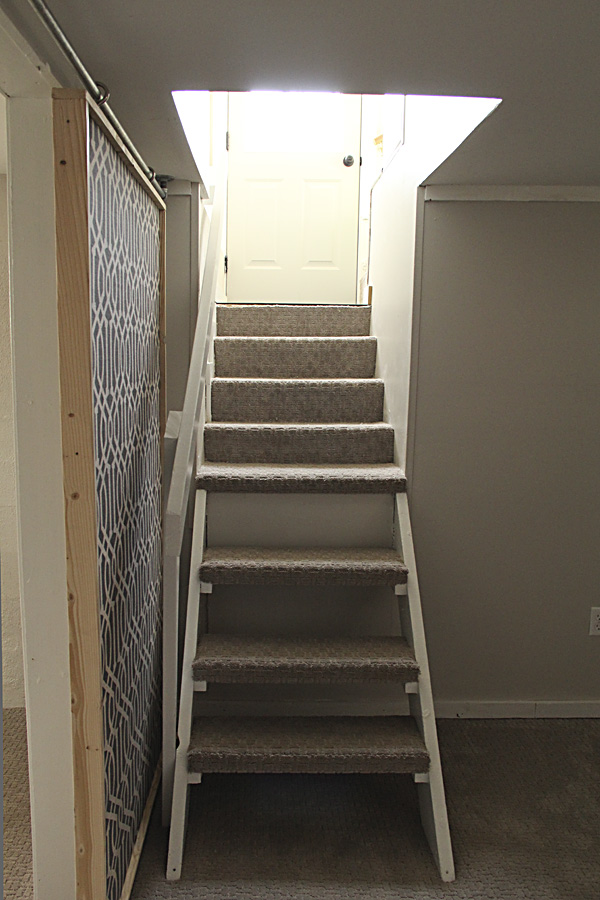
We couldn't spend a lot of money in the basement, but wanted to finish this portion of it to be clean and usable. There were two odd-sized door openings that would have required custom door solutions, so I turned to this tutorial to make screens that slide on metal piping. I think the result is fun and playful, though they will never be as solid as a real door. With an bigger budget we would have used actual smooth-sliding barn door hardware or framed in a real door.


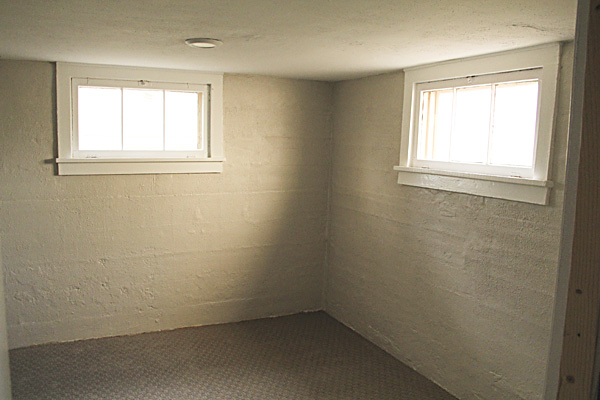
Now these two rooms are comfortable and usable as bedroom or office space.

The basement before:

The photo below shows one of the doorways now covered by one of the new screens. (It was formerly covered by a cracked vinyl accordion door. You can see the challenges here. The concrete was uneven and it would have taken quite a bit of work to even this out and frame it properly for a door.
The rest of this basement beyond this opening is fairly large and great for storage. The ceiling is shorter and the floor higher, so it isn't ideal for finished space.

And that's it!
I love to take an old house and make it new again, while preserving its best bits. This was a dream project and I am thankful for the opportunity to have worked on it. Now, someone please snatch this up and hire me to help you decorate! :)