Master Suite project

Well hi there. I thought I would pop in and tell you what we've been up to on our house. Ready for an update?

We finally started in January of this year on our Master bedroom. This is exciting because this part of the house is the first thing you see when you walk in the front door!

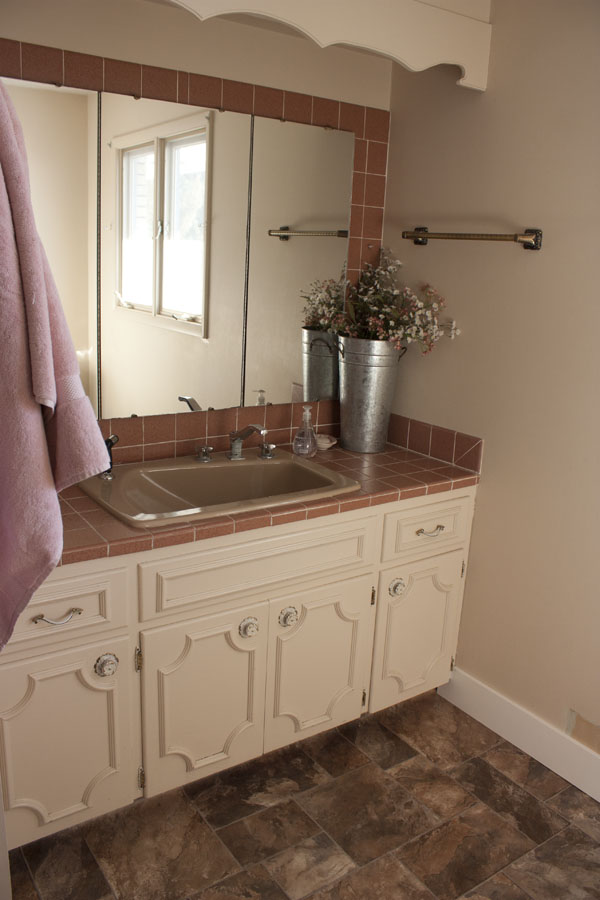
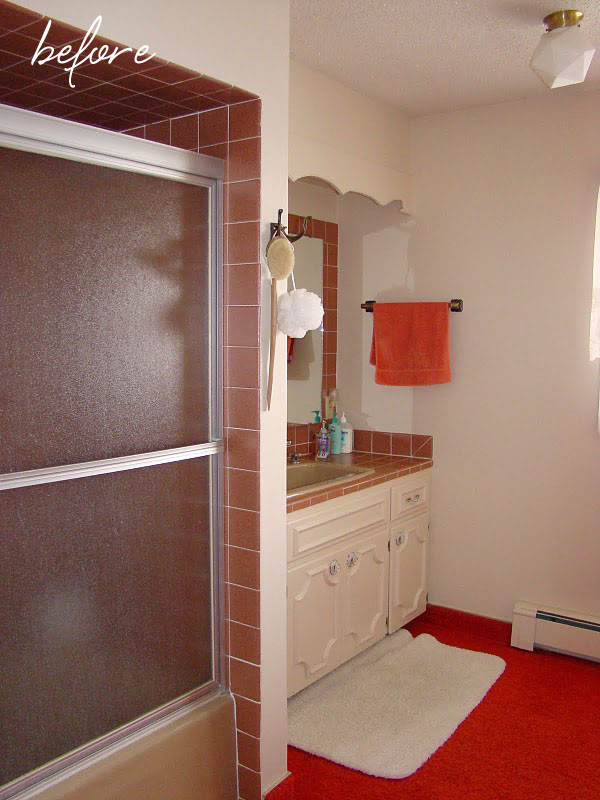
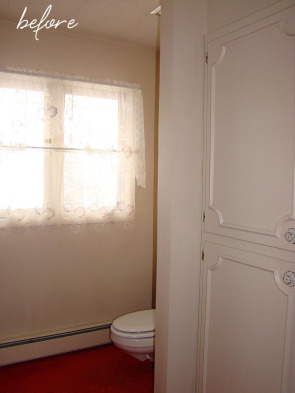
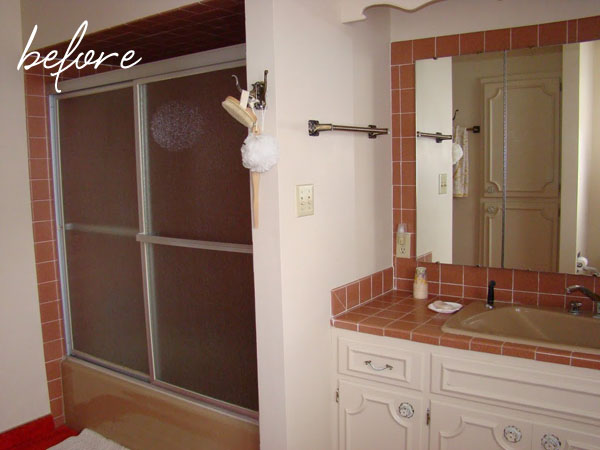
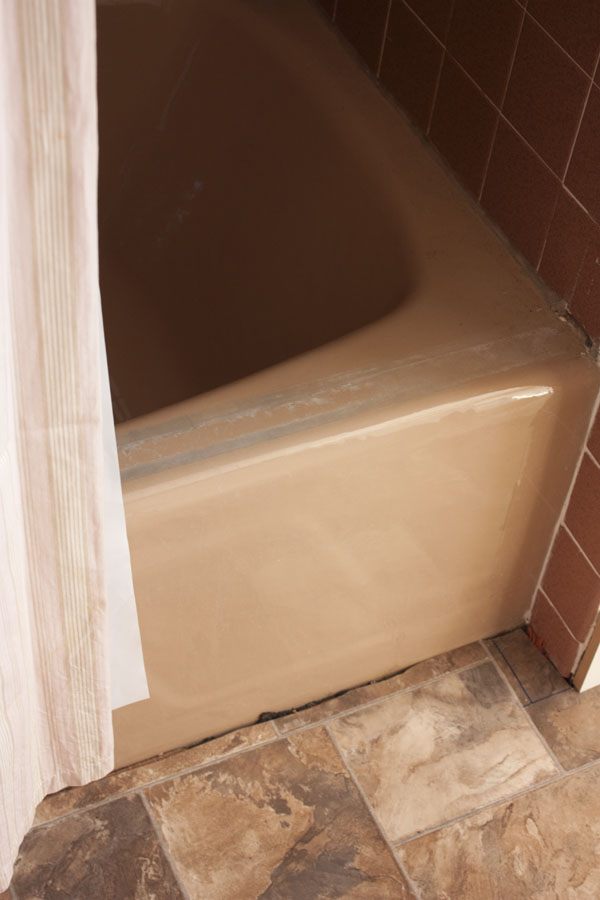
Let me throw some awesome before pictures at ya:

The bedroom:

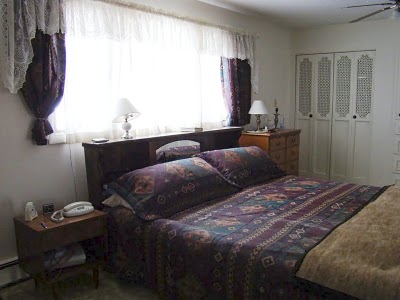
Of course, we moved our own furniture in, but otherwise left things as is in anticipation of much bigger changes when we were ready.

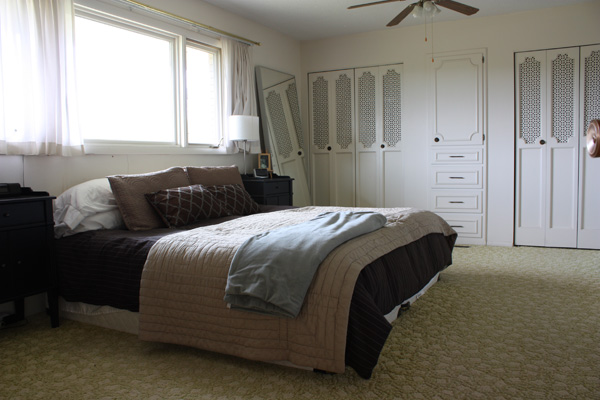
It took us 7 years to be ready. And trust me. We were very ready to rip out that old carpet. 

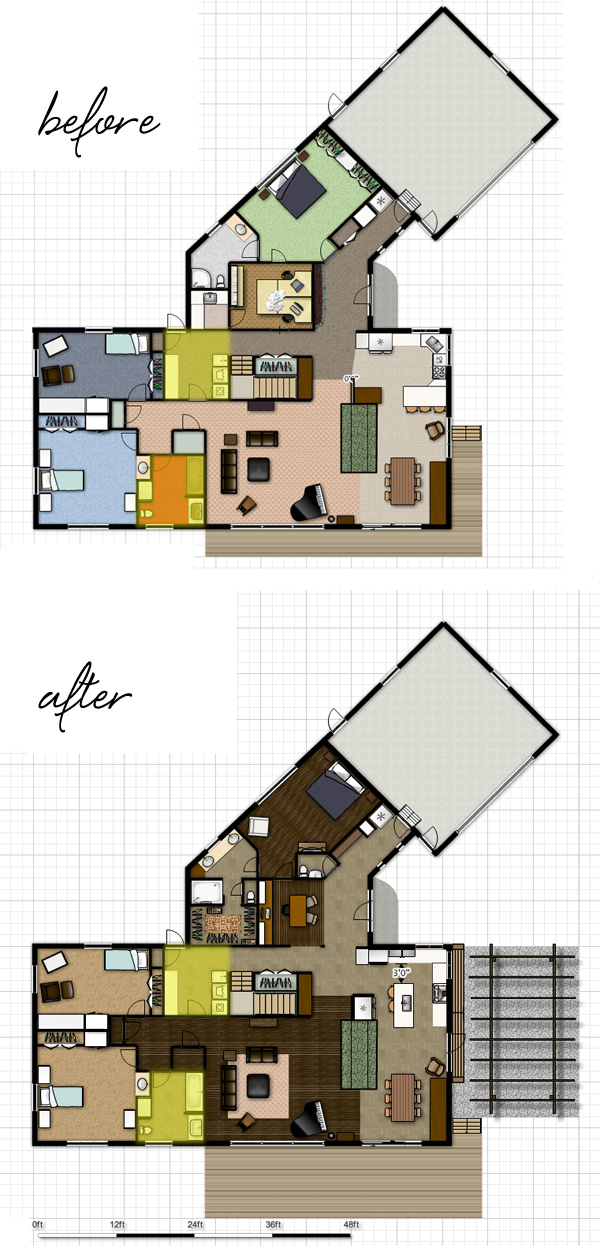
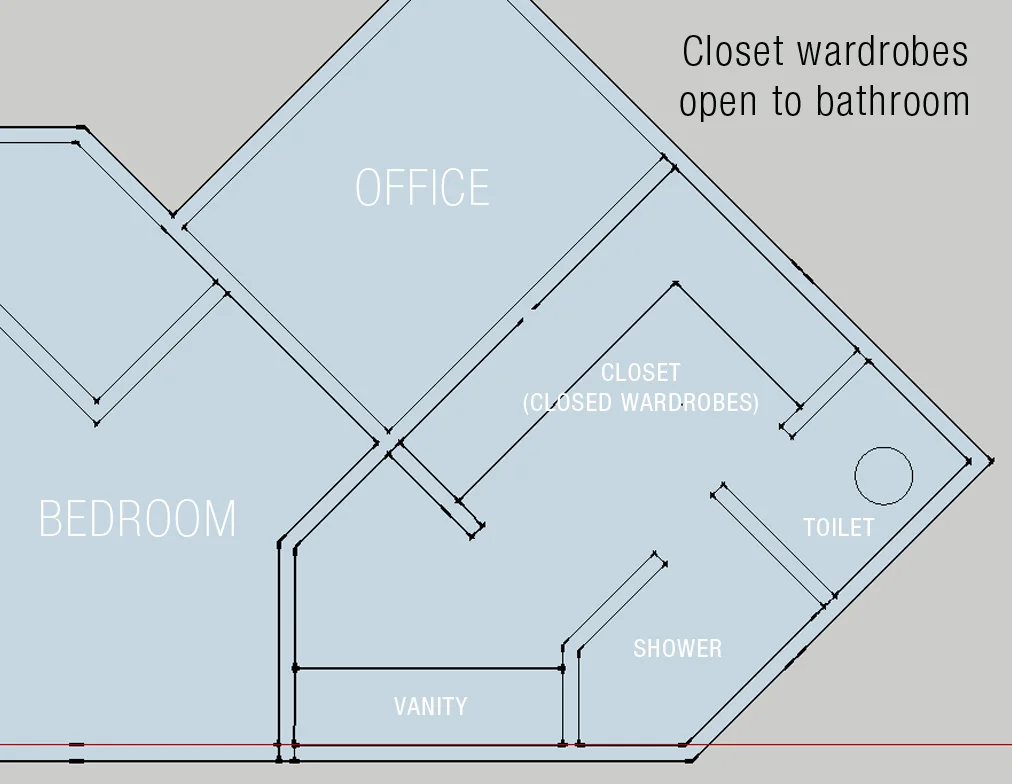
Back in this post from June of 2011 I outlined my plans for this portion of the house and shared these floor plans of the Master wing:

It fun to see what I was thinking 6 years ago and how those plans have evolved. As you can see, the space is an awkward shape. I translated these plans in SketchUp for some more specific renderings.

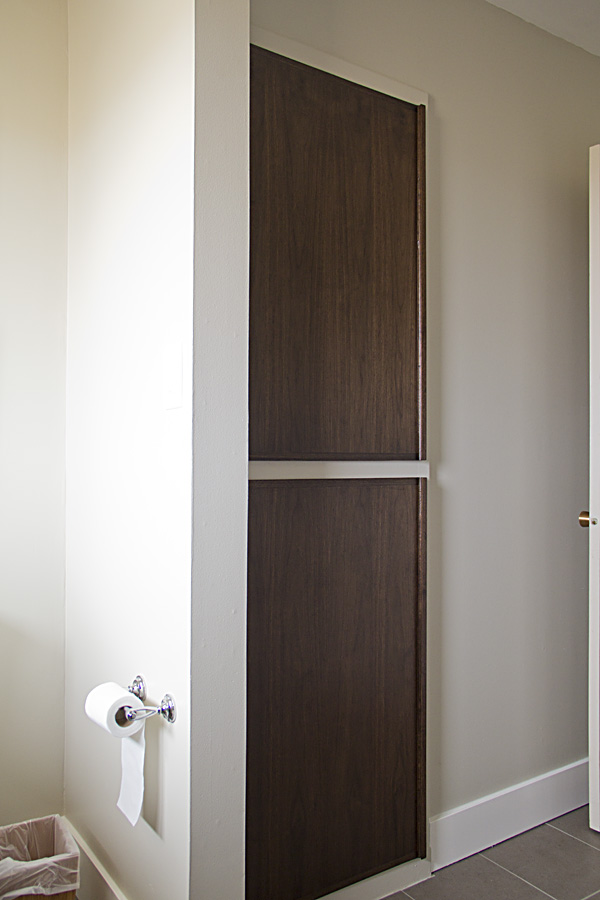
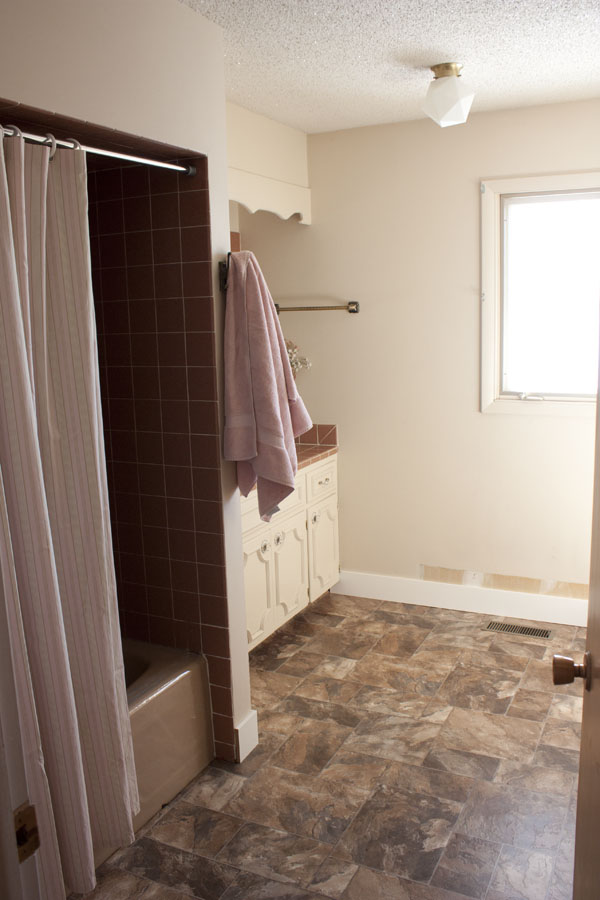
The bedroom had two entrances—a small one through the office and the main door across the entry from our front door. It was always a fun dance to climb out of the shower, peek out the bathroom door to see if the bedroom doors were open, streak across the room to the closet and pray that no one appeared at the front door.

The plan was to:

  • relocate the office entrance to the front of the room and close off the side. 
  • make the office smaller to leave more room for bathroom and closet.
  • eliminate the dark room next to the closet (my grandma was a photographer—we just used it as a glorified storage room)
  • widen the door from the office to the bedroom
  • eliminate the front entrance to the bedroom and add a powder room in this spot. (We later nixed this plan. I decided I didn't really need another bathroom to clean).  
  • Remove the closets on the far wall and add a walk-in closet near the bathroom. 

Here is a closer look at the office. Even though the square footage is smaller, we want to maximize the storage by adding cabinetry. It isn't floor space you really need in an office anyway, but I did have to fight Tom for this real estate. ;)

In the bedroom, removing the closets allowed us to place the bed on the far wall instead of under the window. Instead of adding the powder room, we just ran the wall straight across and added a closet that is accessed on the hall side. We would love to add a fireplace eventually on the wall between the bedroom and bathroom because this room tends to be cold in the winter.

masterbedroom.jpg

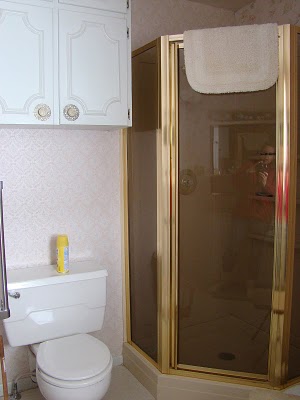
The bathroom and closet area was the most challenging space to work out because of it's odd shape. My priorities were to have adequate closet space near the bathroom and a separate room for the toilet so we could still have privacy while the other is using the sinks or closets. Here are a few options I explored:

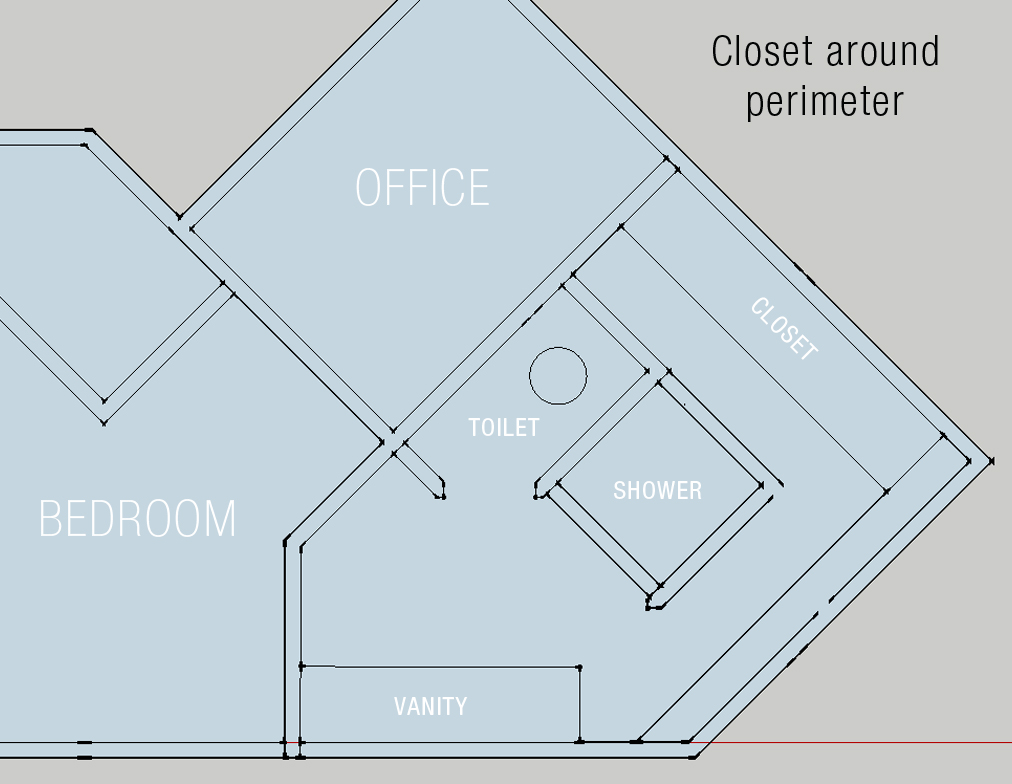
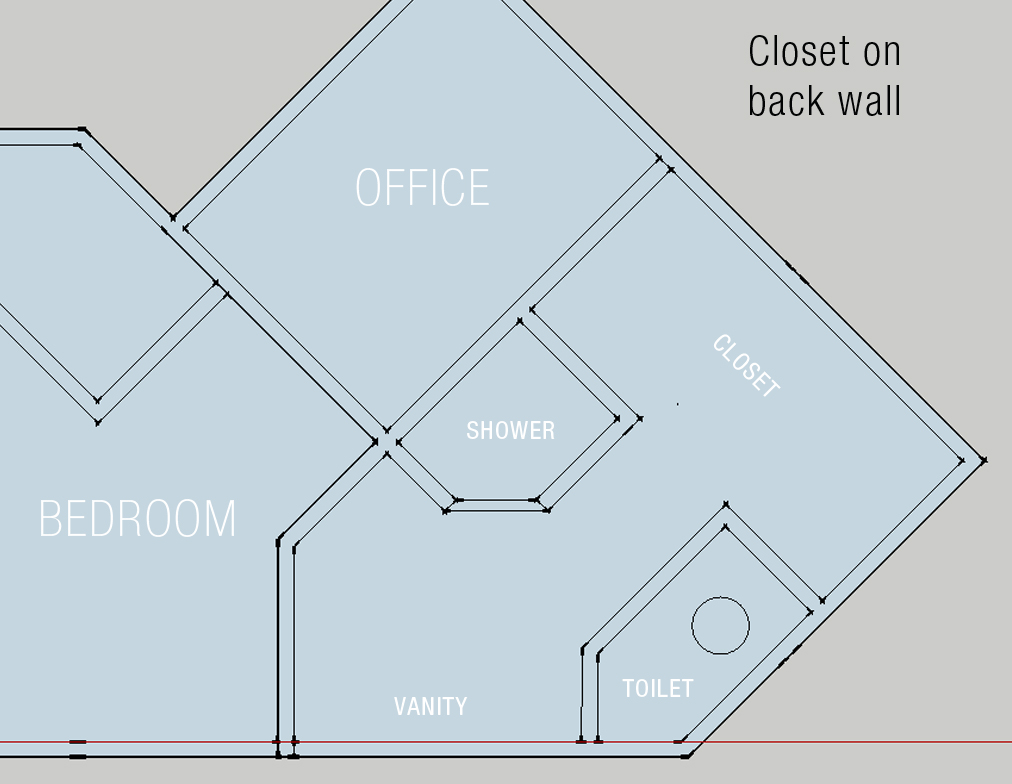
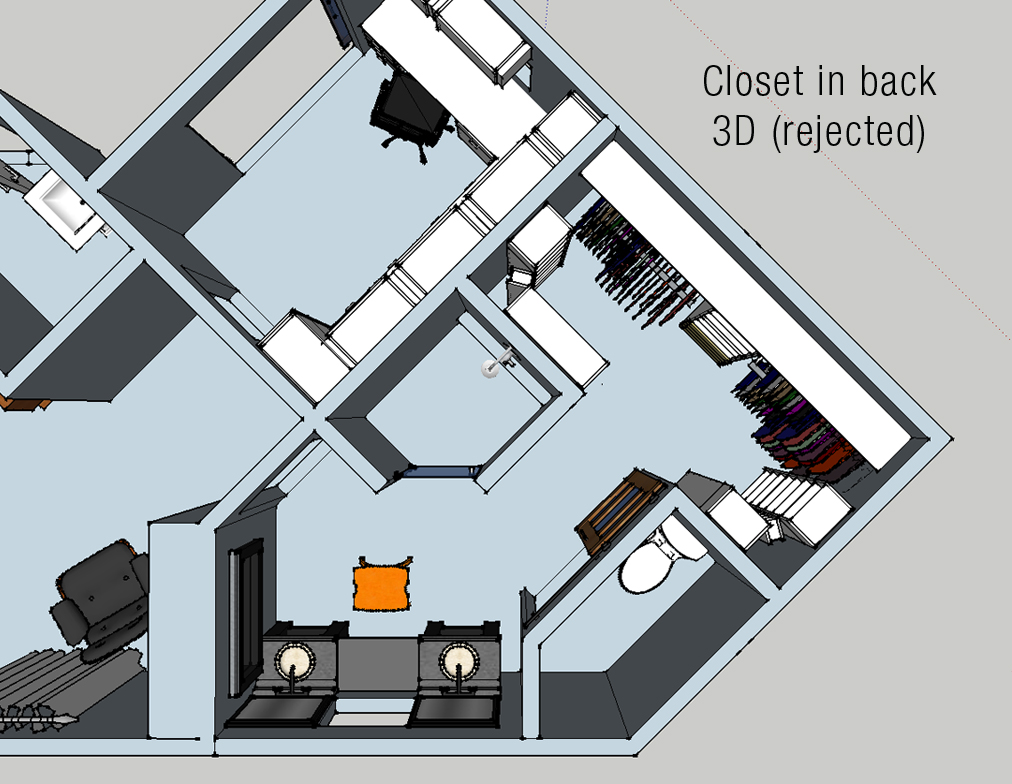
I thought this last idea had the most potential and flushed it out in 3D. After showing it to my family, however, they felt it was too tight and had too much wasted space. Back to the drawing board.

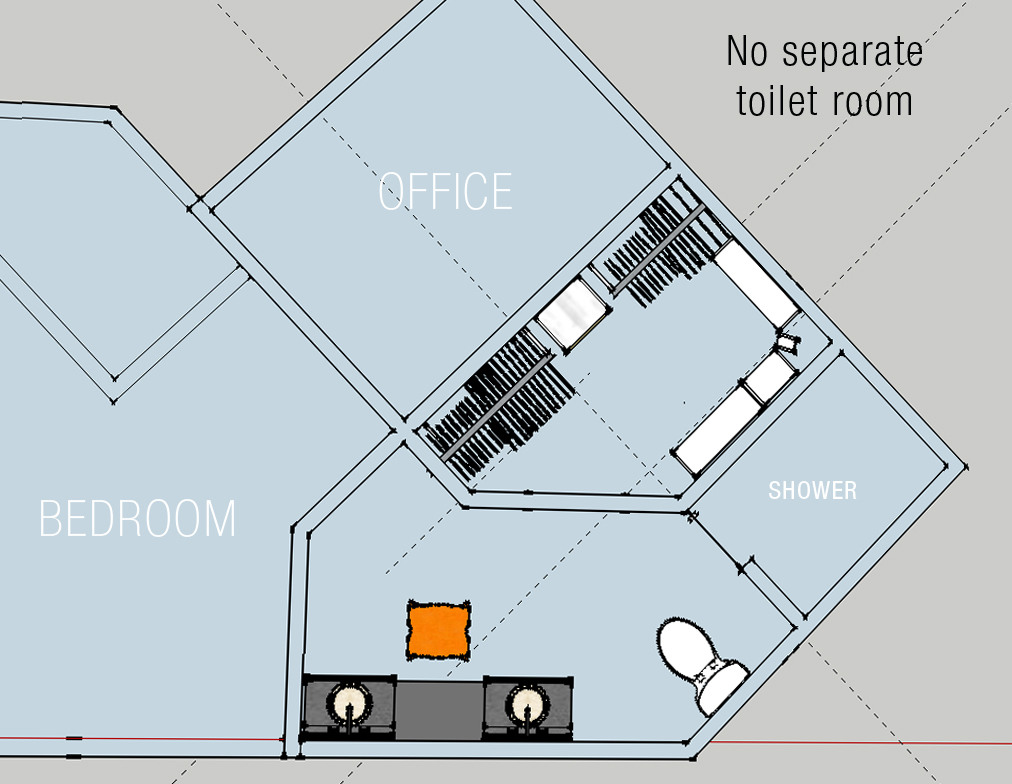
I thought I might have to resign myself to losing the separate toilet room. This does leave lots of room for everything, including a huge shower.

Then I had an "a-ha" moment. The toilet could go in the same room as the shower and be closed off by a door! In this plan, the shower and closet both would have to be smaller.  The shower is about 48" x 46" in this plan.

As an alternative, the wall could be square with the sink room instead.

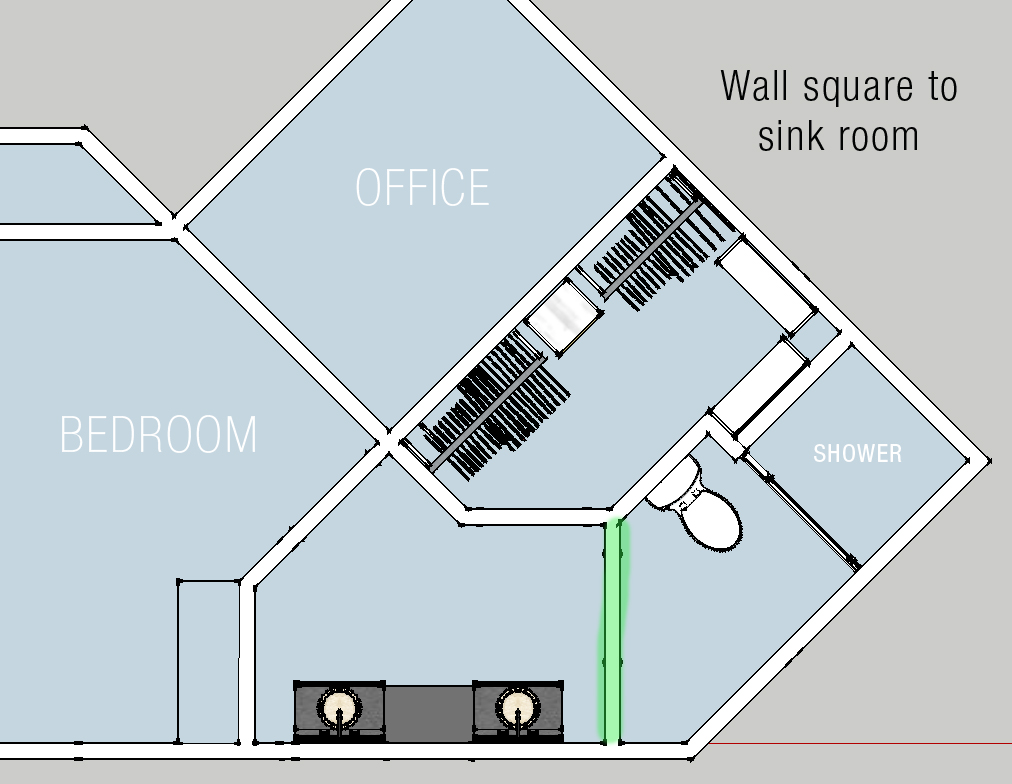
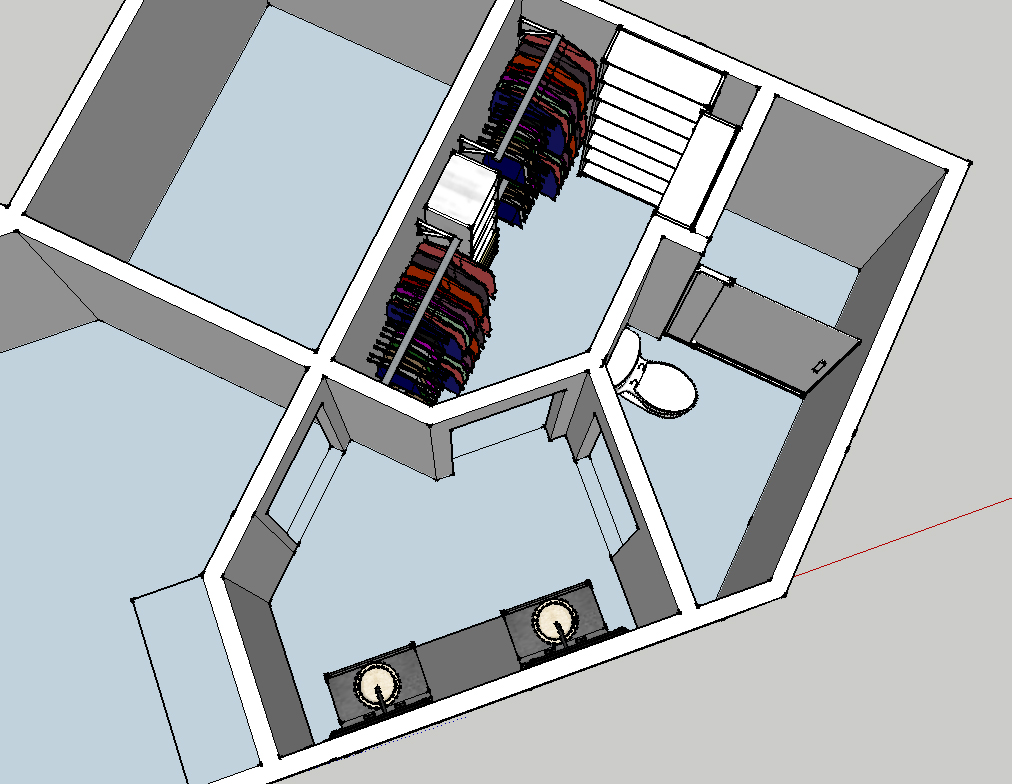
Here is a 3D view of this plan. 

(Note: I also moved the wall beside the sinks into the bedroom a bit to leave more room for the vanity. There is a window on this wall that dictates vanity placement. I anticipate doing a lower counter with a stool under the window between the two sinks.)

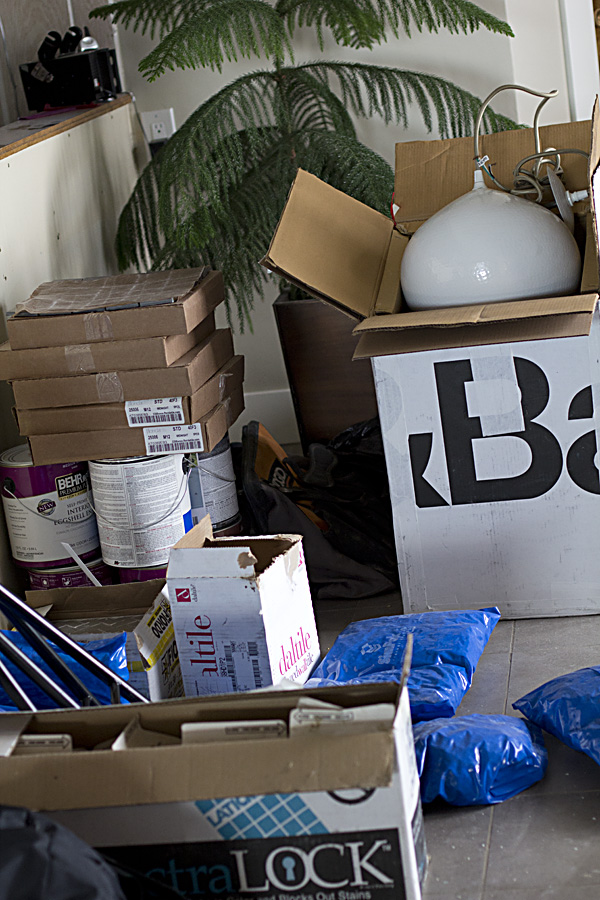
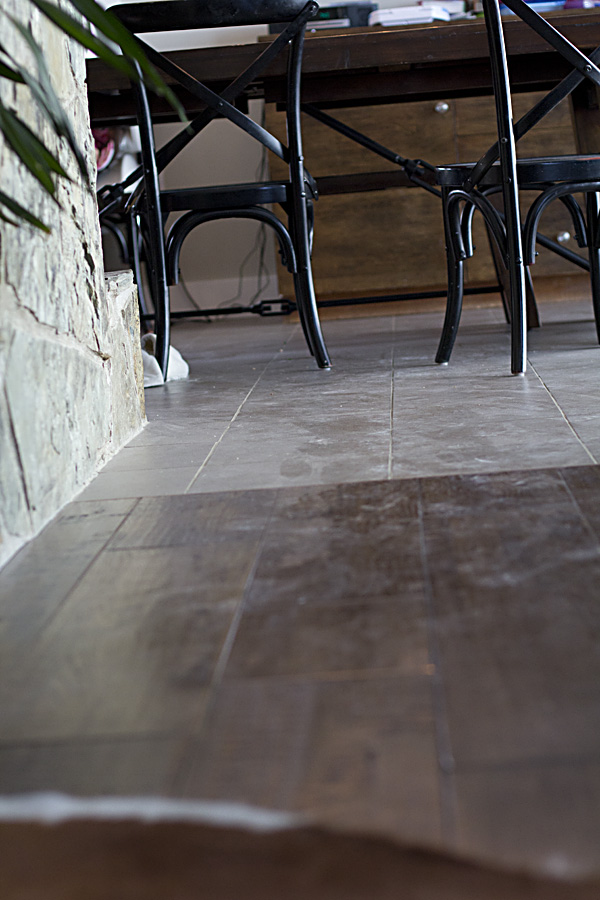
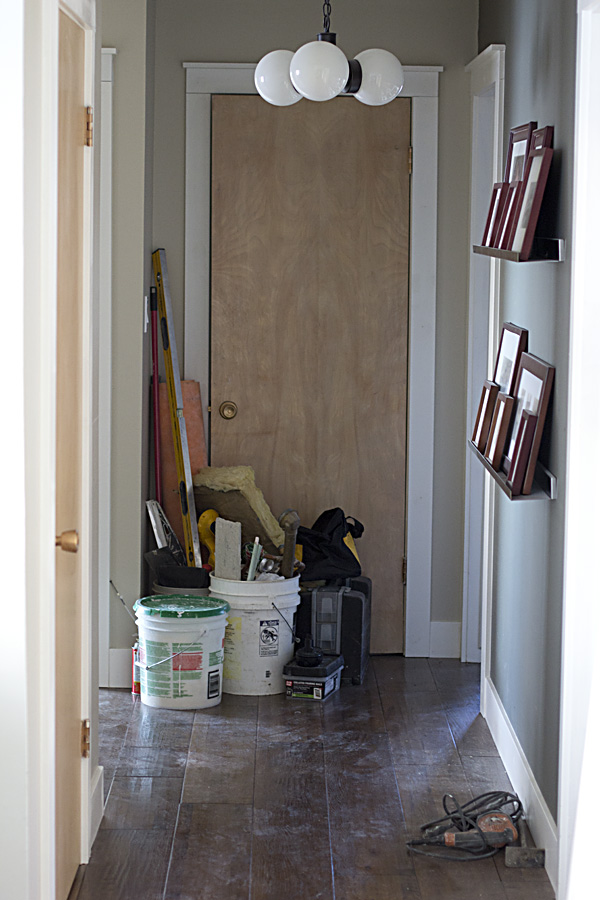
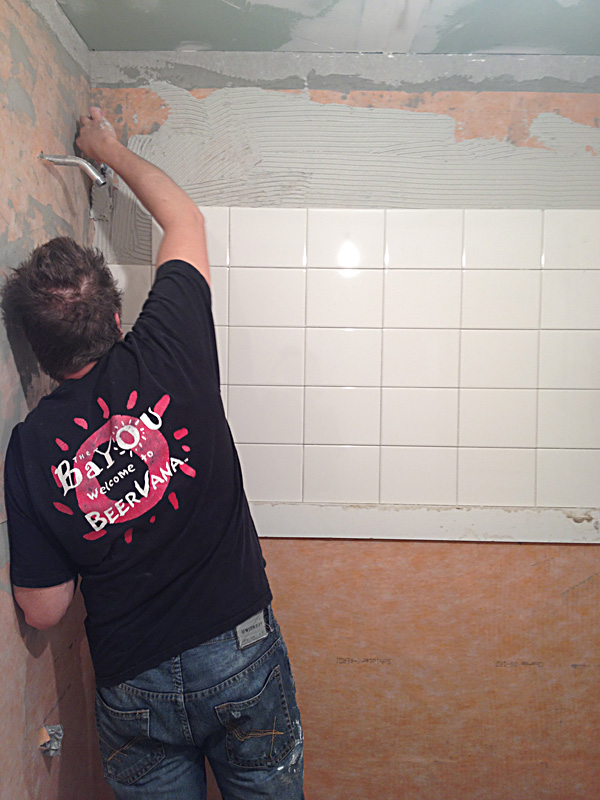
Construction is done on the office (except cabinetry) and bedroom. Stay tuned for more on that! We knew we would not have time to complete the whole bathroom this winter, so we opted not to demo it. Instead we finished all the walls on the bedroom and office side and hope to tackle the rest when winter comes again. In the meantime, I hope you will weigh in on my bathroom plan options! Am I crazy to insist on a separate space for the toilet?

Bathroom reveal

I had grandiose plans for this bathroom at one point, including adding a walk-in shower and a clawfoot tub. I even purchased an old tub to refurbish. But 4 years into our renovations we are feeling a bit burnt out—or more practical. Either way, I decided to edit my plans to just a tub/shower combo and keeping everything in the same locations. I was going for FINISHED. We had a list of other projects to tackle once this was complete, so FINISHED seemed like a worthy goal.

(For previous posts about this project and to see my inspiration pics, go here, here, and here.)

I will list the sources at the bottom of this post.

I searched high and low but could not find a vanity that lived up to my inspiration and expectations. It took a bit of arm twisting, but I was able to talk my Dad into building it. (I found a builder on Etsy as a backup option, but doing it ourselves definitely saved us money). I chose this insanely gorgeous walnut for the project, and we went for a mid century design that resembled a piece of freestanding furniture. (I would have loved to use an actual vintage dresser, but it would have been a challenge to find a piece that met our size specifications. My search over the past 2 years yielded no options.) I gave my dad a rough design, and he helped me refine it. My dad did all the construction and I did the staining and finishing. It turned out just like I'd hoped!

We built the mirror to match, and saved even more money. 

The light over the vanity was one I had seen ages ago and loved. They were sold out online, but I ended up calling multiple stores and tracked down one of the last ones in stock. When it arrived I was surpised by how big it was... but the store had done me a special favor tracking it down and it didn't seem like a good idea to send it back! The inside is gold, so I carried those gold/brass touches throughout.

We kept the existing ceiling fixtures, although we shifted one so they would be lined up. The spacing was odd before. I adore these lights, and love that we were able to keep something from the old bathroom.

We had several boxes of tile left over from our kitchen/dining/entry/laundry spaces. We calculated it to be exactly what we needed for the bathroom, so we ordered one extra box to be on the safe side. In the end we had one box left over. Go figure. :)

Here are the juicy side-by-side before and afters:

The observant will notice a few structural differences: We removed the soffits above the tub and sink. We expanded the width of the wall between to accommodate the niches in the shower wall. The wall heat register is gone, replaced by a floor vent (we put in forced air heat throughout the house). 

Not exactly the same view here—sorry. The new shower is very light and bright. We chose simple 6x8 white tiles from Home Depot. Cheap and classic. We chose to stack them rather than stagger them subway style for a more contemporary look. 

Sorry- this view is shot at a different angle also, but I wanted to show you how we replaced the doors on the built-in shelves. Dad built these out of the walnut as well.


This before photo of the vanity is after we affectionately bid adieu to the red shag carpet and installed a cheap piece of sheet vinyl to tide us by.  And you may wonder—what could possibly be wrong with this delicious brown 70s tile and brown shampoo sink? If you are crying a tear over their demise, let me assure you they were past their prime. The tile was staring to fall off the front of the vanity, the sink and shower faucets leaked (horribly). Okay, we could have kept the shampoo sink, but I think it was time for a new look.

These shower niches were my brain child. I wanted something to look at other than a blank shower wall since you see this spot first when you walk in the room. Also, I like to keep things off the tub ledge. I think it was worth it, even though it added some challenge to the tile-laying process.

I had a small obsession with finding pretty shampoo/conditioner, but I couldn't seem to find any that fit the design scheme like I wanted. I was able to purchase the empty amber plastic bottles from Specialty bottles, and then I searched for some white vinyl lettering to label them with. I had trouble find the perfect letters, so when I saw these gold letters I thought- perfect! More gold! Tom thinks they look mail boxes now. Whatever. 


I had a couple of unused white frames on hand, so I scoured Etsy for some art to put in them. I ended up falling for these little watercolor dresses from Mary Catherine Starr, who did a "dress-a-day for 100 days" project. These are two of her originals. I thought it would bring a bit of femininity to the space since it is used primarily by our girls. 


We actually ended up replacing the toilet also. The old one was still pretty new—an expensive wall mount toilet with a power flush feature that scared the kids. I think it scared a few grown-ups too with it's sonic flush. Luckily we were able to access the plumbing through a closet in the basement and move the sewer pipe in order to put in a standard toilet. 


The faucets are fun and modern, but I'm finding the chrome shows. every. spot. The countertop is cut from a Quartz remnant I found in a local stone yard.

Finally, I added one last piece of art. I found this perfect frame on clearance at Target, so I just added a gold mat I found in my stash and a sweet photo of Sarah shot by talented Darla of rozephotography.com.


SOURCES:


winter projects

If you've been around me or followed this blog for very long you know that this time of year means one thing—house projects. And I'm past due with a project update. I get caught up in the remodeling chaos and put off posting in hopes that a finished project, a clean house, and a tidy little "before and after" post are just right around the corner. But I realize this blog would be a lot more interesting if I would show you a little in-progress reality along the way. 

Have I even told you what we are working on? 

After we finished Sarah's room in October, we had a stretch of good weather and mostly worked on outdoor farm projects. We also tore up our deck and side yards to start on some patio work... just before the snowy weather moved in. Now we have mud yards. That's how we roll. Instead we moved inside and gutted our upstairs bathroom—right before we had a whole string of company. Again, that's how we roll. It wasn't that having one less bathroom was such a big deal. It's this:

Construction supplies—everywhere.


Drywall dust...everywhere.

Laundry and dishes pile up. Blogs are ignored. But hey—things are getting DONE!

If you come see us right now our house will be a disaster and you might be handed a paintbrush. Consider this your warning.

We tore out the tub, all the tile, and the soffits above the tub and sink. (And by we I mean Tom.) Rather than just scraping the popcorn from the ceiling and retexturing, Tom and Dad installed new sheetrock on the ceiling so we could do a completely smooth finish.


This is a couple of phone snaps of the tiling progress. We had quite a bit of tile left from our kitchen/hallway, so I ordered one more box to make sure we would have enough. Now that we are done we have one box left. Go figure.


Here my dad is holding our backsplash tile next to a Quartz remnant we found to use for the counter top.

Since I couldn't find the perfect vanity, I talked Dad into building one. It was extra work but we saved a bunch of money. And just wait until you see it. This photo was snapped when I was working on staining and finishing the drawers and drawer fronts.

I now have a fully functional bathroom that doesn't leak at every faucet and is at least 100 times less ugly. It isn't done yet however—the finishing touches are taking the most time. Because we like to start new projects before we finish the old ones (who else does this?), the guys are now working full time on a unit in my parent's four-plex. The tenant moved out before the holidays, and the unit needed some updates. (Some updates = gutting the entire unit and starting over, basically). Time is of the essence because they want to make sure it is rentable before spring farm work kicks into gear. 

Therefore, my house projects are taking second fiddle (cue big sigh) and I expect you to feel very sorry for me. I kid. But you will have to be patient while we chip away at the last few details in our spare and rare time. We have a mirror and backsplash to install, some new cupboard doors to build and install, and trim to caulk and paint. 

In any case, THIS...

...is a thing of the past!

Note: You might enjoy this post of the bathroom before, this post of a few small improvements we made, and my Pinterest board full of inspiration we used for the new design.

upstairs plans—laundry room and bathroom

Our laundry room and main bathroom are highlighted in the layout below:


I love the laundry room and how conveniently located it is, but there are a few things that will improve its functionality. 

1. First, we need to repair the ceiling and walls that were damaged from leaks before our roof was replaced.

2. As in the kitchen, I want to remove the soffit in here too. Then I can move the cupboard over above the sink, and move the hanging bar over the washer/dryer. Currently when I hang clothes to dry (mostly jeans), they hang too low and get in the way of the sink. 

3. I will reuse the cabinets in here, but I want to give them a clean coat of white paint and dress them with new hardware.

4. We purchased a new front load washer/dryer when we moved in, so I want to build a new counter over them, mostly to prevent things from falling down between or behind the appliances.

5. Having a sink here is great, but this one is covered in years of hard water scum. I want to replace both the sink and faucet.

6. The other side of the room has great storage, but I would like to make some small adjustments. My Grandma had a sewing table here, but I would rather sew elsewhere and fill this space in with some open shelves to store laundry baskets. 


The main bathroom is another high priority project, but it might not be high enough to trump the Master bath and kitchen.


1. Flooring. The red shag carpet is already gone, and now it looks like this:

But we did buy the cheapest piece of vinyl we could find as a temporary solution because the long term plan is to lay tile on the floor in this room.

2. We also removed the shower doors. I would love love LOVE to have a claw foot tub in here. Since they are a teensy weensy bit over budget, I must search high and low for a vintage one I can have resurfaced. Please, please help me?

3. For the vanity I want to find a vintage dresser or credenza to convert.

4. And, of course, painting, trimming, and popcorn ceiling scraping. 

5. New vanity light fixture and mirror. I think I will actually keep the ceiling fixtures in here and just paint the metal black. Or reuse them in the hallway and buy a new fixtures in here.

If only because I need lots of time to scout for things for this bathroom, its a good thing it is further down on the priority list. It can't be too far down, however, because tile has started to fall off the counter top. And the toilet leaks. 


basement progress—bathroom teaser

If you could hear through cyberspace you would hear alot of banging in the background of this post. That is because the carpet layers have arrived and are nailing down tack strip in our basement! We have been putting in a few marathon days to get ready for their arrival, and while I wish I could say that we were 100% done with everything, we still have quite a bit more trim to caulk, spackle, and paint. We also have the flooring on the stairs to do and a few other finishing touches around the basement.

But for today, I thought I would show you the progress in the bathroom.

It went from this....   to this.....


And now to this....

Well, I'm not quite ready to show you the whole thing yet. We have some cabinets to build, mirrors to install, etc. and I want my final reveal to be complete. But I won't leave you hanging. Here are a few teasers:

A glimpse of the sink and faucet, with a peak at the marble tile countertop in the background. (We still have to add a tile backsplash after a tall cabinet beside the sink is installed.)

This is the accent tile in the shower, and below is one of the dual shower heads. We have my dad to thank for the gorgeous tile work. Considering how much tile installation would have added to our costs if we would have had to pay someone else to do it, we are incredibly fortunate to have a bathroom this beautiful.

The floor is simple except for the addition of a subtle "rug" accent in front of the sinks.

The light fixtures are from West Elm. You will have to excuse the construction dust on everything... it was futile to clean at this point.

We kept our costs in check by purchasing all in-stock items from Home Depot. The tile is a great line of porcelain that included a great variety of accent pieces to choose from. The sinks are semi-recessed from Decolav. The faucets are these by Glacier Bay, and while they were a little less elegant than I wanted, they were the only in-stock option that would work well with our sinks. We were willing to make a few concessions since this is, after all, a basement bathroom.

For example, I had my heart set on a Euro-style frameless glass shower door. After pricing a couple of options ranging from $850 to $1400, we decided we would live with a shower curtain. We are installing a rod that is hidden inside the shower and an extra long shower curtain, so it won't be visible when the shower is not in use. (I'll show pictures later.) So, as I said, we have made a few concessions; but we are still very pleased with the results (especially considering where we came from!)


a red-letter day

I almost forgot to tell you—we rolled out the red carpet! Rolled it right up and out of the house to the dump.


As much as we valued this carpet for nostalgia's sake (cough, cough), it was time for it to go. For it's aesthetics, yes, but more so because it was completely unsanitary—perpetuated by a slow leak in the toilet. Yep, sorry, this post is about a bathroom, after all. It was a dirty job to remove as it was glue-down rubber-backed carpet that had to be scraped up.

So, when we ordered our carpet for the basement, we asked the floor guy if he had a cheap piece of vinyl he could sell us. He offered this piece for $100, and we agreed sight unseen. We really didn't care what it looked like, but it didn't turn out half bad.

While we were at it we also decided to remove the lace curtains and the old glass shower doors to make sitting on the edge of the tub and bathing kids easier.

It made a huge difference in opening up the bathroom. It did leave some marks on the tub (that I can't get off despite trying vinegar, lime away, etc.) and some minor holes in the tile, but it was still worth it. I put up the shower curtain from the girl's old bathroom to keep the shower functional.


I hesitate to call these "after" pictures, because really they are just temporary. There is still a lot of work to do to improve this bathroom. It badly needs a paint job, for example (as you can see from the marks left by the old register). Tom lightly tacked up some baseboard to hide the unsightly black stuff left by the carpet base, but we didn't even glue the vinyl down.

Eventually we hope to completely redo this bathroom; new tub and sink, vanity, and tile floors and tub surround. Even though the guys are saying "whoa, one project at a time, lady!", I can't help but dream a little about someday . . .

image from Longman & Eagle.

I lost the source for this image. If you know it, please let me know. Thanks!

I especially love this bottom image. I am inspired by black and white tiled floors, lovely wood vanities (maybe even an old dresser), and unique mirrors. Does anyone miss the red carpet treatment now?