Sometimes when you are in the middle of a big project (like a kitchen), it helps to tackle a few small projects in between so you don't forget what progress feels like. I have been determined to finish up a few punch list items in our basement this year so they don't drag on forever. This is what is/was on our punch list:
Finish trim around stairway and touch up paint
Paint doors and install closet doors
Stain and glue down shoe moulding around fireplace
Retrim and paint new side door, and add more cork around base
Install bathroom cabinets and add hardware
Finish tile backsplash in bathroom
Blinds on all windows
Decorate!
I felt bad every time we had company at our house that there were no blinds on the guest room window, even though we live in the middle of nowhere. First, I checked out some special order blind books from Home Depot. But after perusing their in-stock section, I discovered these:
 They looked every bit as nice as the special order blinds I was looking at, at less than half the price. The only trouble was they couldn't be cut to size. However, the blinds could be outside mounted on the trim and they had sizes that would work for that. So I brought them home.
Once home, however, I just couldn't bring myself to settle for outside mount. It's an okay look, but these blinds would have exposed ends and would stick out from the window more than 2 inches. So after looking them over I decided they could be trimmed to fit:
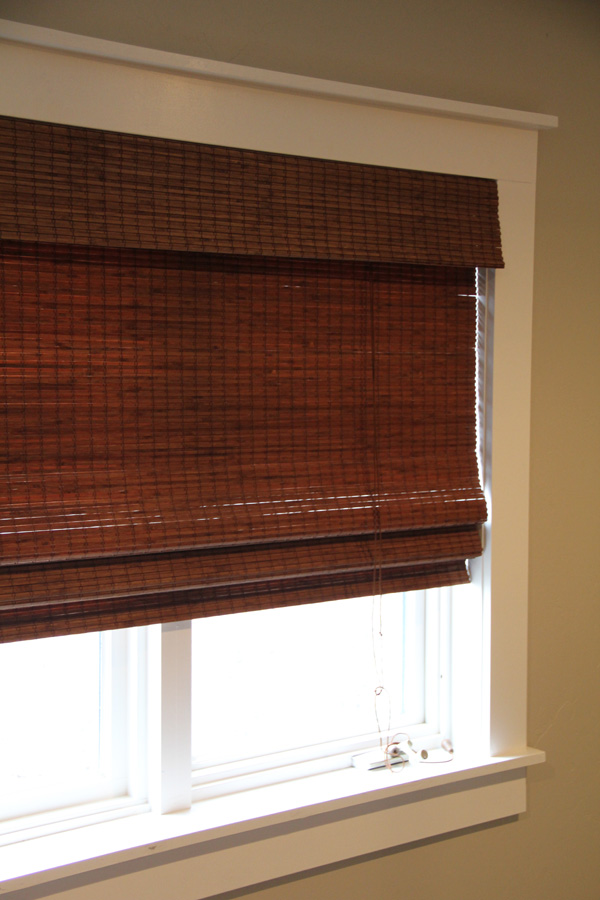
And I think they look so much better! Here is a quick tutorial in case anyone wants to try this for themselves.

First of all, don't try cutting these with a saw. It will split the fragile bamboo, which is why they won't cut these at Home Depot for you. For tools you will need a coping saw or something similar, wire cutters or something similar with a sharp, short blade (I used craft and rubber scissors from Stampin' Up!—shown here with a black handle—and they worked the very best), a ruler, a pencil, and a utility knife.

Open the blinds and loosen the strings so you can lay them out flat. Then measure your window and decide how much you need to trim. (Don't forget to allow space for the brackets plus a little extra. You don't want them to rub as you lower them.)
Next, measure from the edge and draw a line where you need to make your cut. You can cut half off of each side, but from the front you can't tell if the strings are off-center. Save yourself the trouble and cut off one side.
 You want to try to avoid cutting the vertical woven support strings. Since my line fell very close to these, I just pushed them over to the left with the back of my pencil before cutting. Then, carefully trim one slat at a time. At the bottom the slats are doubled up and harder to cut, but as you go up it will cut more easily.
At the top, where the slats are stapled to the wood support, the cutting is trickier. Here I used the utility knife to cut through them one at a time. After the slats are cut away, you will need to cut the wood support to accommodate the brackets.

Measure the existing slit to see how much further you need to extend it and draw a guide. Then, with your coping saw, cut the end of the wood support off to be flush with the slats you've already trimmed.
The last step is to cut out the slit you marked. It doesn't have to be pretty. Mine looked like this:

Although the cut isn't perfect, I highly recommend using a hand coping saw because you don't want to risk damaging the bamboo slats as you are cutting. This won't show after it is mounted.
That's it—your blinds are ready to mount!

A custom look for half the cost! (And privacy for our guests—priceless.)