I've had this image on my Pinterest boards for a long time, labeled "This image just grabs me".
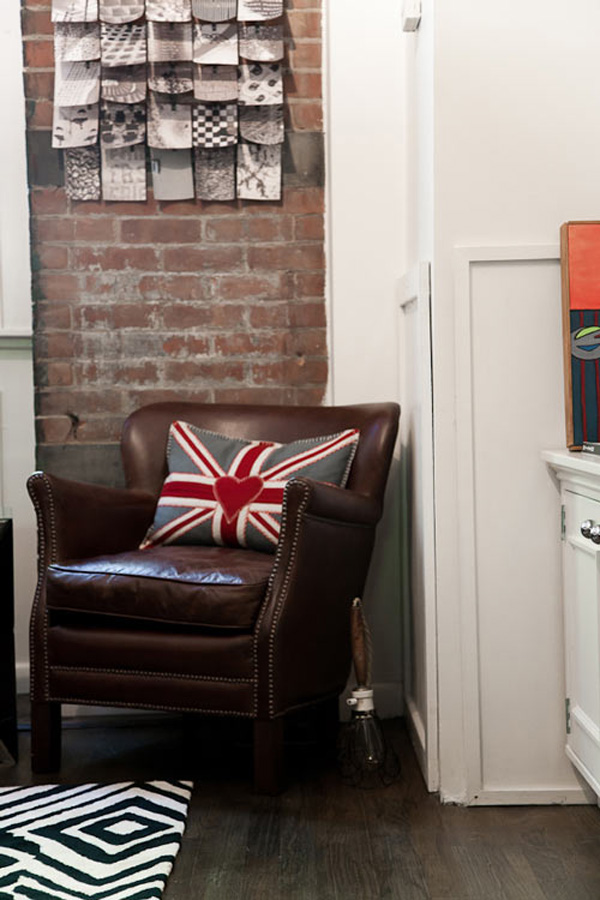
Why does it grab me? Because of the dark leather chair and black & white photos contrasted against the rough brick. But mostly because of the graphic punch of that Union Jack Pillow. I'm not sure when I started wanting to own a Union Jack Pillow... from this image or way before, but I've had my eye out for one for a long time.
Not long ago I ran across a pillow on Haute Look that was made from felt. I loved it, but I passed it up because of the $50 price tag. Actually, I debated over it for 3 days, and just when I finally decided to go for it, I realized it was too late. Then I lived with regret. Until I decided I could make one.
Here is my version:
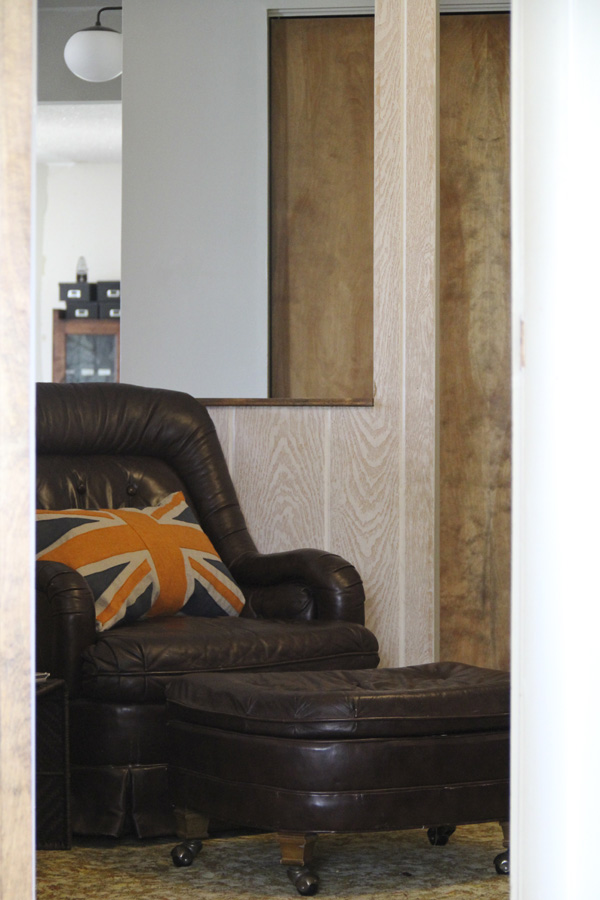
Above is the view I see into our office when I'm in bed.
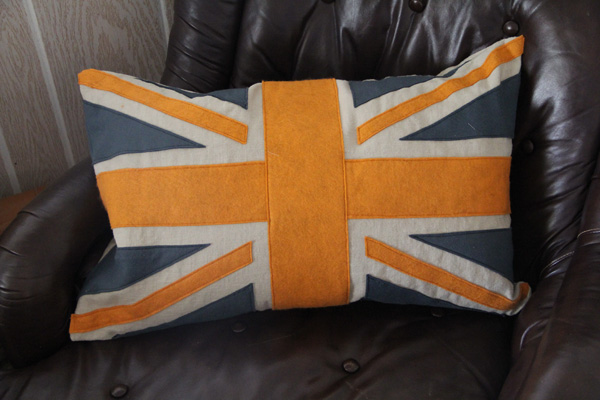
I decided if I was going to make it I could take some liberties with the color.

It took me a full afternoon to complete the project, but after seeing the result I wouldn't have cared if it took me a week of afternoons. I'm in love with my new pillow. I had $24 into the supplies: $7 for the down pillow insert (Ikea), $12 for the pillow cover (also Ikea) and $5 for the felt.
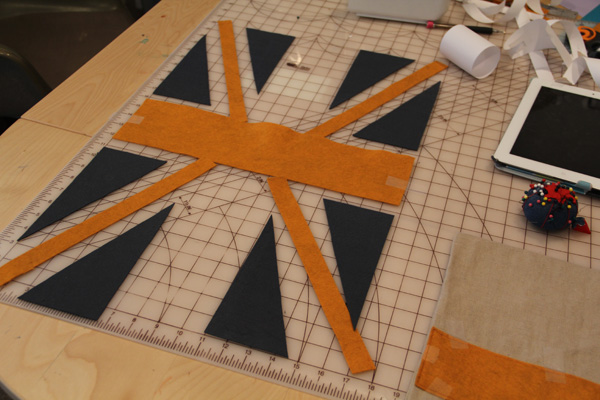
To make it, I first made a template with paper and then used those pieces as a pattern to cut the felt. The gray pieces were all the same size. It definitely took some time and careful measuring to do this part of the project correctly.
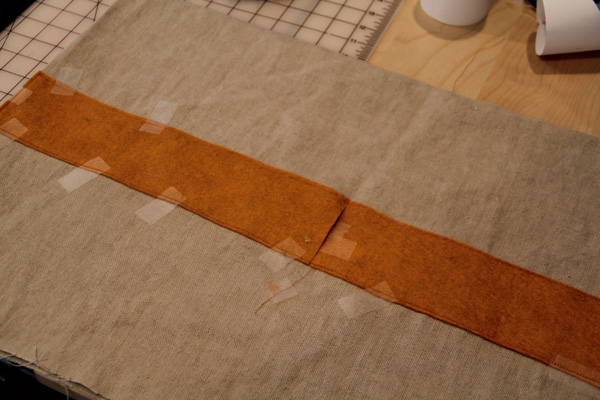
To applique the felt to the pillow, I used scotch tape to hold it in place because I figured it would hold flatter than pins. I sewed right over the scotch tape and removed it afterwards. If I had it to do over again, I would try an iron-on adhesive to attach the pieces before sewing.
Another thing I would do diffferently—I wouldn't use a pre-made pillow cover. I really liked the fabric (a loose weave linen) or I wouldn't have gone this route. The pillow cover wasn't the proper size and needed to be trimmed down on one side. I left the other 3 sides in tact, but in hindsight it would have been easier to sew onto a flat piece of fabric and sew the back on the pillow later. As it was, it worked okay but was challenging working into the corners. I machine sewed half of the final side, inserted the pillow form, and then stitched the rest closed by hand.
You might remember this isn't my first project with the British flag. I can't explain my attraction. It's less the iconography and more the geometric graphic punch. And trend, I confess. You see it everywhere. When searching for a pillow to guide me in my project, I found this one:
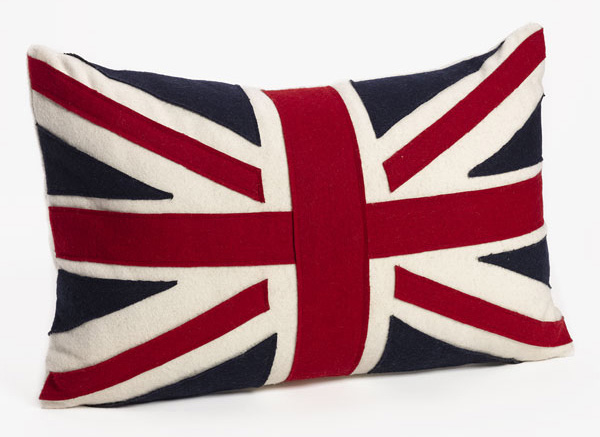
From Nordstrom, no less. ($58). So my taste isn't too far off of mainstream. The trend will pass, I'm sure, just as the once popular Americana has faded somewhat. I should pay tribute to my own Old Glory in a modern way. I sense a new Pinterest board coming on...
I had this project planned anyway, but I finished it off in time to participate in the Pinterest Challenge. Click through to see more inspiring projects!