basement bathroom

Continuing in sharing some of basement progress and rooms we are checking off as finally finished...

Next up is our basement bathroom.

Lest you forget how far we've come:


The pictures really don't do it justice. But don't you especially love the mirror that is hanging way to the right of the sink? And the laminate counter that just wraps itself right up the wall?

I've shown you various iterations of this bathroom as we've chipped away at the details—most recently the cupboards and the artwork. The last thing to be finished was the tile backsplash. We finally wrapped that job up when we were installing the kitchen tile and already had all the supplies out. We were finally able to hang the mirrors also, since they are mounted right above the tile. It's a miracle we didn't end up with broken mirrors while having them propped on the counter for a year!

The backsplash mimics the trim in the shower. I have had these baskets for quite awhile, but I found these cute chalkboard signs to mark them as "clean" or "dirty".


The yellow/green accents were kind of an accident, and not a color I would have been inclined to pick for this room, but I think I like it! (By the way, this room is was really difficult to photograph with no natural light or wide angle lens. I should have spent more time correcting the white balance. I did the best I could, but the photos have a distinct warm cast.)


I've mentioned them before, but these funny little vases are from CB2. I just love them, but we did have a casualty a short while ago. I was just happy they were still available so I could replace him (this time with a more secure nail). 

The old shower had a cracked plastic tile surround, brick barriers, and rough concrete floor. The new shower with it's marble bench and dual heads is by far the nicest in the house, so we all use it more than our own upstairs. One more thing we'd like to add to this room eventually—a Euro frameless glass shower door. Right now we have an extra long clear curtain liner (on the inside so it can slip out of sight when not in use). It works smashingly until we are willing to fork out the $700-900 it will cost to put in a glass door (choke). Maybe never?

basement guest room

We've been chipping away at a few projects in the basement, and I am finally getting to the point where I can call some rooms "finished". I thought I would show you some of our progress this week.

One room that received some attention was our guest room:

Remember the before?


Ha. :) I know some would say the before had more retro character, but the after makes for a very comfortable guest room. This room was all about using what he had so the design is a bit more traditional than the rest of the house, but I like how it came together.


We had closet doors sitting in this room for a long time waiting to be painted, so while we were painting the kitchen we finished them off and finally got them installed. Then I sold a big armoire that was taking up space in the corner, and replaced it with a chair that would be much more useful for our guests. (This chair used to have a home in our kitchen/dining area, but our new layout doesn't allow for a large chair like that.)

I hung a few photos on the wall—a watercolor I painted quite a few years ago and a collage of old family photos. I'd love to add more photos to this collage over time with some small vintage frames, so I plan to watch garage sales and Goodwill for unique ones.


The rest of the room was mostly old Master Bedroom furniture—all of it purchased at different times over the past decade or more. So as I said, very pieced together! I'm not into overdoing things, so hopefully this room is just the right amount of complete without feeling sparse. Does it make you want to come visit?

Friday randomness

I've been neglecting this here blog because I've had kids, a house, company, etc. that have needed me more. Therefore, I'm stuck doing random update posts to catch you up. So here goes... here are the happenings since we last talked:

1. Today is a very wet day.

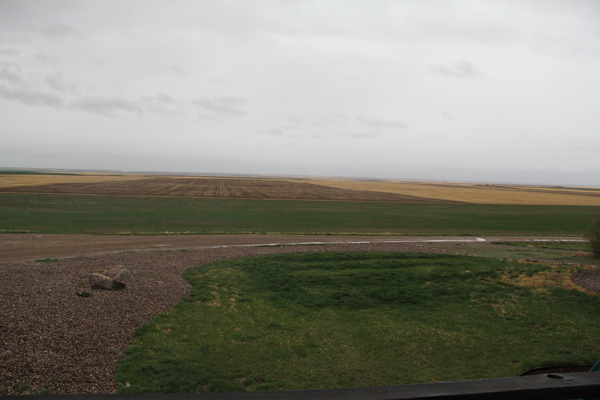
The rain is delaying the already long seeding process so today the guys are in the shop working on a spray truck that broke down earlier this week. Most of the farmers in the area were done with their spring seeding in a snap because they mostly just do wheat. Not us. So far we have planted peas, mustard (new for us this year), canola, and barley. We will finish up with spring wheat when we can get back in the field. Nevertheless, we will take the rain when we can get it! And when it dries up, oh boy does that lawn of mine need mowed.

2. Things break on the farm. All the time. The afore-mentioned spray truck, for one. My mom's lawn mower broke down so they have ours at their house. And then ours broke down. Lawn mowing is not as high a priority as field spraying, so I will be getting my push mower out. Also this week our cistern emptied and we ran out of water. Too many farmers are spraying and using a ton of water right now, and our cistern is the last on the line to be filled. Small inconvenience. When things break, usually it is faster and cheaper to fix them ourselves, but Tom (and I) aren't nearly as mechanically inclined as my dad. I'm not whining here, just pointing out how different it is from living in the city. There are so many moving peices and parts and no shop right down the road to take them too. Broken equipment can definitely add stress to an already busy time.

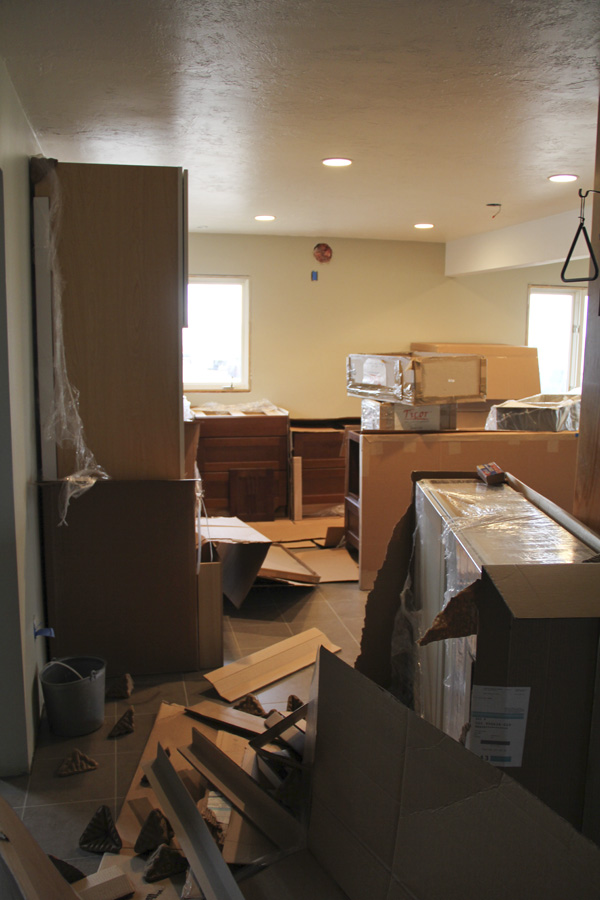
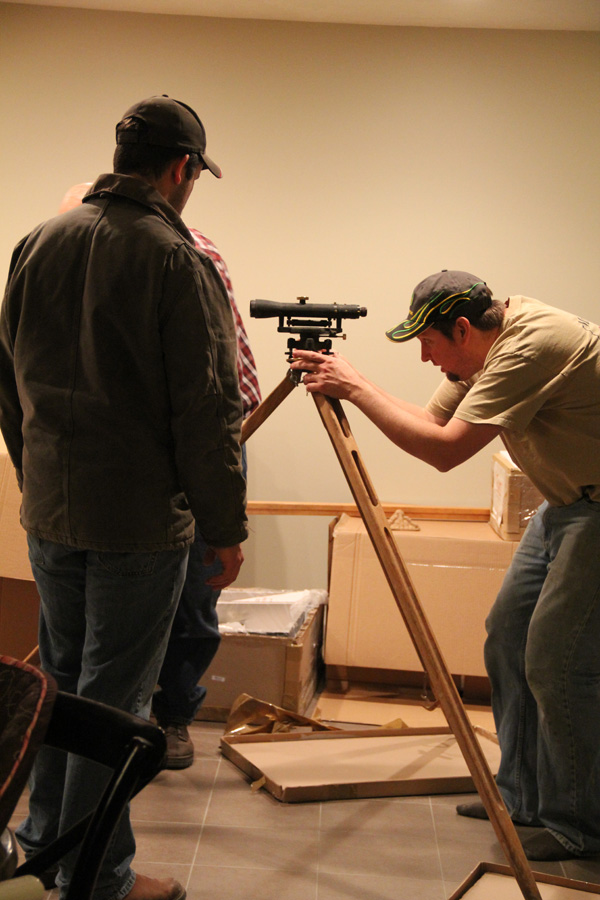
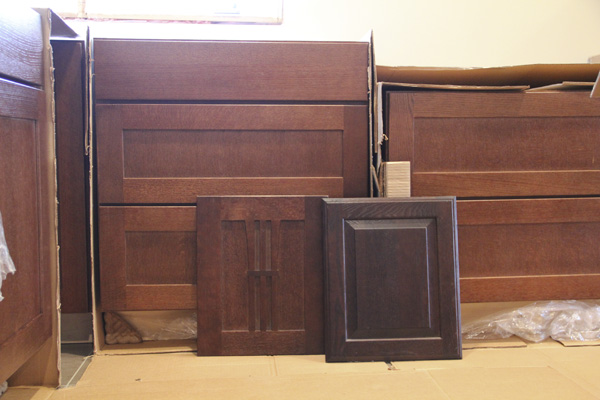
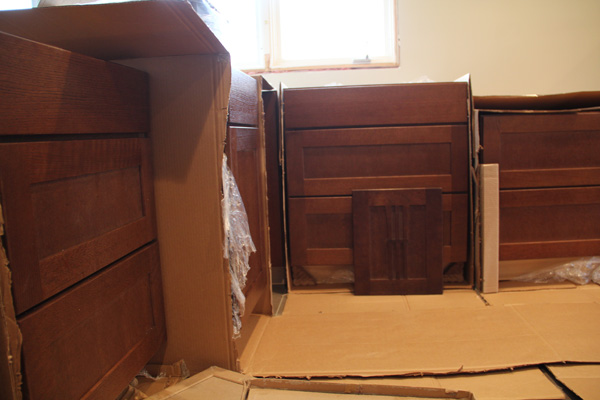
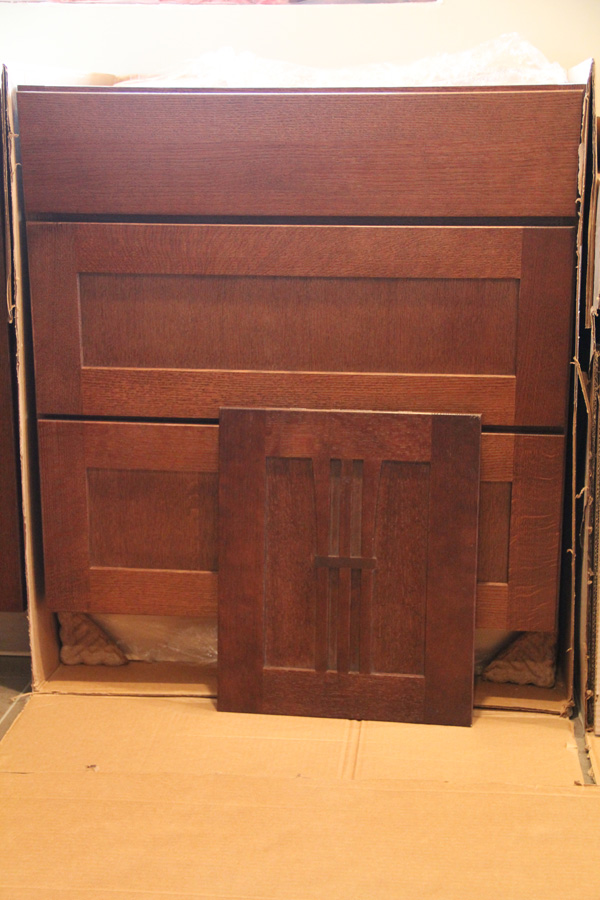
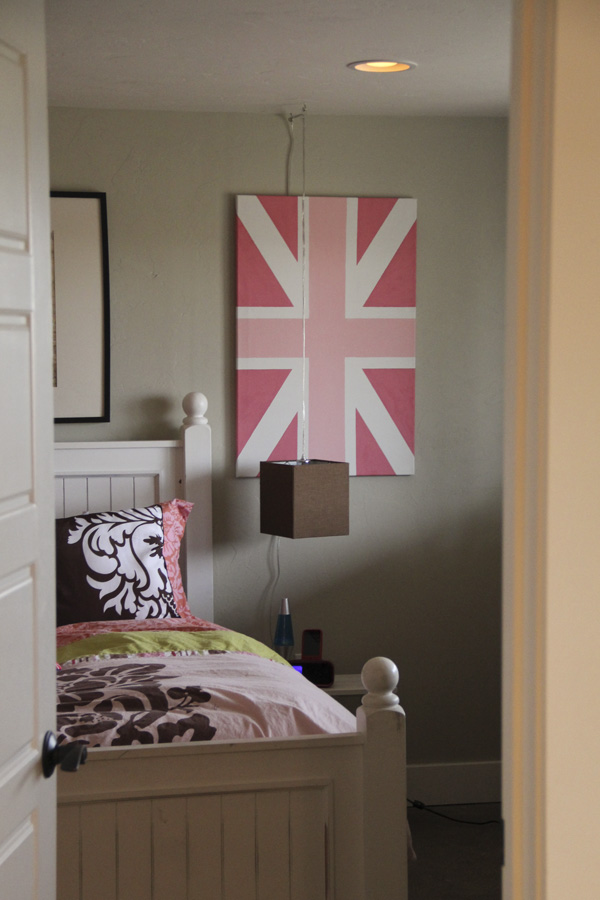
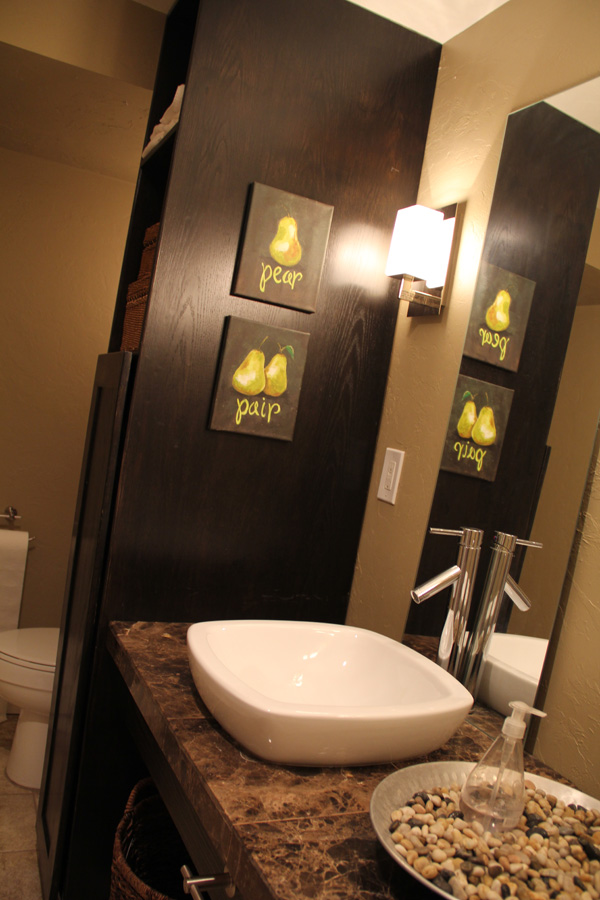
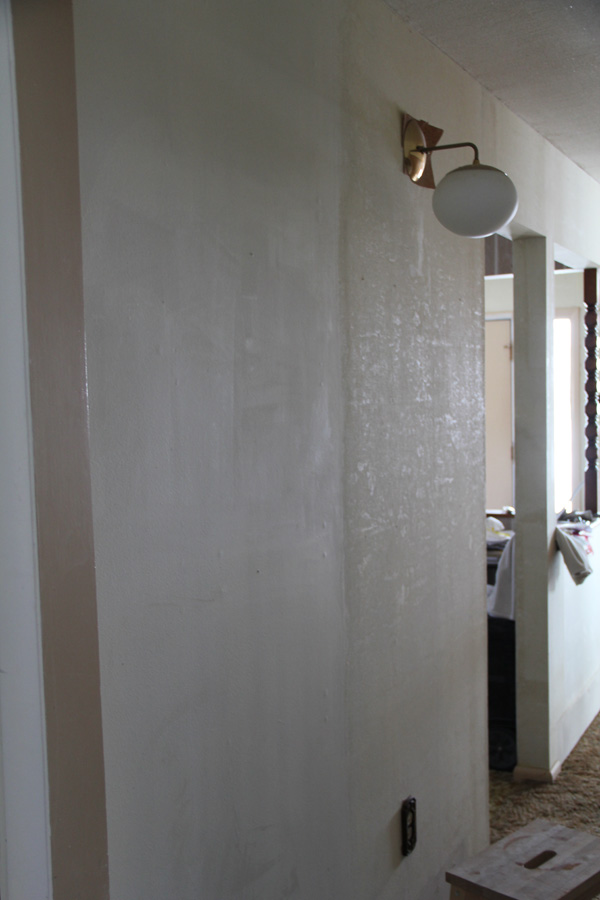
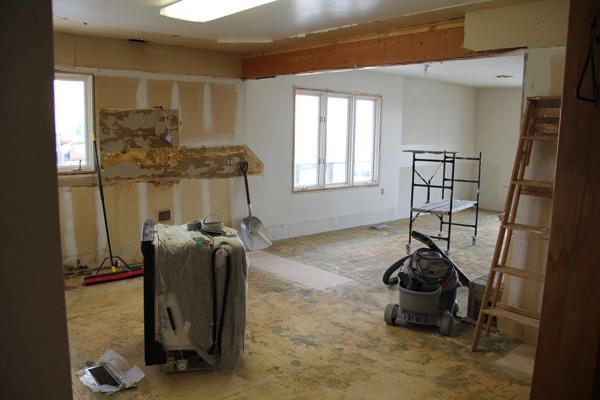
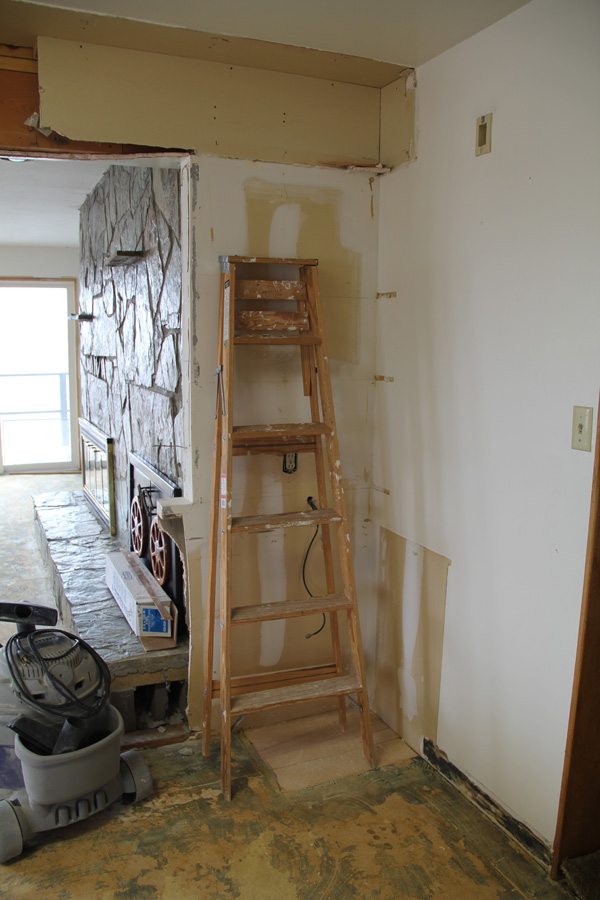
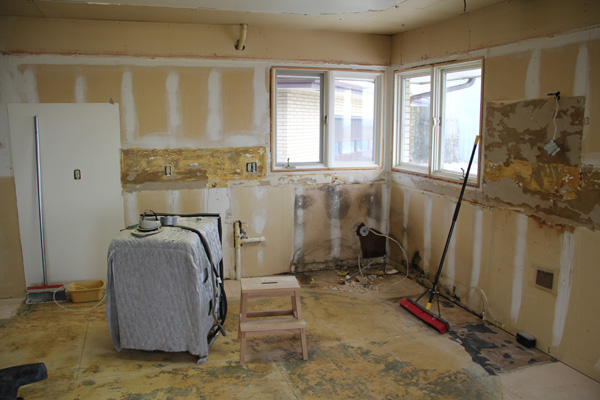
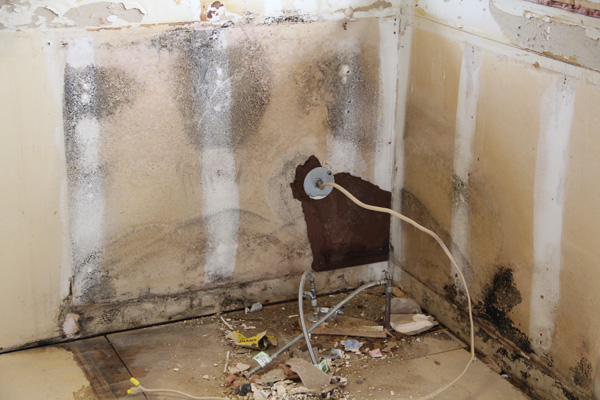
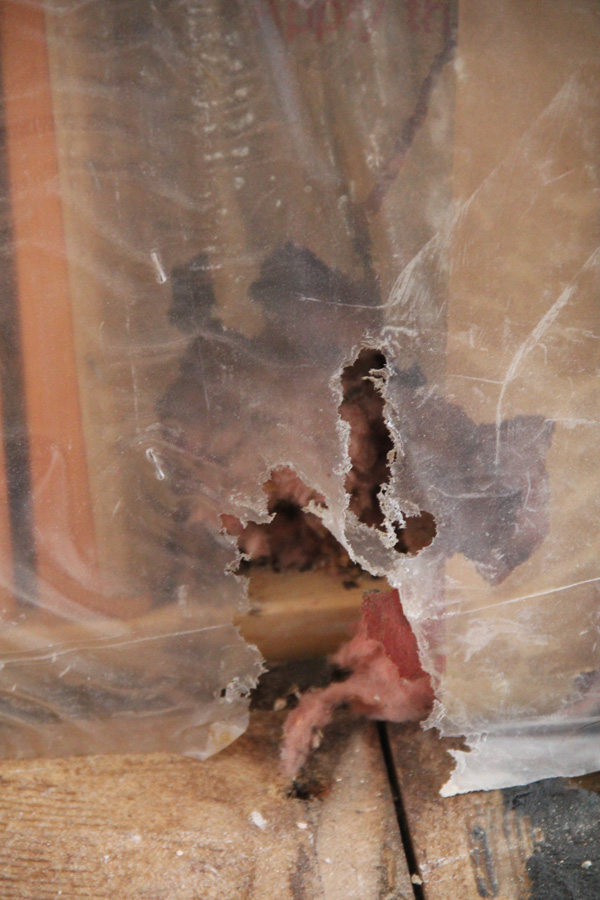
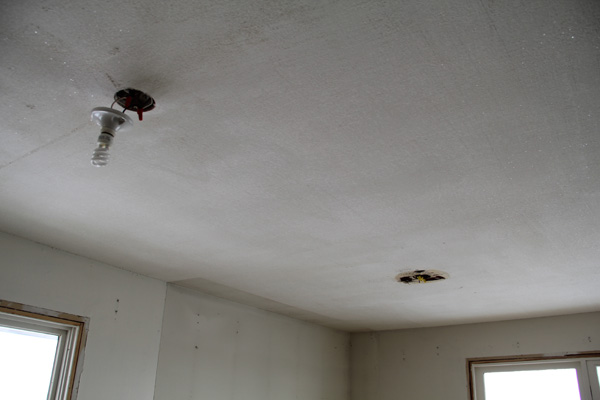
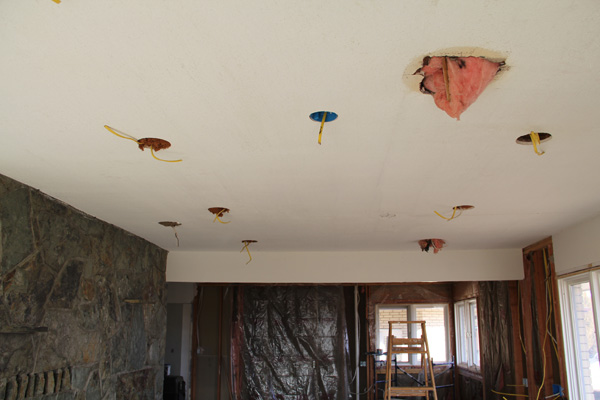
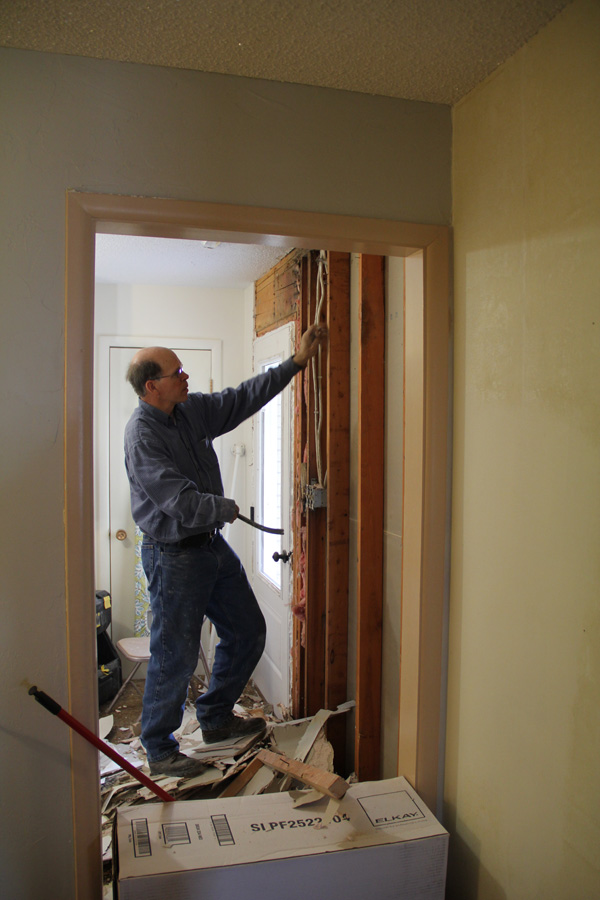
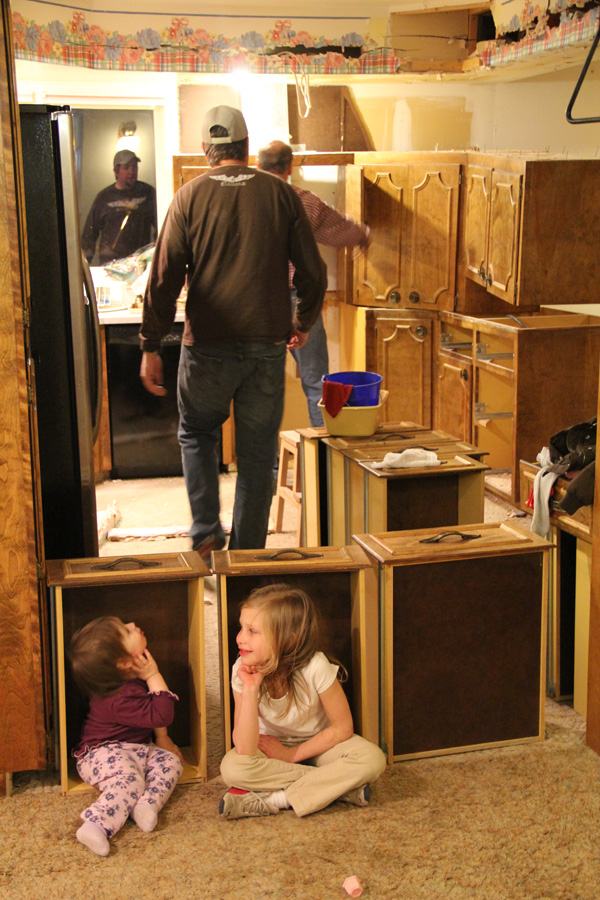
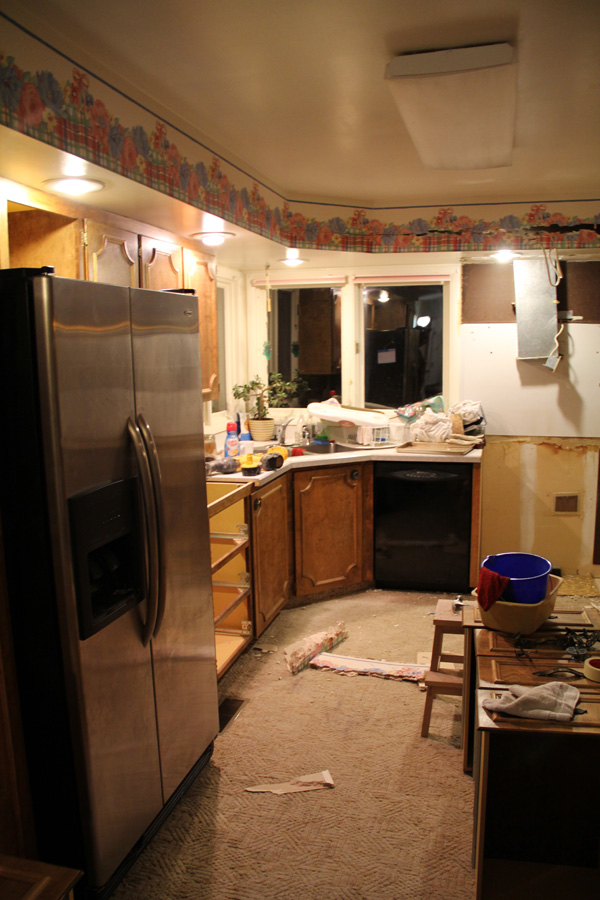
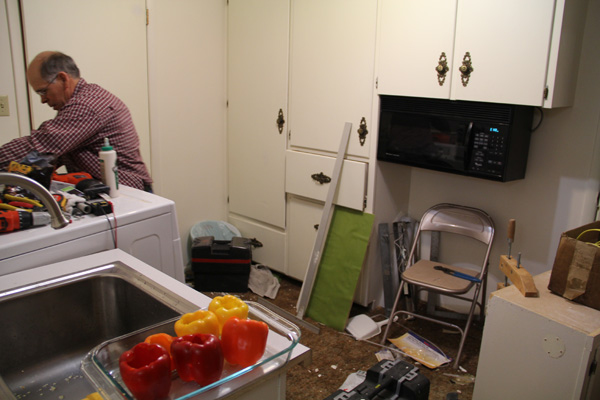
3. House projects. Now we get to add the outdoor projects to the already long indoor list. I am really trying to find the joy in the process and not get overwhelmed by how much there is to do.


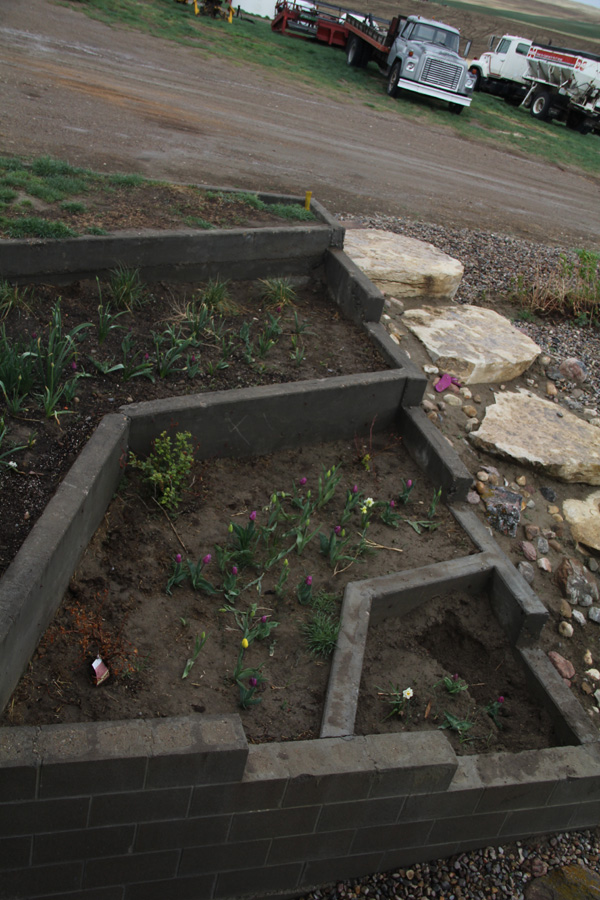
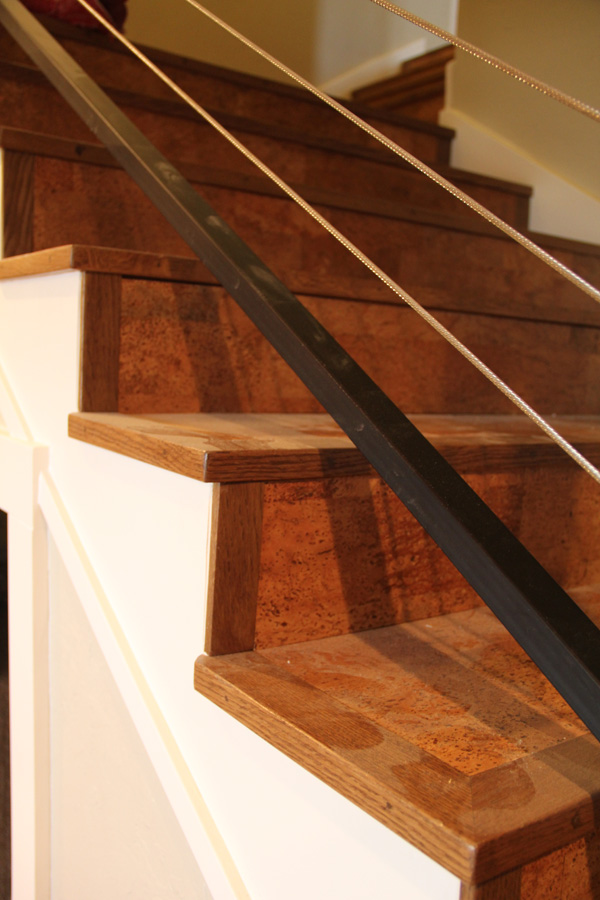
I'm starting to see the rewards of the planting I did last fall. I was worried that I got things started too late, but it seems like most of it is springing up. In the planter I have tulips and daffodils beginning to bloom and 2 out of 3 rose bushes showing some life. I have been weeding and plan to spread some mulch. Now if I can just keep the dog from digging and trampling, I'll be good. (See the big hole in the lower bed? Grrr.) Next to it the rock garden/staircase needs some new plants before the weeds completely take over. 

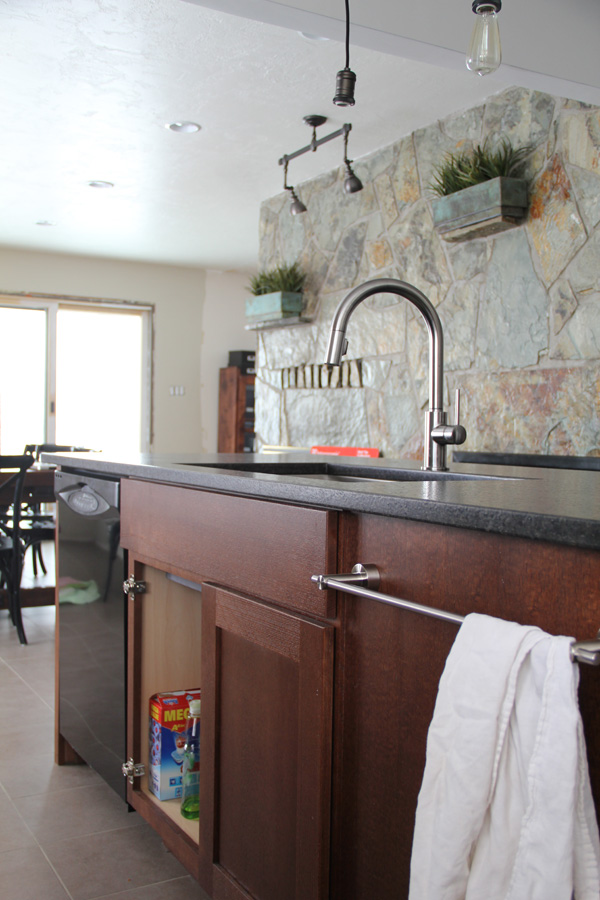
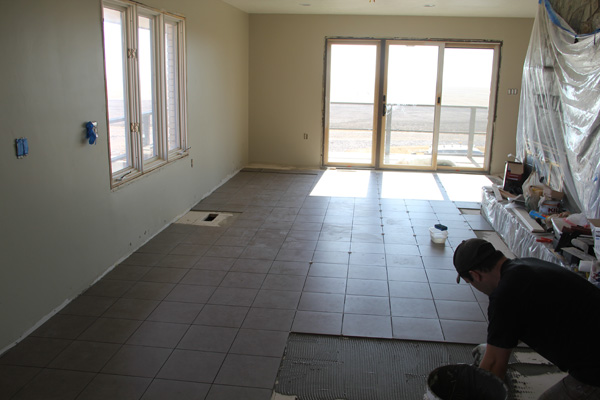
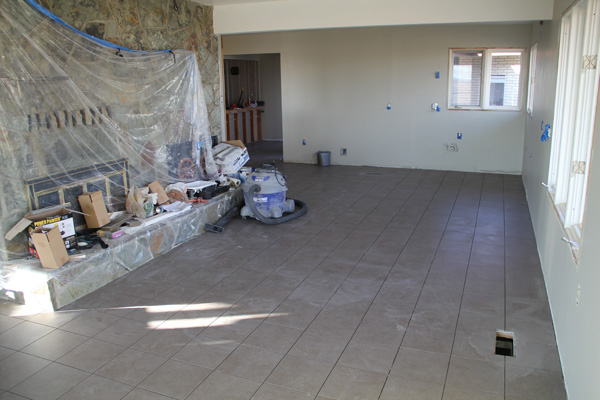
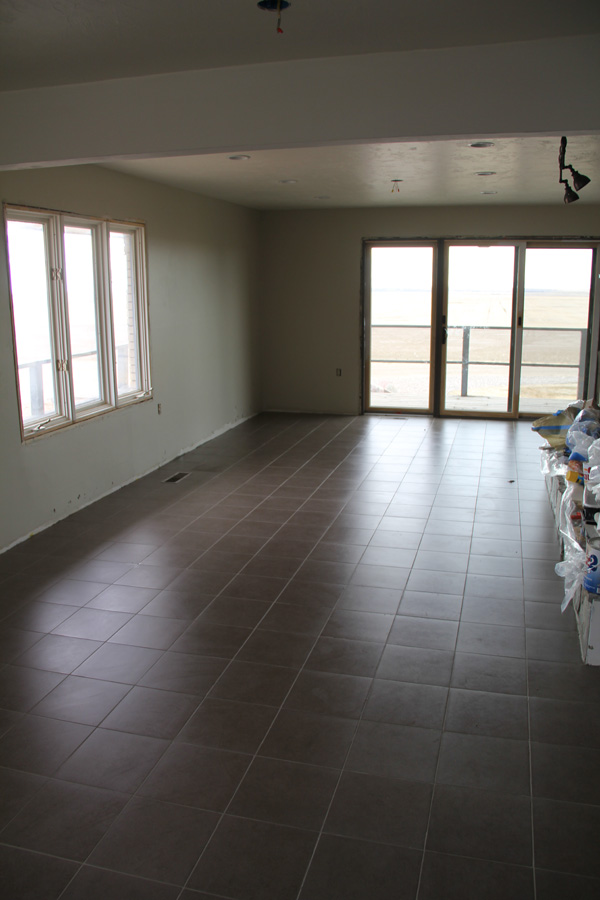
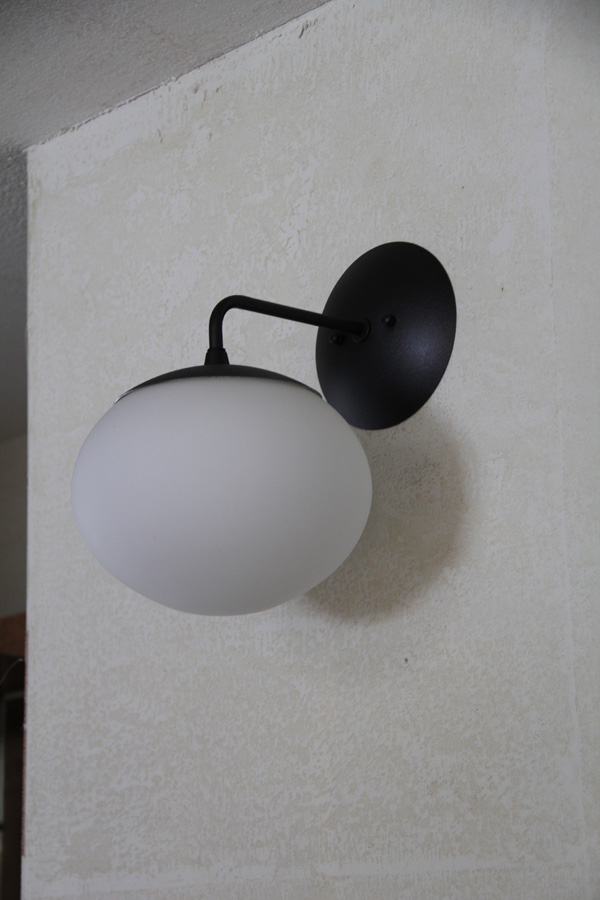
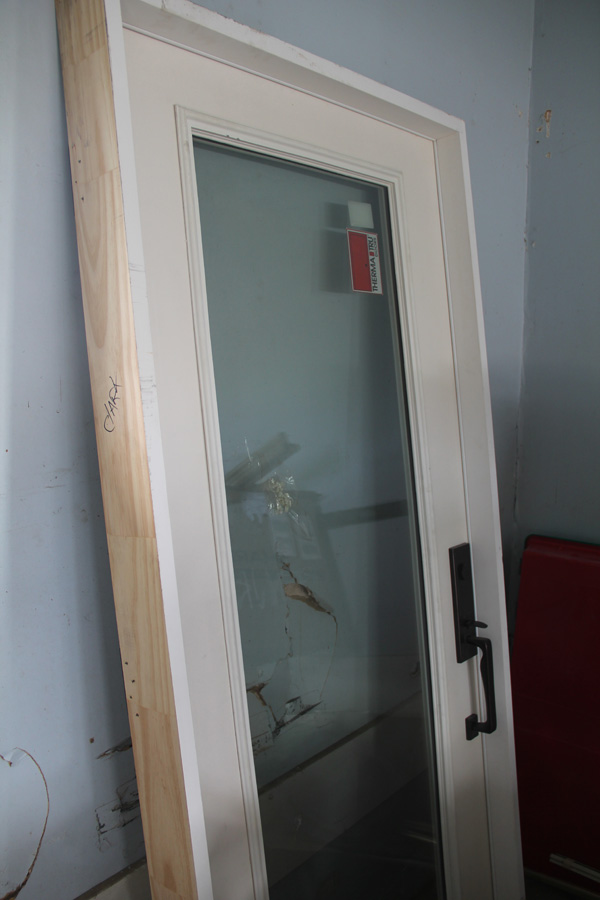
Some of you have asked about the front door. You may remember we ordered one and then rejected what they delivered because they got the order wrong. Well, we regrouped and decided to order just the door without the sidelights—then we will replace the glass in the current window frames. This option was actually much cheaper too. But now the new door sits in our garage and will wait for the guys to have time to install it, along with several windows. The lock set we purchased fits the new door as planned, and once the door is painted it should look fabulous!

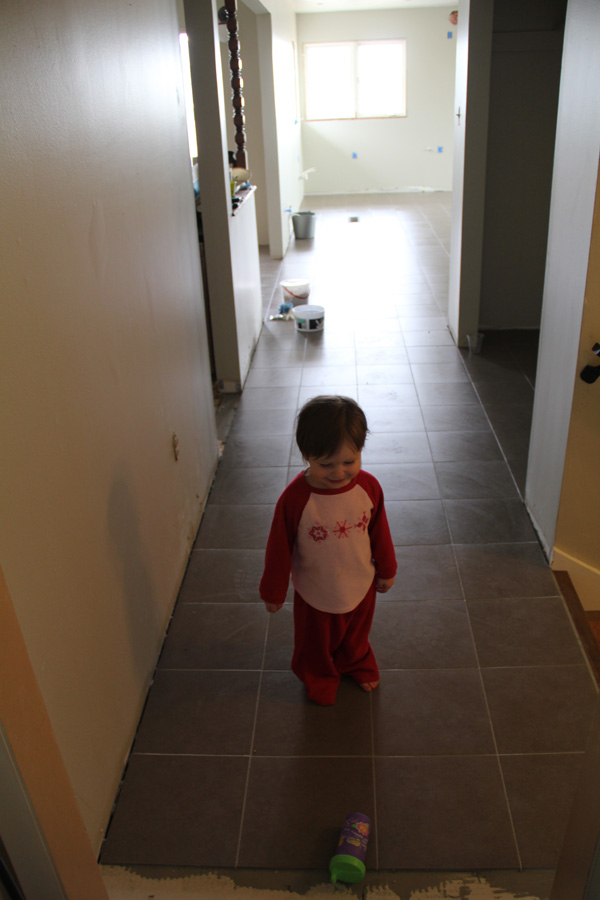
4. I adore spring. The warm days, and even the rainy days. The girls are loving it too, and yesterday they romped in the puddles when the sun came out after a storm. And I finally remembered to get my camera out.


5. Speaking of spring, it is the season of cleaning, isn't it? I cleaned my house from floor to ceiling for company last weekend. Big news, I know. But sometimes it just feels good to get it all done at once and feel caught up for a change! That feeling lasts for about 2 seconds.

Case in point: I scrubbed the ranch limo, inside and out.

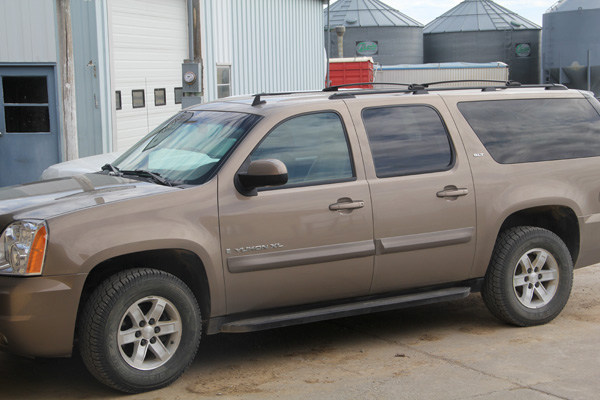
And I had to "take a picture to make it last longer" since a half hour later I had to drive right back down the dusty gravel roads to pick up the girls from the bus. 

Another job like that is mopping my kitchen floors. It looks great for 10 minutes until someone walks through the door. I already kicked the dog out and might have to kick the kids out too. Kidding, of course. Sort of. But I am thinking I should implement a no-shoes policy. I mopped my floor twice within two hours yesterday. Can anyone relate? Of course you can. We Moms all know that controlling the chaos is a never-ending job and its why being a SAHM is much more work than I ever expected. 

6. My photo book came in the mail today! It turned out great and I will show you Monday after I can get a post together

7. I had a birthday last week. These days they come and go without a lot of fanfare but this year Mom made me a cake. I love cake.

This one was Pink Lemonade (from the cover of the May BHG issue) and it was delish. In the background is the print for a skirt she sewed for me also. I'm so spoiled!

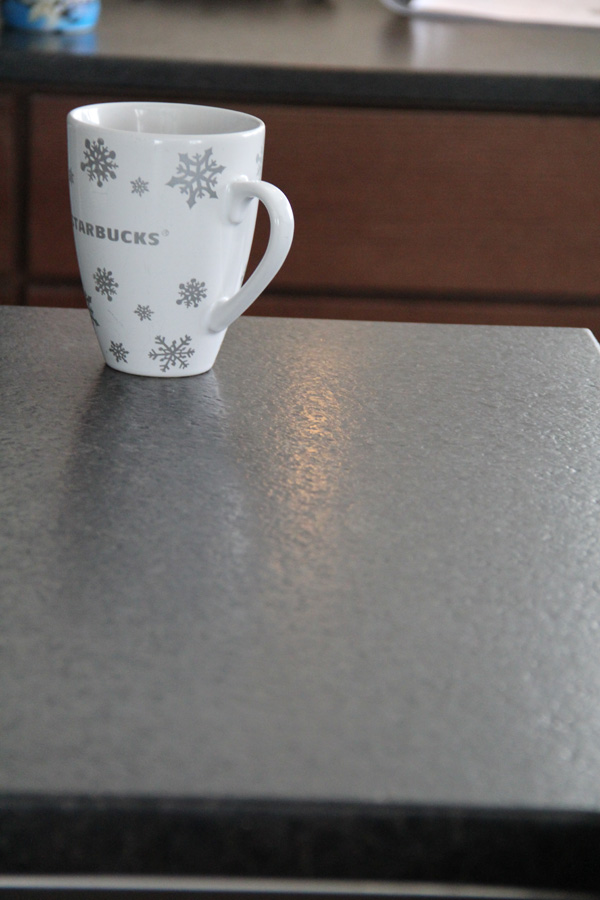
I have had a favorite coffee mug (coffee tastes better in the right mug!) since I graduated from college. It was an MSU pottery mug and a graduation gift from the potters themselves. Well, a couple of weeks ago I was setting it out of Eva's reach and it fell over onto our new tile floor and broke. (Frowny face.) Little did I know, my sweet husband called that very day to custom order a replacement for my birthday and I am now the proud owner of a new beautiful MSU mug. 

Mountain Arts Pottery here.

8. A few other random acquisitions:


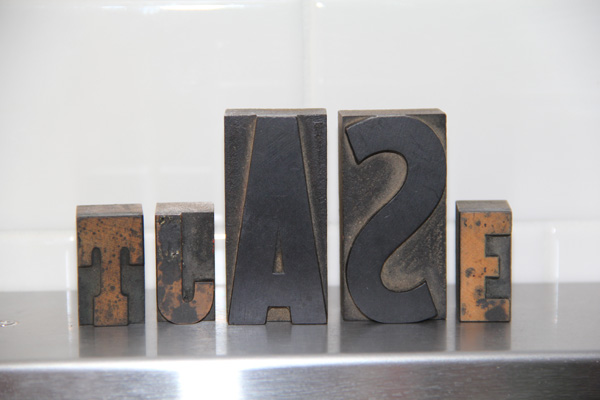
I bought these print blocks in the letters of each of our names at a tiny local flea market. 

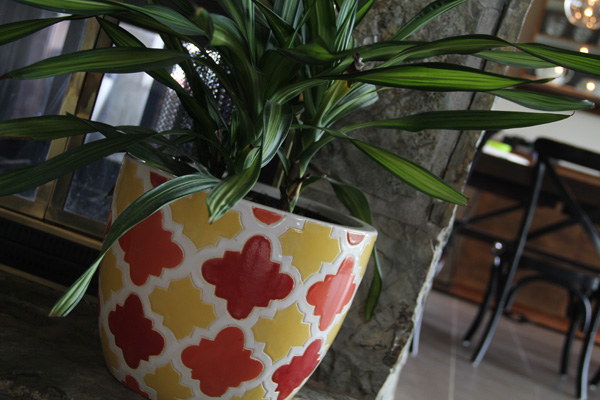
I bought this cheery pot from Ross Dress for Less of all places. I've had a couple of plants that were left here after my Grandpa's funeral, and I thought I'd better finally get them potted for them to have any real chance at survival. 

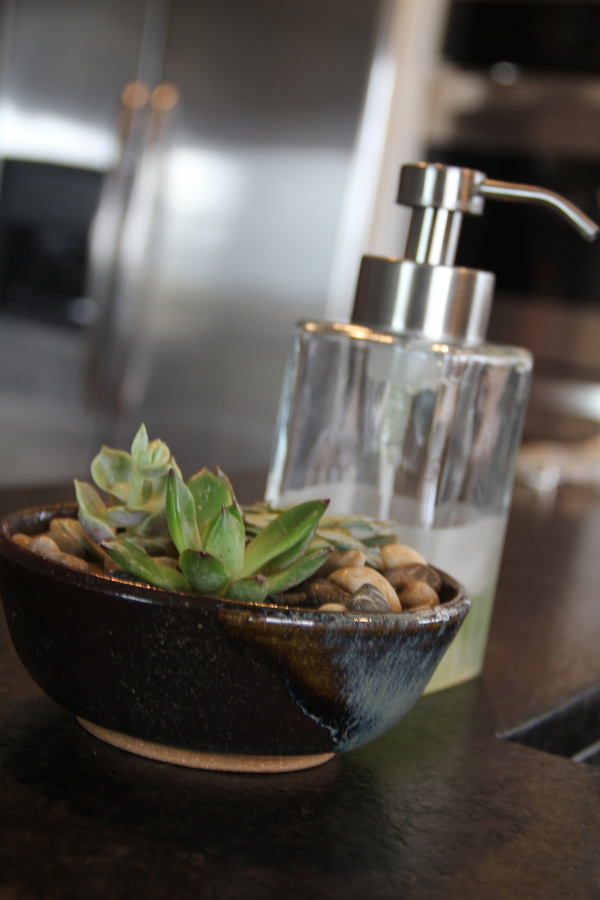
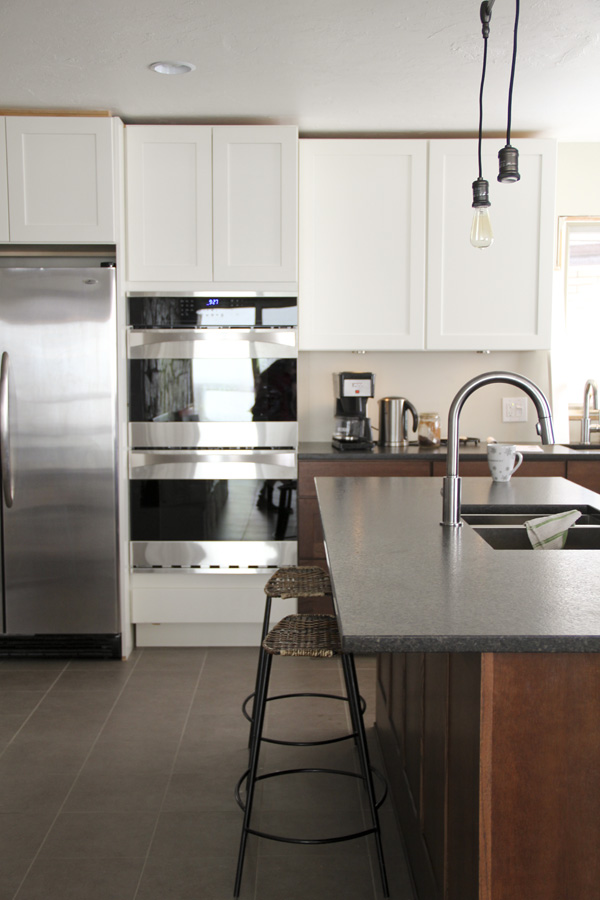
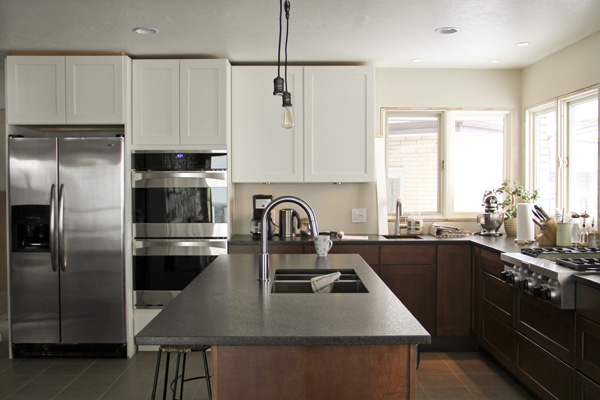
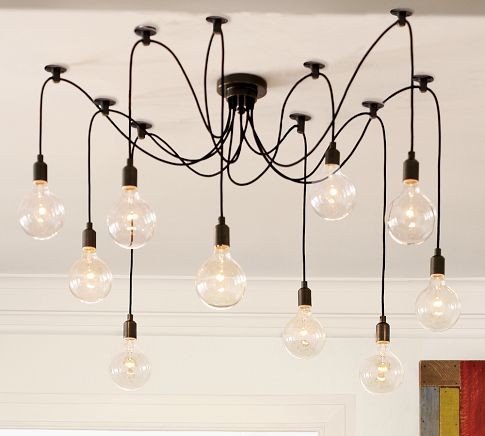
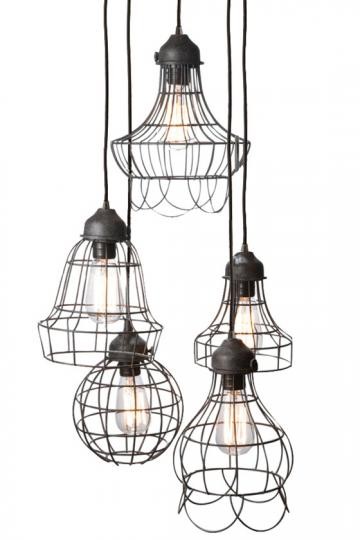
The cheery succulents came from a recent home show, and this sweet bowl needed a purpose so they found their match in my kitchen. The soap dispenser is one of several things I've been shopping for to outfit our new kitchen. 

9. And one last thing...


Shirley Temple paid us a visit this week. She was here for a Good Ship Lollipop performance for a Senior Citizen's lunch at school. Parents weren't invited. Pshaw.

Monday randomness


1. This weekend I installed all the hardware on our cabinets. It is such an improvement since these drawers were rather hard to open without it. I chose the Metrik handles from Ikea. When it turned out we were unable to go to Utah over Easter weekend, I opted to order them online. Checked another item off the list!

2. My new floors show everything. I guess the even color and fairly smooth finish is less forgiving than tile I've had in the past. It's okay—mopping isn't my least favorite job (cleaning bathrooms gets that award)—but I'm not willing to do it every day.  Right now, it really needs mopped daily, and this member of our family is the main culprit:


Immediately after I mop, a new blanket of fur is covering the floor, and it is causing me to pull my own hair out. So some changes are going to be made. Poor Mia. Mom is mean but this spoiling must stop. I am DONE having an indoor dog.

3. I've been battling a nasty cold for a week. The bright side is while laying low I've had an opportunity to spend some time on the computer and work on a photo book. For a long time I have wanted to do family "annuals" to get some of our family photos printed, but it always fell to the bottom of the to-do list. Earlier this year I finally set up a template and have been chipping away at my 2011 photos. I'm pushing to get it finished and ordered this week! I'll be sure to share it with you.

4. Our laundry room is put back together and functioning again . . . as a laundry room (not a kitchen). My utility sink was hooked back up this weekend. I have a laundry list (ha ha) of things to do in that room before it is really finished, though.


• Scrape the popcorn ceiling (or cover it with beadboard?). The celing in this room is painted so scraping will be more difficult. 
• Patch walls and ceiling and paint.
• The countertop was retrofitted from our old kitchen, and it needs a few end pieces touched up. We also need to install a backsplash- either more laminate or perhaps tile...?
• Paint cabinets and install new hardware.
• Add some open shelves to store laundry baskets (under the upper cabinet on the left in the top photo).
• Paint exterior door and install trim.
• New light fixture, or maybe DIY one using this frame.

I'll keep you posted as this project rolls along, but it will probably be awhile since finishing up the kitchen is much higher on the priority list. Ugly as it is at the moment, it is still great to have a large, functioning laundry room.

5. I wasn't sure what to do with the closet doors in the hallway. Since replacing them wasn't really in the budget or a priority, the old ones went back up. I decided they looked best as-is rather than painted, but I did switch out the hardware:


The funny thing is, the old handles still left their mark:

Apparently the doors have faded over time. I've decided not to lose any sleep over it. I did run a bit of stain right over top of the existing finish, and it helped to minimize the imperfections and scratches somewhat. The new handles are a bit small for the doors, but they fit the holes from the old handles. For now we have bigger problems to worry about. But what is your opinion? Are they an eyesore? Should we replace them down the road with something? Like what?

kitchen backsplash and hood

One kitchen detail I have yet to show you is the last project we finished before seeding began—tiling the backsplash.

After much debate, we ended up with inexpensive white subway tiles from Home Depot. We didn't debate the style—I knew I wanted subway tile—but we debated the color. My cabinets are called "Divinity" and our trim color is called "Powdered Snow", neither of which are bright white. They aren't cream either. Somewhere in between I'd say. I looked at a number of different options, and ultimately decided the white of these tiles was suitable, and they were certainly the best price at just over $1/sf.

(I just realized neither photo I've included shows the white cabinets, so I'll have to post more for you later. The tiles are a bit whiter than the cabinets, but it isn't extreme and it all blends pretty well.)

I went for white grout, although I have definitely noted (and liked) the trend of going with gray or darker grout. I just wanted a cleaner and more timeless look and wanted the tile to be the backdrop, not the star of the show.

We ran out of wall adhesive before we were able to finish the section above the window on the far wall (above). We will go back and finish that when Tom has some availability, and then I will caulk all of the seams. 


The new hood is great too—I can finally cook without setting off the fire alarms (a regular occurrence before)! But by far my favorite part is the stove backsplash. We opted not to buy the expensive backsplash that matched the Kitchenaid cooktop. Instead we found a less expensive magnetic backsplash on sale from Pottery Barn. It came with some cute magnetic clips that provide the perfect spot to clip a recipe. Pottery Barn also had this stainless shelf with hooks. Not only did we save money, I LOVE the result. I wasn't sure about the hooks at first (they are removable) but now it is my favorite part. My measuring cups and spoons are perfect here and within such easy reach. I bought a second identical set to hang on the other side. The shelf also provides a perfect ledge for my oils and salt & pepper shakers. I am on a mission to keep my counters as clear as possible and this helps a ton.

To the right of the hood you can see two rows of holes in the tile. These are for the hidden supports that will hold two open shelves. We purchased some 1-inch thick 7-inch wide oak boards that we need to glue together and drill for the supports. My dad will tackle that project when seeding is finished and then I can stain and finish them. It will be SO handy to have our everyday dishes there, right across from the dishwasher.

Much to do, but it is finished enough to be enjoyed, and enjoying it we are!

dining room hutch—before and after

Remember this?

I'm referring to our dining room hutch. People seemed to either love it or hate it. It does have some midcentury clean lines and it stores a TON. My great grandfather had made it as a wedding gift for my grandparents, so it had sentimental value also. But it wasn't perfect. The doors are a bit crooked and the finish was worn. The finish was very orange. The wood is inexpensive plywood. 

Here it is before we moved in:

Just adding my own furniture and decor already made it look WAY more modern. But when we finished the kitchen remodel, it didn't seem fit to go back in the dining room without some TLC. So I set to work.

Now it looks like this:

Can you see the difference? I know it isn't a major change. I wanted to improve it while still keeping its character.

First I stripped, sanded, and refinished it. I took a lot of elbow grease because this thing is HUGE. 8 feet long, to be exact!

I first tried a medium walnut stain—I didn't want it to be too dark—but didn't notice any difference. Then I tried dark walnut, and still I didn't see a significant change. This type of wood didn't seem to want to soak up the stain very well. Finally, I tried to apply an ebony stain over the dark walnut, and the grain really picked up the darker color. I liked the look of the enhanced grain and thought it was worth the double application.


I also replaced the hardware. The old wood handles were glued on and left a mark even after sanding and refinishing, so I chose a handle that would cover this up.

The upper cabinet got the same treatment. Next, I repainted the inside of the shelves white to match my trim color, and then painted the backs of the shelves with black chalkboard paint to make my white dishes stand out.

I have one more thing I want to do. I would like to remove the kick base on the lower cabinet and add legs to make it look more like a piece of furniture and less like a cabinet. Because the cabinet is so large and heavy, my dad wants to custom build metal feet that would be stronger than traditional legs. I'll keep you posted on that, but since it might be awhile, I couldn't wait to show you how it turned out!

We're cookin' now!

Literally! We are cooking in our new kitchen! I was AWOL on the blog last week which means we were cookin' up lots to share with you this week. It was a flurry of excitement last week, starting with the countertop installation on Tuesday. They were here within a week of templating, which was so much better than the 3 weeks they told us it would be! That set in motion the installation of the sinks and appliances which means—BAM—functional kitchen!

I even hosted a stamp class here on Saturday—am I crazy or what? I was stressed out cleaning until 1 AM the night before, but it was good to have a deadline to work for. And it gave me an opportunity to take some snapshots of a relatively clean kitchen without all the construction mess. So without further ado:

I couldn't be happier about how it has all come together. The flow of space feels perfect and nothing feels cramped or awkward. We have the recommended 42" on the cooking side of the island and still plenty of walking space on the other side between the island and fireplace.

It's not your imagination that the light fixture above the island is missing a bulb. It is this track fixture from Pottery Barn. It came with a broken cap on the track, which we super-glued together. Then when Tom screwed the bulb in the socket it wouldn't connect and light up. When he unscrewed it again the inside of the socket broke out. So it is going back to PB and we are going to pick something else. It hurts my pride a bit since there are several people that could say "I told you so" and "I didn't like it anyway".  I thought I would like the industrial feel of it, but I knew when we put it up that it wasn't quite right. It just looked unfinished in the space.

The first night we officially cooked entirely in this room was Friday night. Mom was over helping out and wanted to try a couple of new Thai recipes. We had all 4 burners in use and the griddle, with 3 of us working. If that didn't test my kitchen's capacity, I don't know what would! It was awesome! Oh, and the next day I used both of my ovens at the same time. I am in kitchen HEAVEN.


Left: Our sinks and faucets—LOVE—I'll give you more details on those another time. Right: Our new gas cooktop. LOVE this too. We've used the griddle every day since it has been hooked up. Not kidding. Anxious to get the backsplash and range hood installed.


Some closeups of the countertops. This is leathered Mysore black granite and I am in LOVE. They are smooth like butter to wipe clean, and they don't streak like polished granite. The natural beauty doesn't steal the show but the color blends with everything like it has always been there. I absolutely could not be happier.


Above left: This is the back side of the island. We are missing a door because we sent it in to Medallion cabinets, along with the sample door we had, to show how much lighter the stain turned out. I am not really unhappy with the color, but we still felt it was worth showing them that it wasn't exactly what we expected. They need to replace their samples if nothing else. And we are hoping for a bit of a rebate.

Our old dishwasher blends in just fine. And oh boy is it nice to have it functioning again! We rotated the microwave cabinet to face the end of the island, which left a blank side and a perfect place to install a towel bar next to the sink.

Above right: Don't you just love the industrial feel of our open pantry? JUST kidding. Obviously this is temporary. We were thinking we would custom design/build a pantry for this space. But as spring farm work rapidly approaches I am actually hoping that the rebate I mentioned above could help us purchase a stock pantry cabinet for this spot. Otherwise I might be using a 'temporary" industrial shelf for a good long while. 

In the dining room things are looking pretty bare and unfinished also. (But we are loving the light fixture in here at least!) Remember the hutch/buffet thingy that was in here before? Well, it is going back in here but not without some work.

It is a GIANT piece of furniture and I very much need the storage it provides. But it is difficult to put something old back in a new space. I can't wait to show you what I have up my sleeve for updating it.

These are all very much IN PROGRESS shots which I didn't style or light at all. I realize things still look a bit sterile and cold. We have a lot of finishing details and decorating to do which will warm the space up a lot.

Here is our left-to-do list:

1. Tile the backsplash. This is up next. We have the tile and supplies—just need to get to work! Spring weather has been tugging the guys outside but today we've been blessed with a much needed snow storm! Might be getting to work on that tile job shortly!

2. Install the range hood, stove backsplash, and open shelves after the tile is installed. 

3. Build or buy a pantry?

4. Base and case trim

5. Refinish and install dining hutch.

That is just our kitchen/dining list. We have more projects in the laundry room, entry, and hallways. One thing at a time!

progress report—cabinets installed

Well, hello! Since I last checked in, our cabinets have been installed!

This means I got over my issues about the color and we kept the cabinets as-is. In fact, as many of you suggested, I am already wondering what all the fuss was about. :)

Did I mention how un-level our kitchen is? In this photo you can see how far the perimeter cabinets are mounted off the ground. (On the far right out of the picture they are resting on the floor!) Fortunately the kick-base trim should cover the gaps.

Also visible in the photo above—the new track light spotlights we mounted above the fireplace. Before there were simple recessed can light fixtures that didn't really point at the fireplace. And with the new can lighting in the kitchen we wanted to set this light apart a bit.

This next photo was taken the next day in natural light, so you can see how much the lighting affects the color. I didn't color correct these photos or edit them at all. Obviously. These are very much "in progress" shots with no styling whatsoever. Or cleaning. Construction zones are messy!

We laid cardboard out on the island to test the island counter overhang and make sure we would have enough walk space between the counter and fireplace. We are going with a 9" overhang—shorter than the recommended 12" for a counter-height bar, but more than the original 6" I thought we'd have to live with. On the other side of the island we stuck with the 42" isles most kitchen designers recommend. Overall things feel spacious and comfortable.

The granite guy came to template yesterday. Yippee! This might just be the most exciting step yet! The installation of the ovens, cooktop, and sinks all ride on the timing of the counters.


Last night we moved the dining table back to it's home in the dining room. In fact we ate our first meal in there with no paper dishes! It felt like a celebration. Above right, the microwave is installed, but the power isn't turned on to it and we haven't tried it out. The cooktop is also resting in it's new home, but it won't be functional until the granite is installed. In fact, we are trying to solve a teensy propane leak—I'll rest a little easier when that is taken care of.

The oven cabinet is resting in place temporarily. We have to pull it back out to assist with granite installation. When the granite is in place we can anchor it in permanently and then install the cabinet above the refrigerator to the left of it, and of course install the new ovens! For now we moved the fridge to the pantry spot to get it out of our crowded living room.

You might have also noticed the new light fixture above our table. Yep, we ended up with the Firefly pendants from CB2, although there were also many votes for the drum shade as well. I wanted to wait and put the fixtures up last as the "icing on the cake", but Tom couldn't wait.

You can see a sliver of popcorn ceiling in the living room where it meets the dining room—you can bet I can't wait to get the rest of that out of my house! 


Today Tom has begun ripping out the flooring in the laundry room so we can finish the tiling in there. Bye bye forever filthy brown carpet!

Starting construction in the laundry room might make things interesting given we are still using that space as our kitchen. I'll have an enormous pile of laundry to catch up on when we are done. It is a small area and the tiling should go pretty quickly though. 

I don't think I ever showed you the old original avocado carpet that was under all the brown carpet. (They left it in place because it is glued down!) Except for the edges that were cut away for the tack strip, it is in surprisingly good shape and ironically looks better than the dingy brown carpet over it. It strikes me as funny that all the carpet left in this house (except the new stuff in the basement, of course) is original. All the newer stuff is gone. I'd say that shows they don't make carpet like they used to, hmm?

So there you have it—the good, bad, and ugly. I could have new counters as early as a week from now—can you tell how excited I am to move back into my kitchen???

progress report—tile, cabinets and stress

Hello again! This is what has been happening at the ranch. It's been a long, busy week.

The tile is going in...

And then the grout...


Without the laundry room (we decided to do that later since that would disturb our temporary kitchen area) it was still nearly 800 square feet. It was a big job. Tom swears he will never lay tile again. I'm trying not to remind him that I have big tile plans for our bathrooms in the future.

The grout color turned about a bit lighter than I was expecting. Fortunately it is epoxy grout and shouldn't stain too badly. It is still a gray color, just lighter than the tile. These things happen when you are remodeling. (Which happens to be a phrase I'm telling myself a lot...)

Eva likes it, so that's what counts.


The cabinets were delivered on Thursday! This is a big moment. The guys got out the surveying equipment and it made me chuckle. How many guys does it take to change a lightbulb... I mean, line up a cabinet? Actually, leveling the cabinets is serious business and very important for setting the granite countertops. And our floors are decidely NOT level. They are off more than an inch from one side to the other. 

Here's the deal with the cabinets. When we opened that first box I was expecting elation and excitement. Instead I felt deflated with a giant pit in my stomach. The thing is, the color turned out lighter than I expected.

The sample on the right is Espresso, which is what I originally wanted. As it turned out, I couldn't order that color in Quartersawn Oak because apparently they can't stain that sort of oak grain that dark. (In hindsight I'm glad they aren't that dark). So I settled for the next darkest color, walnut (shown on the left). As you can see, the actual cabinets are lighter. (You can look back at my original design choices here.)

Here are a few more photos, since the lighting effects the color a lot.


The thing is, the cabinets are gorgeous. The color looks amazing with the rust color in the slate fireplace. It just doesn't quite match the picture I've had in my head all these months. Sometimes those expectations are hard to erase.

We have contacted the company and they've asked to send one of our doors along with the sample door we have. It will take several days for them to receive it of course. Then there are two possible scenarios. IF the company acknowledges the problem, they could potentially agree to replace all the cabinets. Which would take several more weeks of course. IF we decide we can live with them as-is, maybe they will compensate us by discounting the cabinets. But right now I have to make a decision if we are going to keep these cabinets and move forward with installation today, or hold up the project indefinitely and potentially until spring farm work completely halts progress.

I've called in a few trusted friends to advise and it looks like I'm going to be keeping them. The guys are not going to sit around and wait for a decision so they are moving forward with installation. Here is my justificaiton: dark dark cabinets have been trendy for awhile and might be on their way out. (I am doing half white, which to me justified the dark cabinets. By the way, the white cabinets are perfect.) The lighter color is more in keeping with midcentury design. It may be more classic in the long run. It looks great with the house. The question is, can I adjust my own expectations?

What would you do?

Progress report

I didn't blog at all last week. Sorry for disappearing, but sometimes you just need to leave the computer off and get to work. Know what I mean? It's like this quote:

After vacation and then being sick for way too long, we had some serious ground to make up. Long hours were put in last week and I do have some progress to report.


Above: Texturing the ceiling and then priming and painting (in the dark). Done! After that we were able to install all the ceiling can lights so we don't have to work in the dark. Then painting the walls. We still have one more coat to put on the walls, but we'll wait until after the flooring mess is complete.

Above right: Dust coats every surface in the house. I can't keep on top of it so I quit trying for now.

An unexpected delay—our existing subfloor was particle board, which is not an ideal substrate for tiling. It has a tendency to swell when wet and can cause your tiles to crack. We decided $400+ in plywood would be a cheap investment in the long run to protect the 900 square feet of tile we were laying. So up came all the existing subfloor and down went brand new plywood. (A dusty job.)

Next a layer of cement board goes down with thinset and nails. The nailing kicked up even more dust.

Next the tile was brought in from the garage to warm up. Even though not every inch of plywood and cement board has been laid (we still have to do the laundry room), we are trying to move forward in the kitchen area so we can begin installing base cabinets and then get countertops templated. While we wait for the granite to be cut and installed, we can continue to work on the rest of the floor. As of this morning, about a 3rd of the tile has been laid in the kitchen/dining room. Progress!


Although I was recruited for painting and a few odd jobs here and there, mostly my job is feeding the crew and keeping the kids out of the mess. Am I ever thankful for our finished basement to hang out in right now.

Eva is a busy girl and loves to be in the middle of everything going on. Although I probably won't dedicate a whole post to it, Eva did pass the 20 month mark in February. Her biggest milestones are talking—she has a broad vocabulary now and communication is getting easier. This is absolutely my favorite age. She is also getting molars on both sides, top and bottom, so teething symptoms are rampant. Overall she is such an easy, mellow kid and such a joy to us. Loving her to pieces.

Did I mention we had company for several days last week too? Some great friends from San Diego made a visit and we couldn't turn them away. We issued a warning before they came, of course, and really appreciated their patience with our chaos and dust. 

Their little Emma Grace and our Eva Grace are less than a month apart in age. They had the ultimate play date and we had a blast watching them interact. Poor little Emma got sick on their last day here. Boo :( Hopefully it didn't come from lingering sick germs around our house. Consider this a warning—it might be best to avoid our house until the dust and germs dissipate!

painting

If you thought this would be about painting our new kitchen, sorry to disappoint you. We aren't there yet. 

Actually, Tom took off to take the girls skiing on a recent Saturday, and since I was going to stay home with the baby, I was going to have my own breed of fun.

I've had some empty canvases sitting around my craft room for a long time. It was time to put them to use. 

For Abby's room I painted a Union Jack flag. In pink, of course. Why pink? Because I saw one online I liked. And it matches her room. Why Union Jack? Because it's iconic and brings back good memories of our trip there and reminds us of Abby's sweet cousins that live there. Why not?

The flag hangs next to one of our favorite photos of the girls. This photo is the perfect color for her room. (I shot this photo to cleverly hide the mess that always resides on the floor and bed. Ugh. 9-year-olds....)

In the bathroom I finally hung these funny little vases from CB2 that I purchased ages ago.

I hung them from 3M Command hooks and thought I was being really smart until the girls took a shower in here and one came crashing to the floor and shattered. Apparently the humidity wasn't good for the adhesive. Or something. I'm glad I know where to get another one.

The green tied in to the green in the little paintings I made for the cabinet.

Just a cheeky idea I had a long time ago. They aren't perfect but I like them for adding a little color and breaking up the wall of wood on the cabinet. (We still have the backsplash to install also.)

It's fun to finally put some decor up in our basement. I don't sit down and craft very often, and it was a fun way to spend a Saturday! 

best laid plans . . .

. . . sometimes go awry. 

Of course, we are remodeling, so that is to be expected. The biggest hiccup we've run into to date is this: our (supposedly) custom front door we ordered more than 2 months ago arrived—not custom at all. The guys showed up to install it they didn't bring the windows we ordered with them, so they wasted their entire day. The door was okay, but the sidelights attached were not full glass as I ordered (they had fiberglass frames so the actual glass was only about 6 inches wide). On top of that, the whole unit was 2 inches too small (because they didn't custom build it like they said they would!). Big fail on their part. Now we are reevaluating and starting over—trying to decide if we will give this shop a chance to fix their mistake or start over with someone new.

We have been ordering a lot of things online for the kitchen. We have a big delivery from Overstock.com sitting our entry.

The big box in the back is our Cavaliere range hood. It was a great price (maybe too great—you know what they say, "you get what you pay for"—at least it looks nice).

The other two boxes are our new Ticor sinks. Great zero radius sinks at a great price also. I did some research before settling on these and felt like so many others you pay mostly for a name. They seem to be good quality in person. But . . .

Look a little closer:

The corner is bent. Luckily this is an under mount sink and the bent part will be under the counter top. We are going to try to bend it back ourselves, hopefully without damaging the visible part of the sink. It seems easier than dealing with the trouble of returning it.

We are still plugging away in our makeshift kitchen slash laundry room.

Not perfect, but so much better than washing dishes in the bathtub.

It does get a bit interesting when we have to do laundry in our "kitchen".

But at least we can.

Our living room is feeling a little cramped also. The fridge is off to the right here, the dining table and buffet are taking up more than their share of space, the piano is permanently draped with a sheet to protect it from construction dust, and the 2 main entrances are sheeted with plastic. Oh yeah, and the dog has claimed her residence in the corner also. We'll be quite glad to air out this room again when all is finished!

Plugging along and going with the flow . . . it wouldn't be remodeling without a few snafus! Thanks for following our adventure. 

basement blinds

Sometimes when you are in the middle of a big project (like a kitchen), it helps to tackle a few small projects in between so you don't forget what progress feels like. I have been determined to finish up a few punch list items in our basement this year so they don't drag on forever. This is what is/was on our punch list:

Finish trim around stairway and touch up paint
Paint doors and install closet doors
Stain and glue down shoe moulding around fireplace 
Retrim and paint new side door, and add more cork around base
Install bathroom cabinets and add hardware
Finish tile backsplash in bathroom
Blinds on all windows
Decorate! 

I felt bad every time we had company at our house that there were no blinds on the guest room window, even though we live in the middle of nowhere. First, I checked out some special order blind books from Home Depot. But after perusing their in-stock section, I discovered these:

 They looked every bit as nice as the special order blinds I was looking at, at less than half the price. The only trouble was they couldn't be cut to size. However, the blinds could be outside mounted on the trim and they had sizes that would work for that. So I brought them home.

Once home, however, I just couldn't bring myself to settle for outside mount. It's an okay look, but these blinds would have exposed ends and would stick out from the window more than 2 inches. So after looking them over I decided they could be trimmed to fit:

And I think they look so much better! Here is a quick tutorial in case anyone wants to try this for themselves.

First of all, don't try cutting these with a saw. It will split the fragile bamboo, which is why they won't cut these at Home Depot for you. For tools you will need a coping saw or something similar, wire cutters or something similar with a sharp, short blade (I used craft and rubber scissors from Stampin' Up!—shown here with a black handle—and they worked the very best), a ruler, a pencil, and a utility knife.

Open the blinds and loosen the strings so you can lay them out flat. Then measure your window and decide how much you need to trim. (Don't forget to allow space for the brackets plus a little extra. You don't want them to rub as you lower them.)

Next, measure from the edge and draw a line where you need to make your cut. You can cut half off of each side, but from the front you can't tell if the strings are off-center. Save yourself the trouble and cut off one side.

 You want to try to avoid cutting the vertical woven support strings. Since my line fell very close to these, I just pushed them over to the left with the back of my pencil before cutting. Then, carefully trim one slat at a time. At the bottom the slats are doubled up and harder to cut, but as you go up it will cut more easily.

At the top, where the slats are stapled to the wood support, the cutting is trickier. Here I used the utility knife to cut through them one at a time. After the slats are cut away, you will need to cut the wood support to accommodate the brackets.

Measure the existing slit to see how much further you need to extend it and draw a guide. Then, with your coping saw, cut the end of the wood support off to be flush with the slats you've already trimmed.

The last step is to cut out the slit you marked. It doesn't have to be pretty. Mine looked like this:

Although the cut isn't perfect, I highly recommend using a hand coping saw because you don't want to risk damaging the bamboo slats as you are cutting. This won't show after it is mounted. 

That's it—your blinds are ready to mount!

A custom look for half the cost! (And privacy for our guests—priceless.)

new patio door

Around this country it is not uncommon to have a week or more of bitter cold weather and snow, followed by warm Chinook winds that melt all the snow and warm things up. We finally had a week or so of typical January winter, and last week the winds that followed were particularly strong. But since our house is well protected by the eaves, the guys took advantage of the warm day and changed out our patio door. I was a little nervous watching them battle the heavy door on only a few feet of deck in crazy strong winds—but look! It's in!

The glass is so clean and clear—I just love it. See the bare ground outside? The snow melted fast.

I was a bit nervous after I saw the door. The outside has brown-ish cladding—which is great—but it wasn't supposed to be on the inside like you see here! I was relieved when Tom assured me the brown will be covered up with wood pieces. After those are attached the inside will be painted white and it will look very much like our old patio door. Except it SEALS. Tight.

A while back I mentioned I was looking to replace our exterior lights and was debating about what type of fixture to get. (What is it with me and lights, anyway?) Well, I went with none of those options and found something instead that was cheaper than all of them at $12:

It is small and unobtrusive. I'm happy not to be looking at the uglies anymore.

And while we are on the subject of doors, we have all 5 of our side doors installed. This is the one in the basement:

Looks nifty, no? Yeah, right. They look kind of ugly at the moment. We have to put trim around each of them (and in this case, some cork flooring) and paint them all up pretty. Which will take time. But again, they seal up nice and tight which is what we were going for.

It's amazing how many things we are crossing off our to-do list, and and how many things are adding to it at the same time!

painting light fixtures

One thing our house has plenty of is globe light fixtures. People seem to love 'em or hate 'em. (A recent commenter said they've just removed them all from their house). As for me, I don't mind them and they fit the house. We had 5 globe sconces in our hallway areas, 1 large one in the office, and 3 sconces outside. They were all brass finish, and I decided to update them by changing their color.

Before....... and after:


I used Rustoleum's Universal Metallic spray paint in oil-rubbed bronze. They will match the hardware we are eventually putting on all the doors in the house. I just love the contrast and think they look much more modern.

As a side note, sorry about the gross-looking walls. It is wallpaper glue and another project I'm working on.

In the photo above you can see a section of wall I have scrubbed next to a section I haven't. This job has been TEDIOUS as it requires a lot of elbow grease and water changes every 10 minutes. I've slowly been chipping away at it over the past couple of weeks. Although this wallpaper came down easy, I find the paper-backed type easier to remove because it doesn't leave this glue residue. After the glue is off we will have to do lots of sanding and patching before the walls can be painted.

Back to lights—

A funny story: As you know, one of the light fixtures I was considering was a giant drum shade. My toughest critic (Mom) wasn't sold on the size so I decided to mock it up with cardboard and paper and hang it from the kitchen ceiling. (Still not sold). Nevertheless, the mock-up came in handy:

I flipped it over and used it as a spray booth!

The photo above gives you a closer look at the finish. When the light shines on it the finish looks more bronze and metallic, but in shadow it looks darker. In any case, I would highly recommend this paint. It is a simple transformation and only required a good cleaning and light sanding before I applied 3 light coats of paint. By the way, slightly more than one can of paint covered all of my fixtures so it was a very inexpensive update.

The outdoor fixtures saw the biggest improvement. They were filthy and oxidized. A thorough cleaning and sanding was required and the paint job isn't perfect, but they look a thousand times better.

Unfortunately, this is a construction zone and there are sometimes casualties:

The fixture on the left was scratched so I had to touch it up (thus the wet paint)—no big deal—but the one on the right... well, I'm off to shop for a new globe. Hopefully it won't be too hard to find one that will fit. When we get them installed, and when we get our new front door installed (this week hopefully!) I will post photos.

The black stuff on the floor in the photo above is carpet glue. The hall and kitchen carpet is all scraped up and gone! Two layers of it. Yes! Soon cement board will be going down and then tile. If only the guys weren't off playing, I mean, hauling peas to the elevator.

getting rid of the gunk

Dad and Tom are taking a break from the house for the next several days to haul peas to an elevator we contracted to over 2 hours away. Not to worry; I have several days of progress to catch you up on while they are busy.

When you remodel you never know what problems you will uncover. Some of them create extra work, but in the end it feels really good to know what is hidden in your walls is clean and new. 

When the cabinets and soffits were all torn out, we were able to see structurally what we were dealing with. We knew ahead of time we were probably going to uncover this support beam right in the middle of the kitchen. 

Unfortunately the beam is about 12" high. If it had been smaller I may have covered it in better wood and stained it to make it a feature. But as it is, we are going to sheetrock it and paint it white (same as the ceiling). It intersects the island, but we can still put our island pendants on this side of the beam and center them over the whole island.

This next pictures shows the corner where the desk used to be. Removing it exposed an unfinished edge to the fireplace, but it shouldn't be too hard to cover it up with something.

The sheetrock in the kitchen was looking pretty nasty:

Yummy. Yep, that is mold behind the sink area.

In this wall a drain vent pipe broke through the sheetrock (and the cabinets) in two places. What do you think might enjoy access holes like this?

You guessed it—mice. The lower cupboard that had this pipe protruding into it often held evidence of mice droppings. Ewww, I know. A mouse once chewed a hole in the seal on my crock pot lid. That cupboard door never would shut properly either, and I actually once WITNESSED a mouse run inside of it. From that point on there was a trap set inside the cupboard, but I never actually caught one there.

Plenty of mouse chewing evidence behind all the cabinets—sorry friends. At this stage of a remodel the pictures aren't pretty.

Needless to say, the sheetrock came down:

Here my dad is figuring out how to relocate that vent pipe inside the wall.

The popcorn ceiling is gone!

We will be texturing the ceiling before we prime and paint.

They have also been cutting holes for new can lights.

This job wasn't fun. My dad is the one who climbed up in the dirty attic space to run the wiring. Attics in homes with shallow roofs like ours have very little space and lots of loose insulation. 

It wil all be worth it though—the old dining room lighting was much too dim and the light wasn't centered over the table. The old kitchen lighting was partly from soffit lighting (which we tore out) and partly from a too-bright overhead florescent light. The new cans (on dimmers) will be soft and bright and will supplement pendants over the island and the chandelier over the dining table. The old lighting holes will have to be patched. 

The plumbing and electrical work is almost done. Next on list will be sheetrock work and tiling! 


lighting options :: round 2

I am agonizing over the lighting decision in my kitchen. Lighting is such a great opportunity to make a statement and add character. I want to LOVE my lights and not play it too safe.

I think I've narrowed it down to 2 options. Option 1:


2 of these Schoolhouse Electric pendants over the island, and this CB2 drum pendant over the dining table.

The drum pendant is huge; almost 3' in diameter, so it would really make a statement. (A nice alternative at 25" in diameter would be this one from West Elm, available in 3 colors including black.) Cons: The solid globe and shade would interrupt sight lines. The drum shade would be in front of our big view window.


Option 2:


2 of these Schoolhouse Electric pendants over the island, and this CB2 firefly pendant over the dining table.

Is this too globe-y? These wouldn't break up the sight lines as much. Cons: exposed bulbs.


About exposed bulbs. I have a few options. 


1. Clear incandescent bulb. About $1 each. Lasts for 1000-2500 hours. I'm not sure how much longer these will be sold in the U.S. Anyone know?

2. Enclosed CFL. About $8 each. Lasts for 8000 hours. I'm okay with these as long as they aren't slow on and have warm light.

3. LED bulb. About $40 each. Lasts for 25,000 hours. These are the bulbs of the future. I hope that means they will come down in price.

4. Plumen CFL. About $30 each. Lasts the same as a regular CFL (I think). 

5. The Edison bulb. $11-15 each. These look the coolest, no doubt. 


The point is, should I base my decision on lightbulb availability? Yes, its a factor, but it isn't insurmountable and the lightbulb market is changing as we speak.

More thoughts?

kitchen lighting options

Demo is still going strong at our house. In fact, I am sitting down at Mom's house with the kids to steer clear of the messy job of scraping popcorn ceilings.

Soon after the ceilings are done, we will be starting electrical work. I am going to be hearing "Oh architect!" (me), "what is the lighting plan?" So I'd better have it figured out.

First up is deciding what configuration to go with.

There is a beam that intersects the kitchen (shown in white) right above the island. It is 12" tall. I will have to figure out the best lighting placement around that. One option would be to hang 2 pendants each over the island and dining table. All the same? Different? The problem I see with this idea is that they won't line up.

Here is another view:

The table in this drawing looks nothing like mine (just there for placement!) and the lighting style isn't right either. Read on for that.

Another option would be to have pendants over the island and more of a chandelier type fixture over the table. This is the option I favor I think.

I should mention that I intend to have a smattering of can lights throughout. They will be positioned to illuminate my countertops.

If you follow me on Pinterest, you probably noticed I've been pinning a lot of light fixtures. You can click through that link to see more. Here I have narrowed down some of my favorites:

Island Pendant light options:

I've been a long time fan of these pendants from Pottery Barn. I even have a friend who has some to get rid of. Cons: They might be a bit traditional. I'm hoping to have some mid-century influence in my fixtures. Also, the glass gets dusty and looks like it would be hard to clean on the inside. The bulbs are exposed, so I would be spending more on either Edison bulbs or LED bulbs.

I also LOVE these simple pendants from Pottery Barn. They come on a track with either 2 or 3 lights. The trouble is, I would need to make sure the track would fit okay on one side of the beam and still center over the island. And again, they have exposed bulbs. I think you can buy Edison bulbs on Amazon for about $11 apiece. They don't last very long though. You can buy LED bulbs for around $40—which is a lot—but they will last longer than CFLs.

I also LOVE these globe lights from Schoolhouse Electric. In fact I love a LOT of their lighting. These are almost a perfect match to some of the lighting I already have (mine are brass, but I intend to paint them). I love the frosted glass globe—hides the bulb!—but they are also available in a clear glass globe which looks great as well.

Dining Room Chandelier/Pendant options:

The trouble with doing frosted globes in the kitchen is that I don't know what would match it in the dining room.

Schoolhouse Electric also has these satellite fixtures (a bit atomic, don't you think?) that require a special exposed bulb. They are a bit too pricey to do more than one.

If I went with a clear globe in the kitchen, the choices are easier:

The Pottery Barn Edison Chandelier. Again, exposed bulbs! And maybe a bit too trendy. It was on sale, but just now I'm discovering it is no longer available! Guess that decision was easy.

I could go with a simple drum shade. This one is from CB2.

This CB2 Firefly Pendant is in the top running. Again it has an exposed bulb, but if you look closely, they are showing it with CFLs!

I am also completely smitten with these pendants from CB2. They are larger than you might think (16" in diameter) and pricey if I buy two. I don't think my Mom is a fan.

One more just for fun. I'm not sure they are perfect for my house, but i think they are pretty great all the same. They are from Home Decorators Collection.


If you are still here after all of that, PLEASE PLEASE PLEASE offer your opinion. I am nowhere near making up my mind on this decision and I need to! Help?

more demolition

It is a bit challenging to keep the kids out of the mess . . .

I like to reserve Fridays for my Feng Shui Friday posts, but, well, this sort of chaos just isn't condusive to organization right now. I do plan to continue the Feng Shui Friday posts occasionally in the future! 

Off to buy lots of frozen meals and paper plates.

What.A.Mess.

Cooking dinner for my family is an adventure. My kitchen looks like this:

The fridge, sink, and dishwasher are still functional, but the only counter top is right around the sink. Everything is covered in dust and nails and the guys are working on removing the old cabinets.

In the laundry room, the new sink is now functional and my microwave is mounted here temporarily.

It is still a construction zone, but you can see the peppers I have prepped to make stuffed peppers for dinner. Yum. Worth the effort.

In the living room sits the dining room buffet and most of the contents of my kitchen. I have a small amount of space here to chop onions and make a fruit salad.

It takes 4 trips to get everything I need down to the basement where my stove is plugged in.

But once there I managed to brown the meat, cook the rice and vegetables, and bake the stuffed peppers.

Back upstairs we sat down for a lovely dinner (in the living room!) and we didn't even use paper plates (tempting).