Monday randomness


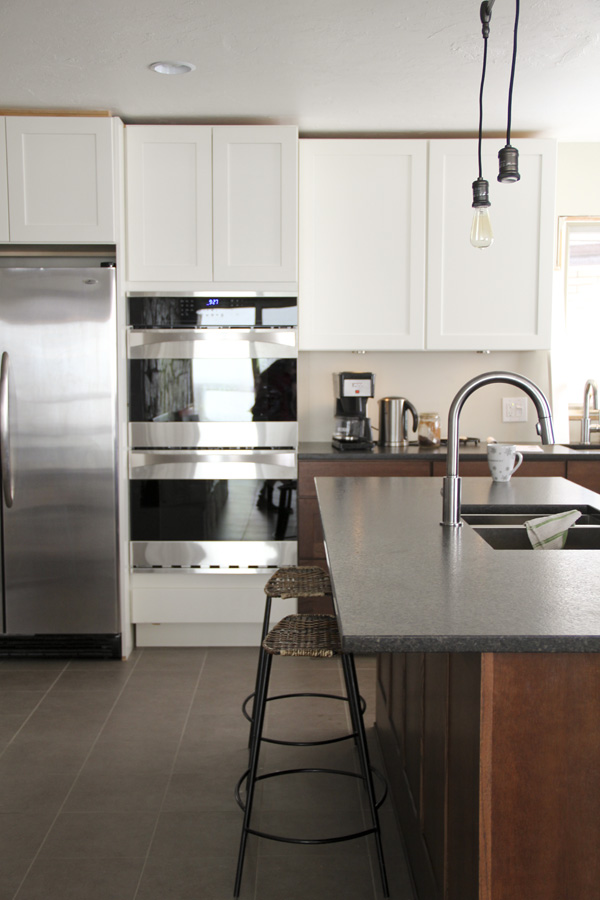
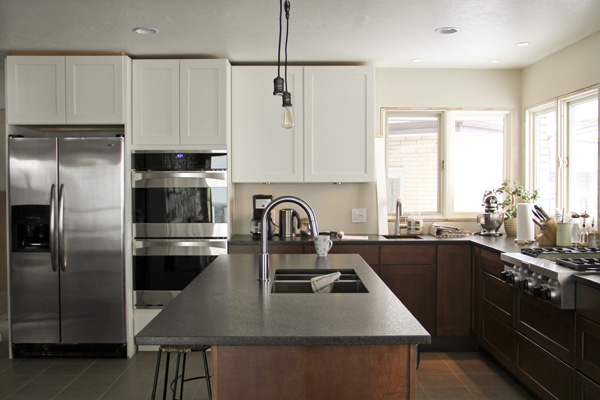
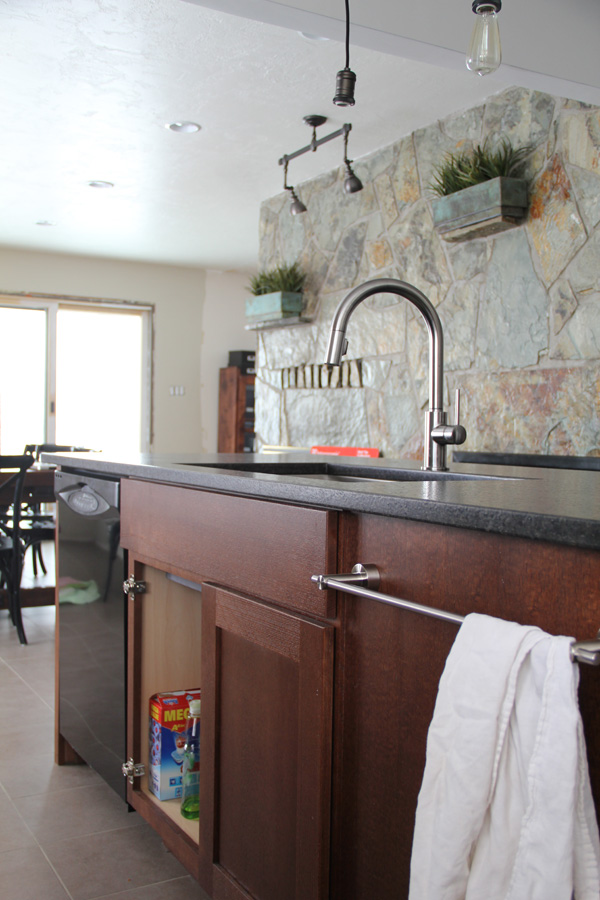
1. This weekend I installed all the hardware on our cabinets. It is such an improvement since these drawers were rather hard to open without it. I chose the Metrik handles from Ikea. When it turned out we were unable to go to Utah over Easter weekend, I opted to order them online. Checked another item off the list!

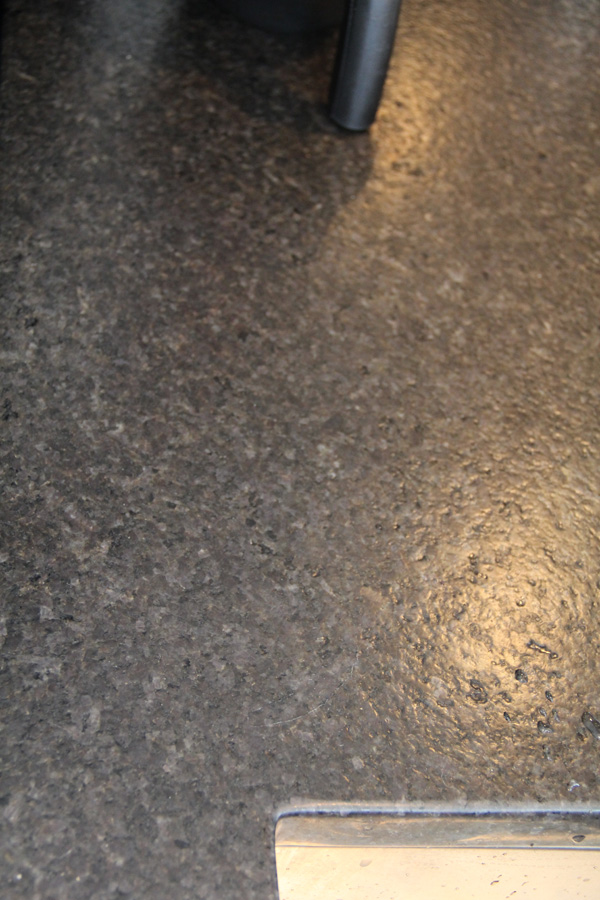
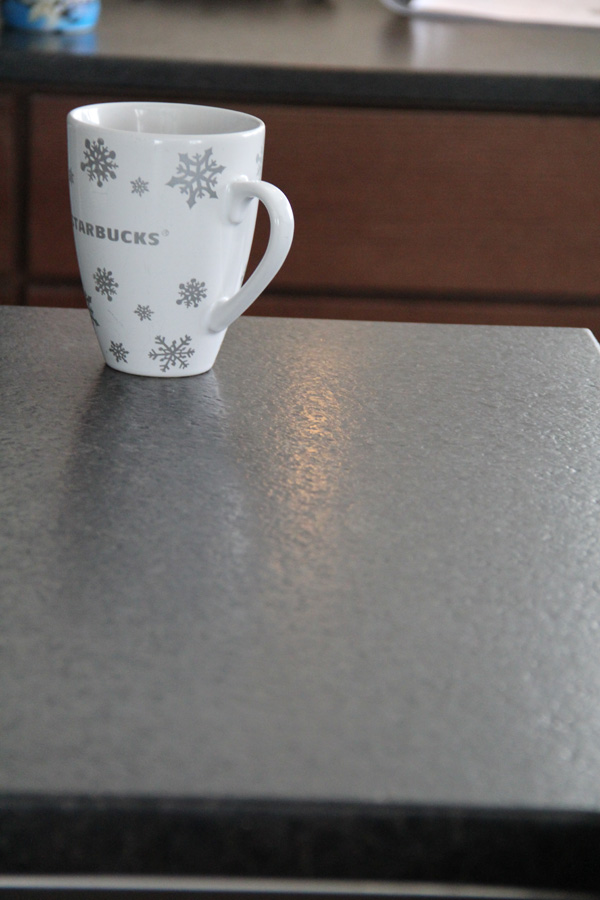
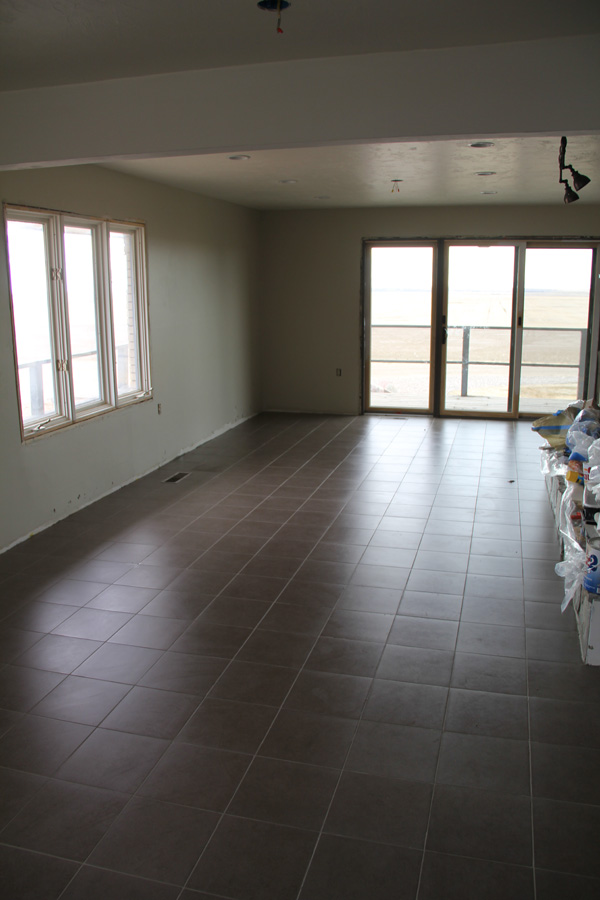
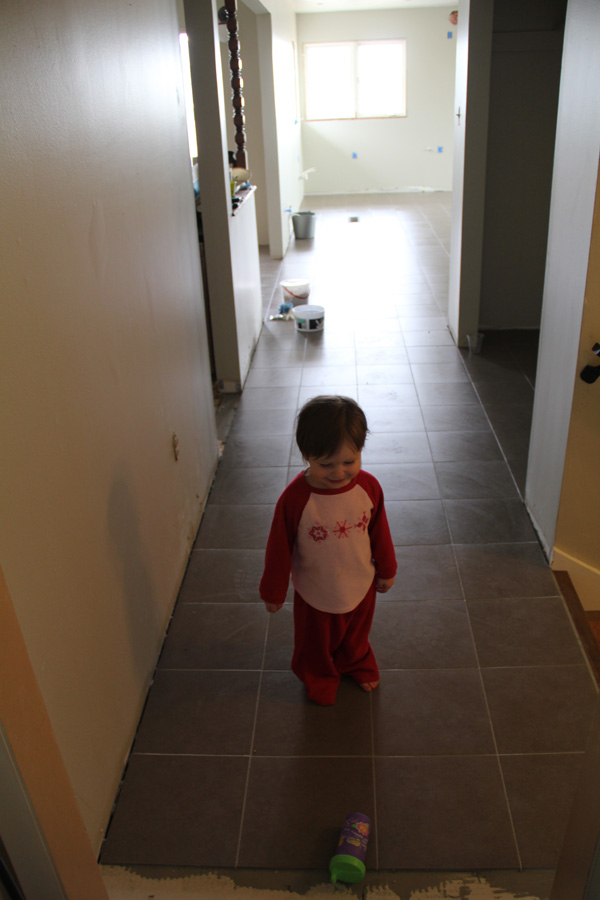
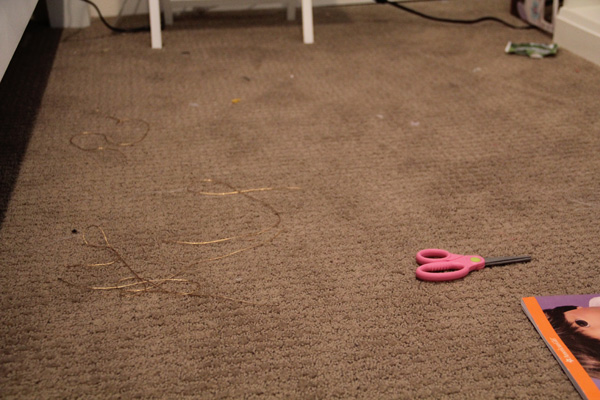
2. My new floors show everything. I guess the even color and fairly smooth finish is less forgiving than tile I've had in the past. It's okay—mopping isn't my least favorite job (cleaning bathrooms gets that award)—but I'm not willing to do it every day.  Right now, it really needs mopped daily, and this member of our family is the main culprit:


Immediately after I mop, a new blanket of fur is covering the floor, and it is causing me to pull my own hair out. So some changes are going to be made. Poor Mia. Mom is mean but this spoiling must stop. I am DONE having an indoor dog.

3. I've been battling a nasty cold for a week. The bright side is while laying low I've had an opportunity to spend some time on the computer and work on a photo book. For a long time I have wanted to do family "annuals" to get some of our family photos printed, but it always fell to the bottom of the to-do list. Earlier this year I finally set up a template and have been chipping away at my 2011 photos. I'm pushing to get it finished and ordered this week! I'll be sure to share it with you.

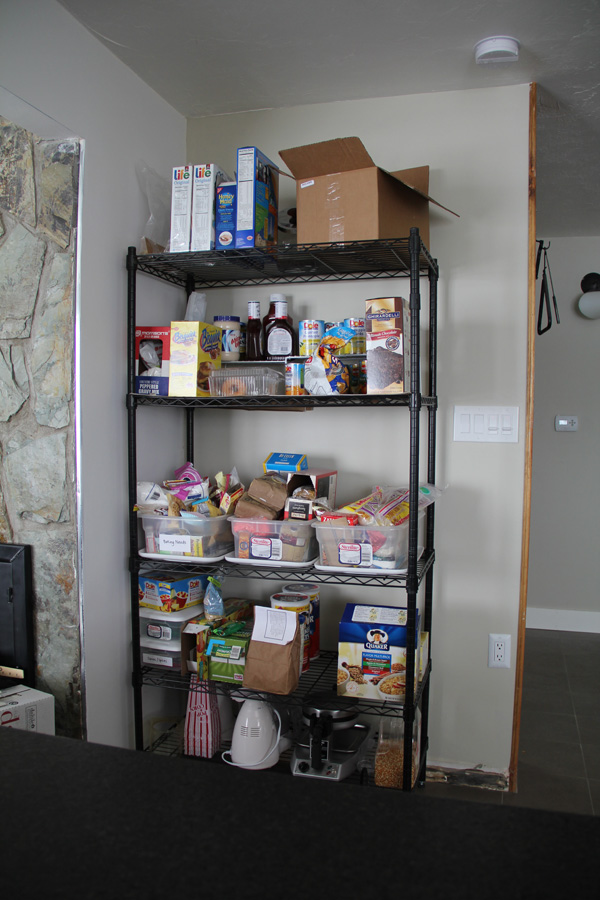
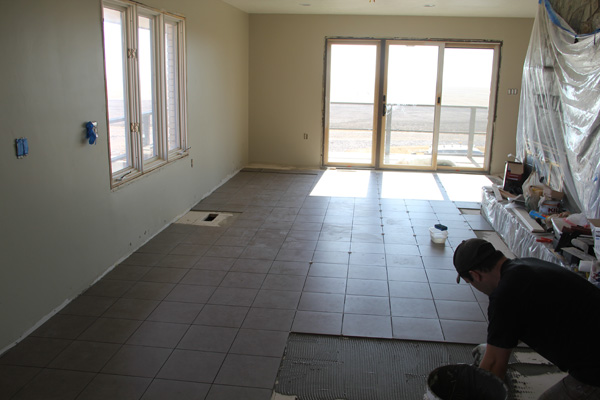
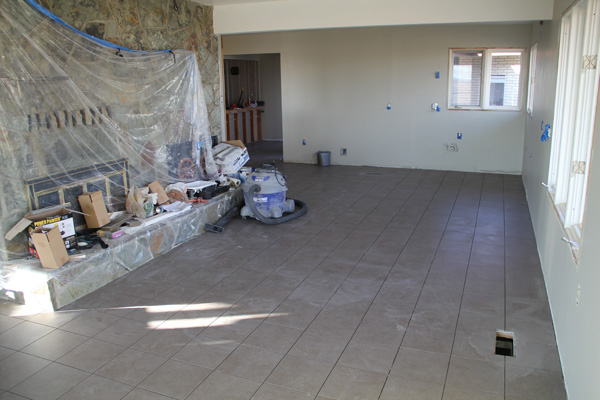
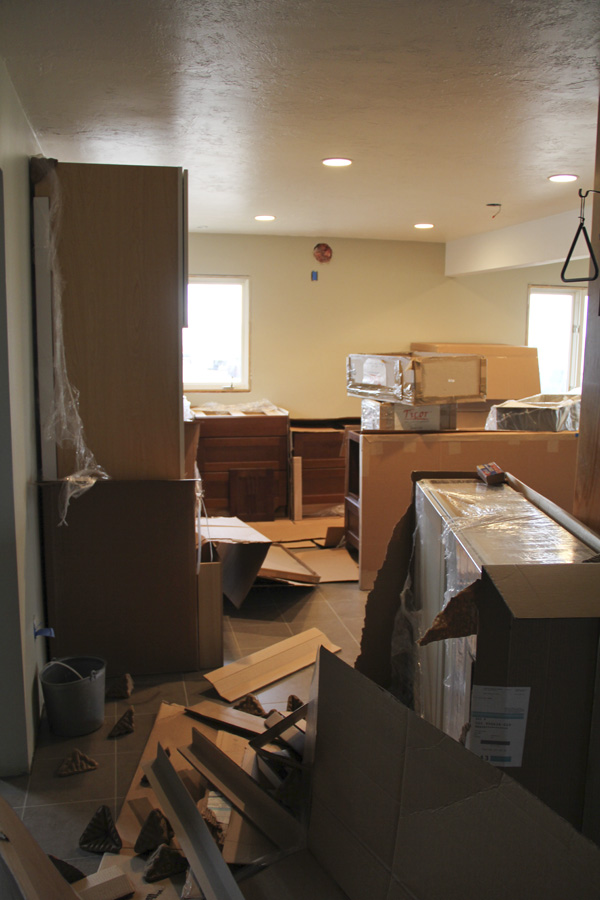
4. Our laundry room is put back together and functioning again . . . as a laundry room (not a kitchen). My utility sink was hooked back up this weekend. I have a laundry list (ha ha) of things to do in that room before it is really finished, though.


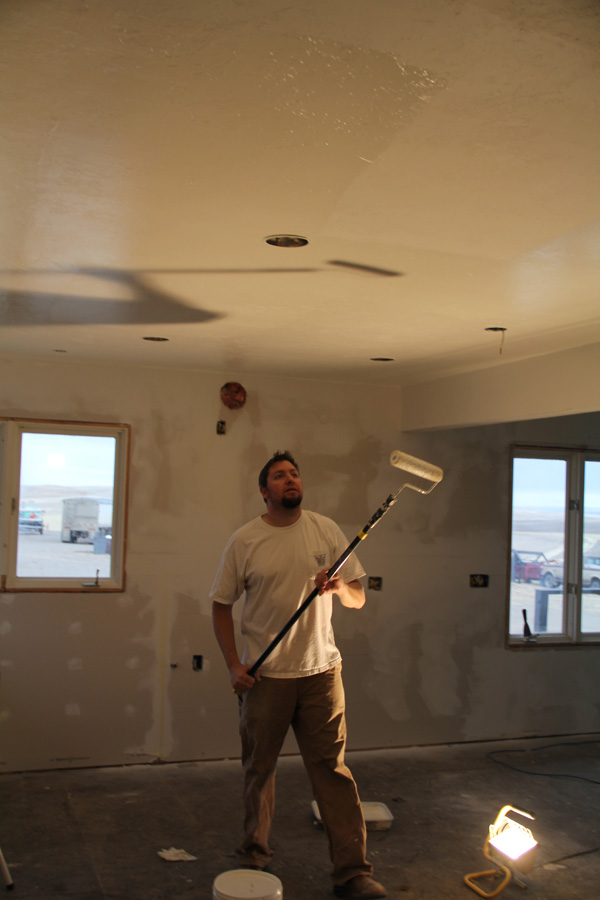
• Scrape the popcorn ceiling (or cover it with beadboard?). The celing in this room is painted so scraping will be more difficult. 
• Patch walls and ceiling and paint.
• The countertop was retrofitted from our old kitchen, and it needs a few end pieces touched up. We also need to install a backsplash- either more laminate or perhaps tile...?
• Paint cabinets and install new hardware.
• Add some open shelves to store laundry baskets (under the upper cabinet on the left in the top photo).
• Paint exterior door and install trim.
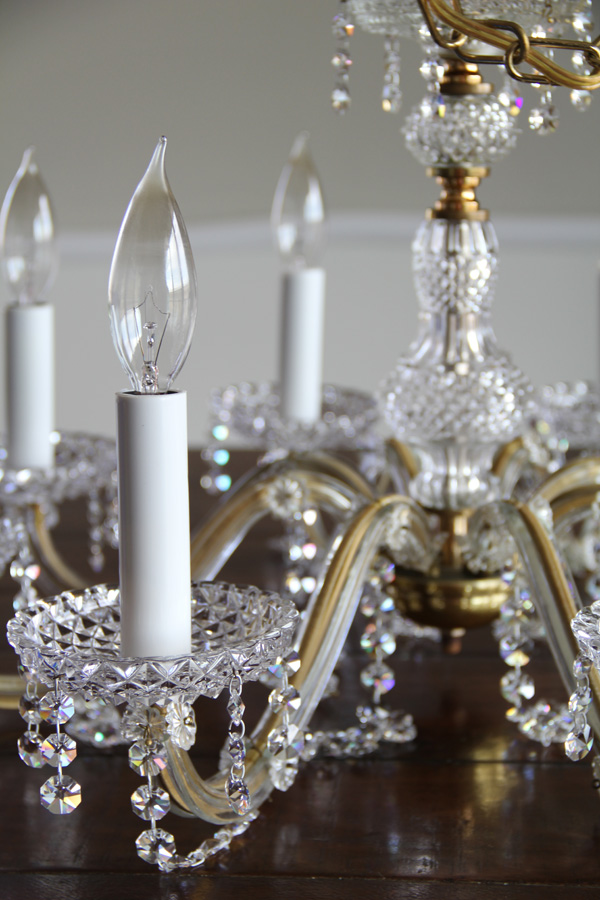
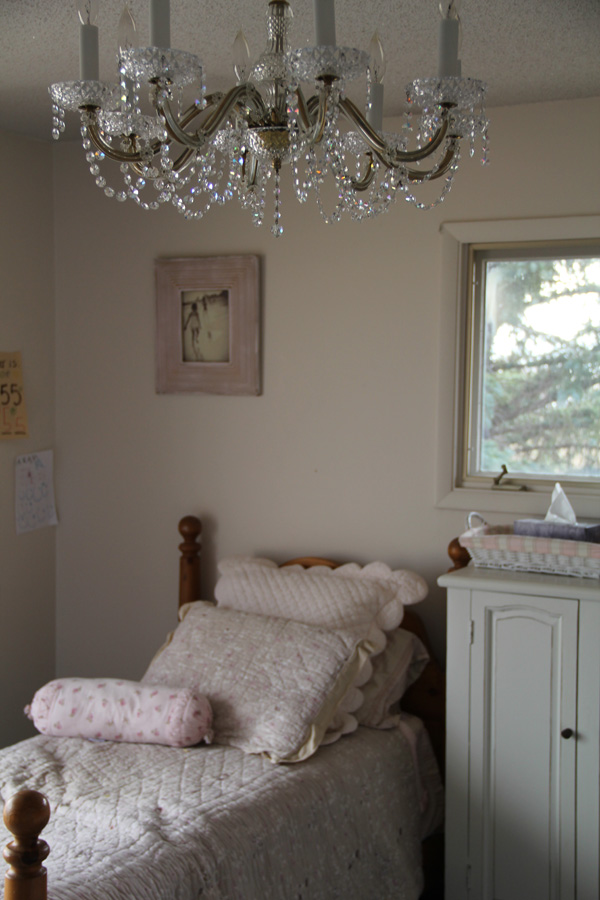
• New light fixture, or maybe DIY one using this frame.

I'll keep you posted as this project rolls along, but it will probably be awhile since finishing up the kitchen is much higher on the priority list. Ugly as it is at the moment, it is still great to have a large, functioning laundry room.

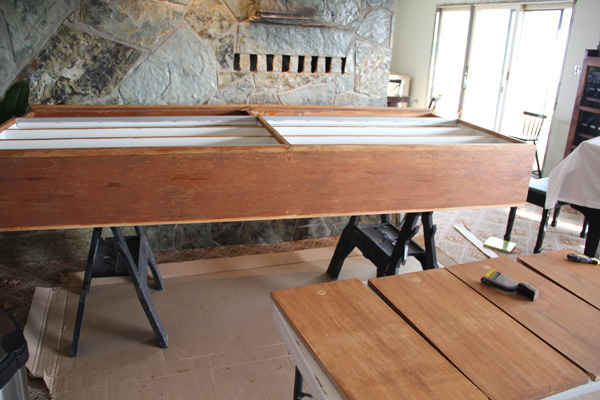
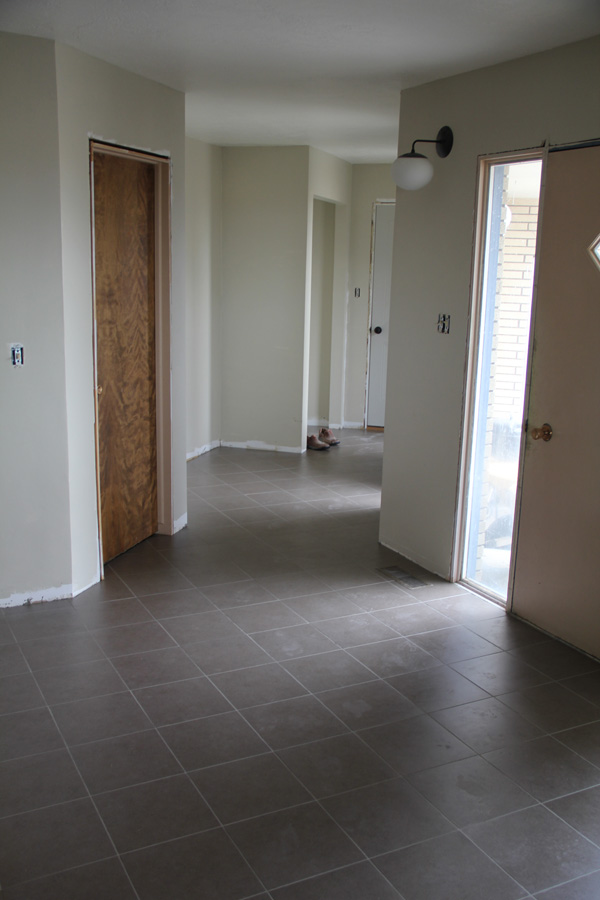
5. I wasn't sure what to do with the closet doors in the hallway. Since replacing them wasn't really in the budget or a priority, the old ones went back up. I decided they looked best as-is rather than painted, but I did switch out the hardware:


The funny thing is, the old handles still left their mark:

Apparently the doors have faded over time. I've decided not to lose any sleep over it. I did run a bit of stain right over top of the existing finish, and it helped to minimize the imperfections and scratches somewhat. The new handles are a bit small for the doors, but they fit the holes from the old handles. For now we have bigger problems to worry about. But what is your opinion? Are they an eyesore? Should we replace them down the road with something? Like what?

Easter weekend

I'm a little behind on this, but I thought I would kick off this weekend by sharing last weekend's Easter photos. After a gray winter it is so refreshing to see spring colors and green grass. A little Photoshop saturation boost doesn't hurt either. :)

Every year as sort of an Easter tradition I try to get the girls a new spring outfit. This year my mom made it easy for me and sewed these adorable skirts with fabric she acquired in Hawaii. My mom is a seamstress extraordinaire. I know this because she used to sew all my fancy childhood dresses.


We shared an egg hunt with my dear cousin Barb and her boys and everyone soaked up the beautiful spring weather. 


Today, just a few days later, it is cold and wet but we are loving the sight of a good spring soaker. Tom said, "It's great, but it's making those weeds I haven't sprayed yet grow faster". Yes, that means it is making the crops grow also. The bulbs in my flower garden are growing, the grass is greener, the weeds are taking over, and the gophers are out.

Abby and her buddy Jace are doing their part to control the gopher population. I'm pretty sure they would need to make this quota daily to make a dent.

kitchen backsplash and hood

One kitchen detail I have yet to show you is the last project we finished before seeding began—tiling the backsplash.

After much debate, we ended up with inexpensive white subway tiles from Home Depot. We didn't debate the style—I knew I wanted subway tile—but we debated the color. My cabinets are called "Divinity" and our trim color is called "Powdered Snow", neither of which are bright white. They aren't cream either. Somewhere in between I'd say. I looked at a number of different options, and ultimately decided the white of these tiles was suitable, and they were certainly the best price at just over $1/sf.

(I just realized neither photo I've included shows the white cabinets, so I'll have to post more for you later. The tiles are a bit whiter than the cabinets, but it isn't extreme and it all blends pretty well.)

I went for white grout, although I have definitely noted (and liked) the trend of going with gray or darker grout. I just wanted a cleaner and more timeless look and wanted the tile to be the backdrop, not the star of the show.

We ran out of wall adhesive before we were able to finish the section above the window on the far wall (above). We will go back and finish that when Tom has some availability, and then I will caulk all of the seams. 


The new hood is great too—I can finally cook without setting off the fire alarms (a regular occurrence before)! But by far my favorite part is the stove backsplash. We opted not to buy the expensive backsplash that matched the Kitchenaid cooktop. Instead we found a less expensive magnetic backsplash on sale from Pottery Barn. It came with some cute magnetic clips that provide the perfect spot to clip a recipe. Pottery Barn also had this stainless shelf with hooks. Not only did we save money, I LOVE the result. I wasn't sure about the hooks at first (they are removable) but now it is my favorite part. My measuring cups and spoons are perfect here and within such easy reach. I bought a second identical set to hang on the other side. The shelf also provides a perfect ledge for my oils and salt & pepper shakers. I am on a mission to keep my counters as clear as possible and this helps a ton.

To the right of the hood you can see two rows of holes in the tile. These are for the hidden supports that will hold two open shelves. We purchased some 1-inch thick 7-inch wide oak boards that we need to glue together and drill for the supports. My dad will tackle that project when seeding is finished and then I can stain and finish them. It will be SO handy to have our everyday dishes there, right across from the dishwasher.

Much to do, but it is finished enough to be enjoyed, and enjoying it we are!

dining room hutch—before and after

Remember this?

I'm referring to our dining room hutch. People seemed to either love it or hate it. It does have some midcentury clean lines and it stores a TON. My great grandfather had made it as a wedding gift for my grandparents, so it had sentimental value also. But it wasn't perfect. The doors are a bit crooked and the finish was worn. The finish was very orange. The wood is inexpensive plywood. 

Here it is before we moved in:

Just adding my own furniture and decor already made it look WAY more modern. But when we finished the kitchen remodel, it didn't seem fit to go back in the dining room without some TLC. So I set to work.

Now it looks like this:

Can you see the difference? I know it isn't a major change. I wanted to improve it while still keeping its character.

First I stripped, sanded, and refinished it. I took a lot of elbow grease because this thing is HUGE. 8 feet long, to be exact!

I first tried a medium walnut stain—I didn't want it to be too dark—but didn't notice any difference. Then I tried dark walnut, and still I didn't see a significant change. This type of wood didn't seem to want to soak up the stain very well. Finally, I tried to apply an ebony stain over the dark walnut, and the grain really picked up the darker color. I liked the look of the enhanced grain and thought it was worth the double application.


I also replaced the hardware. The old wood handles were glued on and left a mark even after sanding and refinishing, so I chose a handle that would cover this up.

The upper cabinet got the same treatment. Next, I repainted the inside of the shelves white to match my trim color, and then painted the backs of the shelves with black chalkboard paint to make my white dishes stand out.

I have one more thing I want to do. I would like to remove the kick base on the lower cabinet and add legs to make it look more like a piece of furniture and less like a cabinet. Because the cabinet is so large and heavy, my dad wants to custom build metal feet that would be stronger than traditional legs. I'll keep you posted on that, but since it might be awhile, I couldn't wait to show you how it turned out!

spring on the farm

A lot of random thoughts to share with you today. I've been rather inconsistent with my posts lately and I'm starting to feel like have lots to catch up on, so random is what you get. 

So we are approaching Easter weekend around here. Actually, we are approaching it everywhere—ha. But here in our small school we don't get a spring break, just 3 days off for Easter to make it a 5 day weekend. We finish earlier than the bigger schools at the end of the year then, but for now we just get this one short break. I was really hoping to make a trip to Utah this weekend. It's been a year since we visited. I have a VERY LONG shopping list, not to mention all the friends we'd love to catch up with. 

Mother nature had other ideas. When spring comes, so does the farm work. It doesn't wait on petty vacations. The seeder is parked out front ready to go and we are out spraying the eager weeds. Once we get rolling, we have at least 2 solid weeks of very long days to finish the seeding. So for now, IKEA can wait.

We are using this contraption to clean lentils and peas for planting:

Last Sunday we had a sneak preview of Easter dinner—I had an old ham in the freezer and some new ovens to try out. The leftover ham bone was the perfect base for pea soup, so while we were out cleaning peas for planting, we were inside cooking last year's bounty for dinner. Farm to table at its best.

I should have trekked out to the shop for some freshly cleaned peas. I had to pick some straw out of mine since they were collected straight in off the field. (Extra fiber, right?) Aside from that, a quick rinse was all that was needed to ready these for cooking into a yummy pea soup.

The girls want to be outside all. the. time. I caught this picture of them on one of our first warm days:

Their cowgirl boots and ball caps made me smile. That's how they roll. Now Sarah is already sporting her flip flops and tank tops. It will be quite a shocker when it snows this week. The snow likely won't stick around for long, however. Spring is in the air. Bring on the moisture! And if it snows, maybe I'll have a little luck getting some help with a few more indoor projects, hey?

Our swing set is being put to good use. Best investment!

The big girls aren't the only ones enjoying the great outdoors. Whenever the door opens, Eva makes a run for it. "'side?" she says. She doesn't want to stay in the yard, either. She just wants to take off down the road and never stop. Reigning her in is going to be a challenge and we are just praying she doesn't learn how to open the door any time soon.

A few other Eva-isms: (See, I told you this would be random.) She is talking a blue streak. One of my favorites is when she says what she wants—for example "juice"—and you repeat it back to her to make sure you understand, "Juice?". She says "ohay" (okay) to confirm. Like its your idea and she is just agreeing to it. So cute.

At night when it is story time, she has to have her own book (always an Archie comic) and reads aloud along side us. She is getting quite vocal when she isn't understood, or when she doesn't get what she wants. Typical almost-2 behavior. Love her.

We are done with the skiing season. Sarah got a slow start this year, despite having a lesson and lots of encouragement from Dad. Finally I had an opportunity a few weeks ago to join them on the slopes, and with a lot of patience was able to get Sarah started, one inch at a time. With every inch came an ounce of confidence, and now she is beating us down the slopes. The photo above was taken on the little bunny slope conveyer lift, but I promise she has graduated to much bigger adventures.

So that is what is going on at the farm—outside. Do you like hearing about the farm work? Would you like to hear more? Inside, projects have stalled indefinitely. Though I'm not completely out of things to catch up on and share with you. More to come!


My poem that won both county and state in a writing contest

by Abby.

My poem won 1st in county and state in a writing contest held by the women's club.
It is now going to nationals!!!I am super excited!
The poem is called " Oh Old scarecrow" and I am very proud of it.
So here it is!
Oh Old Scarecrow
Oh old scarecrow
Hanging in the alfalfa field
Pesky mice
Irritating gnats
Annoying flies
Squawking crows
How do you do it?
Smile on your face
Arms pushing against the wind
Scaring fluttering moths away.
That must really make your day!
Yep! That's my poem.
Hoped you liked it!!!

Sarah's Chandelier

I've been shopping on Craig's List again. It's a bad habit of mine.

Actually, I take that back. When I look around my house at all the things I have thrifted, I am quite pleased with them all. So let's just call it a habit. Nothing bad about it. In fact, just recently I have sold our old kitchen cabinets, an armoire in our guest room to make way for a chair, and our old stove and microwave. We are delivering the latter to town tomorrow and I am hoping to bring home a $20 set of bookcases for our storage room (from another seller). Win win!

Although Sarah's room hasn't been on our target list of projects yet, I have had in mind to buy her a chandelier. She is my princess, after all. Through all the light shopping I've done for the kitchen I have kept my eye out for a good deal. This listing recently popped up on Craig's List:

Genuine Crystal 8-Arm Chandelier, $250


I took note but moved on. It was more than I wanted to spend and a bit traditional.

And then, a week later:

Genuine Crystal 8-Arm Chandelier, Price Reduced! $100

This time I bit. I pulled out the measuring tape to make sure it wouldn't clock us in the head when we walked through her room, then offered $75. It was ours!

I was a little unsure at first. It was covered with that dusty/greasy grime that all things accumulate when they are over 50 years old. I laid it out on the kitchen table and spent several hours cleaning the entire chandelier and every individual crystal.


It sparkled! It was worth the effort.

And after putting it up in Sarah's room I was even more sure of the purchase.


Fit for a princess.

As with any thrift purchase, it is fun to try to find out if you scored a good deal or not. The chandelier bore the mark of Palme&Walter KG, which we identified as a German chandelier maker. However, the only lead we could find on its value was a listing on eBay for another Palme&Walter chandelier (which looked very much like ours) that had rare Strass crystals on it. Apparently those crystals had signatures in them which could be seen with a magnifying glass. This chandelier sold for $6,000. Ahem. Needless to say I got out a magnifying glass. But I couldn't find any such signature. And the likelihood of a chandelier of that value ending up in an unknowing Great Falls citizen's home? Yeah, right.

In any case, although it would be nice to have a better idea what the value of this fixture is, I'm confident either way we scored a good deal. And Sarah is ecstatic.

We're cookin' now!

Literally! We are cooking in our new kitchen! I was AWOL on the blog last week which means we were cookin' up lots to share with you this week. It was a flurry of excitement last week, starting with the countertop installation on Tuesday. They were here within a week of templating, which was so much better than the 3 weeks they told us it would be! That set in motion the installation of the sinks and appliances which means—BAM—functional kitchen!

I even hosted a stamp class here on Saturday—am I crazy or what? I was stressed out cleaning until 1 AM the night before, but it was good to have a deadline to work for. And it gave me an opportunity to take some snapshots of a relatively clean kitchen without all the construction mess. So without further ado:

I couldn't be happier about how it has all come together. The flow of space feels perfect and nothing feels cramped or awkward. We have the recommended 42" on the cooking side of the island and still plenty of walking space on the other side between the island and fireplace.

It's not your imagination that the light fixture above the island is missing a bulb. It is this track fixture from Pottery Barn. It came with a broken cap on the track, which we super-glued together. Then when Tom screwed the bulb in the socket it wouldn't connect and light up. When he unscrewed it again the inside of the socket broke out. So it is going back to PB and we are going to pick something else. It hurts my pride a bit since there are several people that could say "I told you so" and "I didn't like it anyway".  I thought I would like the industrial feel of it, but I knew when we put it up that it wasn't quite right. It just looked unfinished in the space.

The first night we officially cooked entirely in this room was Friday night. Mom was over helping out and wanted to try a couple of new Thai recipes. We had all 4 burners in use and the griddle, with 3 of us working. If that didn't test my kitchen's capacity, I don't know what would! It was awesome! Oh, and the next day I used both of my ovens at the same time. I am in kitchen HEAVEN.


Left: Our sinks and faucets—LOVE—I'll give you more details on those another time. Right: Our new gas cooktop. LOVE this too. We've used the griddle every day since it has been hooked up. Not kidding. Anxious to get the backsplash and range hood installed.


Some closeups of the countertops. This is leathered Mysore black granite and I am in LOVE. They are smooth like butter to wipe clean, and they don't streak like polished granite. The natural beauty doesn't steal the show but the color blends with everything like it has always been there. I absolutely could not be happier.


Above left: This is the back side of the island. We are missing a door because we sent it in to Medallion cabinets, along with the sample door we had, to show how much lighter the stain turned out. I am not really unhappy with the color, but we still felt it was worth showing them that it wasn't exactly what we expected. They need to replace their samples if nothing else. And we are hoping for a bit of a rebate.

Our old dishwasher blends in just fine. And oh boy is it nice to have it functioning again! We rotated the microwave cabinet to face the end of the island, which left a blank side and a perfect place to install a towel bar next to the sink.

Above right: Don't you just love the industrial feel of our open pantry? JUST kidding. Obviously this is temporary. We were thinking we would custom design/build a pantry for this space. But as spring farm work rapidly approaches I am actually hoping that the rebate I mentioned above could help us purchase a stock pantry cabinet for this spot. Otherwise I might be using a 'temporary" industrial shelf for a good long while. 

In the dining room things are looking pretty bare and unfinished also. (But we are loving the light fixture in here at least!) Remember the hutch/buffet thingy that was in here before? Well, it is going back in here but not without some work.

It is a GIANT piece of furniture and I very much need the storage it provides. But it is difficult to put something old back in a new space. I can't wait to show you what I have up my sleeve for updating it.

These are all very much IN PROGRESS shots which I didn't style or light at all. I realize things still look a bit sterile and cold. We have a lot of finishing details and decorating to do which will warm the space up a lot.

Here is our left-to-do list:

1. Tile the backsplash. This is up next. We have the tile and supplies—just need to get to work! Spring weather has been tugging the guys outside but today we've been blessed with a much needed snow storm! Might be getting to work on that tile job shortly!

2. Install the range hood, stove backsplash, and open shelves after the tile is installed. 

3. Build or buy a pantry?

4. Base and case trim

5. Refinish and install dining hutch.

That is just our kitchen/dining list. We have more projects in the laundry room, entry, and hallways. One thing at a time!

a narrowboat home

I thought it might be nice to take a break from kitchen remodeling today.

When Tom and I took our trip to England back in August of 2009, one of our favorite days was spent touring Stratford Upon Avon. There is an old canal system that runs through much of the England countryside that was originally developed for cargo transportation. Once the railroad system came to England, however, the canals were no longer used and filled with silt. Later on they were dredged out and the miniature hand-operated lock systems were restored. Now the canals are used for recreation and are full of these narrow barge boats that people vacation or retire on.


We were intrigued by these boats and enjoyed visiting with a gentleman who was a permanent resident on his. Many of them were decorated on the outside with plants and yard furniture. 

So you can imagine I was excited to see a narrowboat featured recently on Desire to Inspire. It is fun to see what one looks like on the inside!

Can you imagine living like this? It probably isn't much different than living in an RV. But if you ask me, I think this would so much cooler than an Airstream. On the water! In England!

First 2 images, Montana Prairie Tales. All other images, Dominique Brown via Desire to Inspire. Click through to see more. 

progress report—cabinets installed

Well, hello! Since I last checked in, our cabinets have been installed!

This means I got over my issues about the color and we kept the cabinets as-is. In fact, as many of you suggested, I am already wondering what all the fuss was about. :)

Did I mention how un-level our kitchen is? In this photo you can see how far the perimeter cabinets are mounted off the ground. (On the far right out of the picture they are resting on the floor!) Fortunately the kick-base trim should cover the gaps.

Also visible in the photo above—the new track light spotlights we mounted above the fireplace. Before there were simple recessed can light fixtures that didn't really point at the fireplace. And with the new can lighting in the kitchen we wanted to set this light apart a bit.

This next photo was taken the next day in natural light, so you can see how much the lighting affects the color. I didn't color correct these photos or edit them at all. Obviously. These are very much "in progress" shots with no styling whatsoever. Or cleaning. Construction zones are messy!

We laid cardboard out on the island to test the island counter overhang and make sure we would have enough walk space between the counter and fireplace. We are going with a 9" overhang—shorter than the recommended 12" for a counter-height bar, but more than the original 6" I thought we'd have to live with. On the other side of the island we stuck with the 42" isles most kitchen designers recommend. Overall things feel spacious and comfortable.

The granite guy came to template yesterday. Yippee! This might just be the most exciting step yet! The installation of the ovens, cooktop, and sinks all ride on the timing of the counters.


Last night we moved the dining table back to it's home in the dining room. In fact we ate our first meal in there with no paper dishes! It felt like a celebration. Above right, the microwave is installed, but the power isn't turned on to it and we haven't tried it out. The cooktop is also resting in it's new home, but it won't be functional until the granite is installed. In fact, we are trying to solve a teensy propane leak—I'll rest a little easier when that is taken care of.

The oven cabinet is resting in place temporarily. We have to pull it back out to assist with granite installation. When the granite is in place we can anchor it in permanently and then install the cabinet above the refrigerator to the left of it, and of course install the new ovens! For now we moved the fridge to the pantry spot to get it out of our crowded living room.

You might have also noticed the new light fixture above our table. Yep, we ended up with the Firefly pendants from CB2, although there were also many votes for the drum shade as well. I wanted to wait and put the fixtures up last as the "icing on the cake", but Tom couldn't wait.

You can see a sliver of popcorn ceiling in the living room where it meets the dining room—you can bet I can't wait to get the rest of that out of my house! 


Today Tom has begun ripping out the flooring in the laundry room so we can finish the tiling in there. Bye bye forever filthy brown carpet!

Starting construction in the laundry room might make things interesting given we are still using that space as our kitchen. I'll have an enormous pile of laundry to catch up on when we are done. It is a small area and the tiling should go pretty quickly though. 

I don't think I ever showed you the old original avocado carpet that was under all the brown carpet. (They left it in place because it is glued down!) Except for the edges that were cut away for the tack strip, it is in surprisingly good shape and ironically looks better than the dingy brown carpet over it. It strikes me as funny that all the carpet left in this house (except the new stuff in the basement, of course) is original. All the newer stuff is gone. I'd say that shows they don't make carpet like they used to, hmm?

So there you have it—the good, bad, and ugly. I could have new counters as early as a week from now—can you tell how excited I am to move back into my kitchen???

progress report—tile, cabinets and stress

Hello again! This is what has been happening at the ranch. It's been a long, busy week.

The tile is going in...

And then the grout...


Without the laundry room (we decided to do that later since that would disturb our temporary kitchen area) it was still nearly 800 square feet. It was a big job. Tom swears he will never lay tile again. I'm trying not to remind him that I have big tile plans for our bathrooms in the future.

The grout color turned about a bit lighter than I was expecting. Fortunately it is epoxy grout and shouldn't stain too badly. It is still a gray color, just lighter than the tile. These things happen when you are remodeling. (Which happens to be a phrase I'm telling myself a lot...)

Eva likes it, so that's what counts.


The cabinets were delivered on Thursday! This is a big moment. The guys got out the surveying equipment and it made me chuckle. How many guys does it take to change a lightbulb... I mean, line up a cabinet? Actually, leveling the cabinets is serious business and very important for setting the granite countertops. And our floors are decidely NOT level. They are off more than an inch from one side to the other. 

Here's the deal with the cabinets. When we opened that first box I was expecting elation and excitement. Instead I felt deflated with a giant pit in my stomach. The thing is, the color turned out lighter than I expected.

The sample on the right is Espresso, which is what I originally wanted. As it turned out, I couldn't order that color in Quartersawn Oak because apparently they can't stain that sort of oak grain that dark. (In hindsight I'm glad they aren't that dark). So I settled for the next darkest color, walnut (shown on the left). As you can see, the actual cabinets are lighter. (You can look back at my original design choices here.)

Here are a few more photos, since the lighting effects the color a lot.


The thing is, the cabinets are gorgeous. The color looks amazing with the rust color in the slate fireplace. It just doesn't quite match the picture I've had in my head all these months. Sometimes those expectations are hard to erase.

We have contacted the company and they've asked to send one of our doors along with the sample door we have. It will take several days for them to receive it of course. Then there are two possible scenarios. IF the company acknowledges the problem, they could potentially agree to replace all the cabinets. Which would take several more weeks of course. IF we decide we can live with them as-is, maybe they will compensate us by discounting the cabinets. But right now I have to make a decision if we are going to keep these cabinets and move forward with installation today, or hold up the project indefinitely and potentially until spring farm work completely halts progress.

I've called in a few trusted friends to advise and it looks like I'm going to be keeping them. The guys are not going to sit around and wait for a decision so they are moving forward with installation. Here is my justificaiton: dark dark cabinets have been trendy for awhile and might be on their way out. (I am doing half white, which to me justified the dark cabinets. By the way, the white cabinets are perfect.) The lighter color is more in keeping with midcentury design. It may be more classic in the long run. It looks great with the house. The question is, can I adjust my own expectations?

What would you do?

Progress report

I didn't blog at all last week. Sorry for disappearing, but sometimes you just need to leave the computer off and get to work. Know what I mean? It's like this quote:

After vacation and then being sick for way too long, we had some serious ground to make up. Long hours were put in last week and I do have some progress to report.


Above: Texturing the ceiling and then priming and painting (in the dark). Done! After that we were able to install all the ceiling can lights so we don't have to work in the dark. Then painting the walls. We still have one more coat to put on the walls, but we'll wait until after the flooring mess is complete.

Above right: Dust coats every surface in the house. I can't keep on top of it so I quit trying for now.

An unexpected delay—our existing subfloor was particle board, which is not an ideal substrate for tiling. It has a tendency to swell when wet and can cause your tiles to crack. We decided $400+ in plywood would be a cheap investment in the long run to protect the 900 square feet of tile we were laying. So up came all the existing subfloor and down went brand new plywood. (A dusty job.)

Next a layer of cement board goes down with thinset and nails. The nailing kicked up even more dust.

Next the tile was brought in from the garage to warm up. Even though not every inch of plywood and cement board has been laid (we still have to do the laundry room), we are trying to move forward in the kitchen area so we can begin installing base cabinets and then get countertops templated. While we wait for the granite to be cut and installed, we can continue to work on the rest of the floor. As of this morning, about a 3rd of the tile has been laid in the kitchen/dining room. Progress!


Although I was recruited for painting and a few odd jobs here and there, mostly my job is feeding the crew and keeping the kids out of the mess. Am I ever thankful for our finished basement to hang out in right now.

Eva is a busy girl and loves to be in the middle of everything going on. Although I probably won't dedicate a whole post to it, Eva did pass the 20 month mark in February. Her biggest milestones are talking—she has a broad vocabulary now and communication is getting easier. This is absolutely my favorite age. She is also getting molars on both sides, top and bottom, so teething symptoms are rampant. Overall she is such an easy, mellow kid and such a joy to us. Loving her to pieces.

Did I mention we had company for several days last week too? Some great friends from San Diego made a visit and we couldn't turn them away. We issued a warning before they came, of course, and really appreciated their patience with our chaos and dust. 

Their little Emma Grace and our Eva Grace are less than a month apart in age. They had the ultimate play date and we had a blast watching them interact. Poor little Emma got sick on their last day here. Boo :( Hopefully it didn't come from lingering sick germs around our house. Consider this a warning—it might be best to avoid our house until the dust and germs dissipate!

Happy Valentine's Week

Valentine's Day was a bit of an afterthought this year, what with getting home from Hawaii just prior. And getting the flu. We brought a stomach bug home with us and it has taken pity on nobody. Abby is the last one to be affected and is home from school today. Progress on the kitchen has completely stalled while we all work on getting our mojo back. 

I did absolutely nothing Valentine-y for those I love the most. I guess we figured a trip to Hawaii was gift enough. We did spend one night pulling together a last minute homemade Valentine for the girls to give to their classmates, however. Tom wondered (as he always does) why I couldn't just settle for store-bought cards, but they just feel so impersonal to me. 

So I stole (borrowed) this idea found via Pinterest. While the idea wasn't original, it fit the bill of being personal and homemade.

They are rice crispy kisses, molded with a funnel and then wrapped with foil with a simple printed verse attached. And they hardly took any more time to put together than it would have to hand print 40 names on generic cards.

Parent's were invited to join Sarah's Kindergarten class for a party, complete with songs and brownies and ice cream. I was able to watch the kids open their Valentines and witness first hand what appealed to them. 1) Must have candy/treats. If it didn't, it was cast aside quickly. 2) Must be unique. One kid hand painted his cards on plain paper. They were so cute and while I may have appreciated the extra effort more than the kids, they did take a few extra moments to look at the card. 3) Must have the element of anticipation. If they have something to open—an envelope or a box—they really had a good time revealing what was inside.  Oh yeah. And 4) fake tattoos. For some reason those were a hit. 

Hope you had a fabulous Valentine's week!


Hawaii—Part 2

Continued . . .

We ate out about one meal a day while we were there, and the rest of the time we cooked. We made one giant trip to Costco to stock up at the beginning of the trip and we left with more food than we thought we could ever use. Our mantra became "Use it up!" and I must say, we did pretty darn well. My sister-in-law Amy even made granola bars (from leftover pancake syrup, peanut butter, trail mix, and oatmeal) for the plane trip home. How is that for resourceful? They were awesome, by the way.

I'm proud that we incorporated the local food into our cooking. We stocked up on pineapple, papayas, mango, Hawaiian sweet potatoes, Ono (fish tacos!), and so on. Grilled pineapple is awesome in everything.

One restaurant we enjoyed was with our dear friend Sue that we met up with at church and then joined for lunch at her favorite Chinese place. The food was excellent.

I suppose an ideal trip to Hawaii would include a lot of relaxation time for reading, sunbathing, etc. When you travel with kids you have to adjust your expectations. However, there is absolutely nothing better than seeing the world through the eyes of a child.

As it turned out, a big van was the cheapest way to transport our group. It turned out to be a fun way to get around and spend time together. It didn't really say that on the side. But if it had it would have saved a few poor saps some embarrassment as they tried to flag us down at the airport.

Having a pool at the house was the only way to go. It meant the kids could still have fun even if the adults just wanted to sit around and chill.

If you ask people which island is their favorite you usually hear Maui or Kawaii. Tom and I had been to the big island before. Even though many people don't love the city atmosphere of Honolulu, Oahu won out because of the attractions it had to offer (Pearl Harbor, etc.). And we didn't want to island hop with the kids. We have no regrets. We stayed over the mountain from Honolulu and found Kailua to be a perfect mix of urban amenities and rural flavor. The scenery was stunning coming and going. My advice? Oahu is great for a first-time experience, but be sure to get out of the city!

Hawaii—Part 1

While my blog was busily posting as usual, I was off playing hooky. Yep, that's right. No kitchen progress—again. But we figured we would keep up appearances and not announce to the world we would be away. 

I suppose it is crazy to leave in the middle of a huge project like a kitchen remodel, but this trip was in the works for a long time. My mom saved her own paychecks to make it possible to take her entire family on a trip to celebrate their upcoming 40th anniversary, and we were the enormously lucky benefactors.

(Note—you may notice one member of the family is missing in all of the photos, and it wasn't because she was behind the camera. My sister-in-law Annie opted to stay behind since traveling wasn't advised for their little bun in the oven. We missed you Annie!) 

And off we go on a photo journal of our trip:

The house we rented was absolutely perfect... beachy, roomy, and a just short walk to the beach and downtown Kailua.

The first few days we were there were rather cold and rainy, but we made good use of the time by doing some touristy things. The rainiest day was spent at Pearl Harbor. It was quite something, really—while on the deck of the Mighty Missouri battleship, we could see a wall heavy rain storm heading straight for us. Our tour guide gave us a quick warning to make a run for it, but we were all soaked before we made it to cover. 

We took in a luau and the pig was delicious. The other local fare—like poi (Hawaiian root vegetable)—not so much. The show, called Ha!, was worth the while. 

 Kailua beach is touted as the best beach on the island and it wasn't hard to see why. And only a short walk from our house.

I worried we wouldn't have any sunny days to play on the beach, but the weather came through for us.

More to come . . .

creativity—rein it in or let it go?

I have raised little monsters of creative genius. Don't get me wrong—I am proud of them—but with creativity comes a LOT OF MESS. Anyone know what I'm talking about?

My girls are into American Girl dolls. They each have one, and I love that every birthday and Christmas is a piece of cake because they always have an outfit or accessory on their wish list.

Lately though, I've wondered if I should be wasting my money on those accessories. Abby especially has the most fun making her own!

Both girls have little "rooms" set up in the corner of their bedrooms. Here is Abby's setup:


I think every room of the house is accounted for here. That hip black bucket chair you see is made of a cute top and skirt that should be hanging in her closet. (They aren't damaged, just occupied.) The clutter that ensues is a bit frustrating, but I tolerate it as long as it is kept in one corner of the room. (It never does). It's the building process that is the messiest.

The craft room always looks like this. 

So they make their creations on their bedroom floors. (Wait, this picture was AFTER she cleaned up! But the strings, supplies, and fabric scraps still carpet the floor. Never mind the hot-glue-gun-melted spot.)

I was too late to snap a picture of this, but one day I found their dolls laying out on a sandy beach of colored cardstock in their homemade swimsuits with homemade beach bags and towels beside them. I didn't think much of it until later when I was cleaning up and found pieces of socks on the floor. Their bikinis were made out of socks! No wonder my daughter never has enough socks! They are resourceful, I'll give them that. They know right where to find my best scrapbooking adhesive and scissors. I had a workshop recently and found all 3 of my adhesive cartridges empty. I've started buying it in bulk.

I'll end my rant and just say: beware of teaching your little girls to sew. Or paint. Or use scissors. Just sayin'.

painting

If you thought this would be about painting our new kitchen, sorry to disappoint you. We aren't there yet. 

Actually, Tom took off to take the girls skiing on a recent Saturday, and since I was going to stay home with the baby, I was going to have my own breed of fun.

I've had some empty canvases sitting around my craft room for a long time. It was time to put them to use. 

For Abby's room I painted a Union Jack flag. In pink, of course. Why pink? Because I saw one online I liked. And it matches her room. Why Union Jack? Because it's iconic and brings back good memories of our trip there and reminds us of Abby's sweet cousins that live there. Why not?

The flag hangs next to one of our favorite photos of the girls. This photo is the perfect color for her room. (I shot this photo to cleverly hide the mess that always resides on the floor and bed. Ugh. 9-year-olds....)

In the bathroom I finally hung these funny little vases from CB2 that I purchased ages ago.

I hung them from 3M Command hooks and thought I was being really smart until the girls took a shower in here and one came crashing to the floor and shattered. Apparently the humidity wasn't good for the adhesive. Or something. I'm glad I know where to get another one.

The green tied in to the green in the little paintings I made for the cabinet.

Just a cheeky idea I had a long time ago. They aren't perfect but I like them for adding a little color and breaking up the wall of wood on the cabinet. (We still have the backsplash to install also.)

It's fun to finally put some decor up in our basement. I don't sit down and craft very often, and it was a fun way to spend a Saturday! 

best laid plans . . .

. . . sometimes go awry. 

Of course, we are remodeling, so that is to be expected. The biggest hiccup we've run into to date is this: our (supposedly) custom front door we ordered more than 2 months ago arrived—not custom at all. The guys showed up to install it they didn't bring the windows we ordered with them, so they wasted their entire day. The door was okay, but the sidelights attached were not full glass as I ordered (they had fiberglass frames so the actual glass was only about 6 inches wide). On top of that, the whole unit was 2 inches too small (because they didn't custom build it like they said they would!). Big fail on their part. Now we are reevaluating and starting over—trying to decide if we will give this shop a chance to fix their mistake or start over with someone new.

We have been ordering a lot of things online for the kitchen. We have a big delivery from Overstock.com sitting our entry.

The big box in the back is our Cavaliere range hood. It was a great price (maybe too great—you know what they say, "you get what you pay for"—at least it looks nice).

The other two boxes are our new Ticor sinks. Great zero radius sinks at a great price also. I did some research before settling on these and felt like so many others you pay mostly for a name. They seem to be good quality in person. But . . .

Look a little closer:

The corner is bent. Luckily this is an under mount sink and the bent part will be under the counter top. We are going to try to bend it back ourselves, hopefully without damaging the visible part of the sink. It seems easier than dealing with the trouble of returning it.

We are still plugging away in our makeshift kitchen slash laundry room.

Not perfect, but so much better than washing dishes in the bathtub.

It does get a bit interesting when we have to do laundry in our "kitchen".

But at least we can.

Our living room is feeling a little cramped also. The fridge is off to the right here, the dining table and buffet are taking up more than their share of space, the piano is permanently draped with a sheet to protect it from construction dust, and the 2 main entrances are sheeted with plastic. Oh yeah, and the dog has claimed her residence in the corner also. We'll be quite glad to air out this room again when all is finished!

Plugging along and going with the flow . . . it wouldn't be remodeling without a few snafus! Thanks for following our adventure. 

basement blinds

Sometimes when you are in the middle of a big project (like a kitchen), it helps to tackle a few small projects in between so you don't forget what progress feels like. I have been determined to finish up a few punch list items in our basement this year so they don't drag on forever. This is what is/was on our punch list:

Finish trim around stairway and touch up paint
Paint doors and install closet doors
Stain and glue down shoe moulding around fireplace 
Retrim and paint new side door, and add more cork around base
Install bathroom cabinets and add hardware
Finish tile backsplash in bathroom
Blinds on all windows
Decorate! 

I felt bad every time we had company at our house that there were no blinds on the guest room window, even though we live in the middle of nowhere. First, I checked out some special order blind books from Home Depot. But after perusing their in-stock section, I discovered these:

 They looked every bit as nice as the special order blinds I was looking at, at less than half the price. The only trouble was they couldn't be cut to size. However, the blinds could be outside mounted on the trim and they had sizes that would work for that. So I brought them home.

Once home, however, I just couldn't bring myself to settle for outside mount. It's an okay look, but these blinds would have exposed ends and would stick out from the window more than 2 inches. So after looking them over I decided they could be trimmed to fit:

And I think they look so much better! Here is a quick tutorial in case anyone wants to try this for themselves.

First of all, don't try cutting these with a saw. It will split the fragile bamboo, which is why they won't cut these at Home Depot for you. For tools you will need a coping saw or something similar, wire cutters or something similar with a sharp, short blade (I used craft and rubber scissors from Stampin' Up!—shown here with a black handle—and they worked the very best), a ruler, a pencil, and a utility knife.

Open the blinds and loosen the strings so you can lay them out flat. Then measure your window and decide how much you need to trim. (Don't forget to allow space for the brackets plus a little extra. You don't want them to rub as you lower them.)

Next, measure from the edge and draw a line where you need to make your cut. You can cut half off of each side, but from the front you can't tell if the strings are off-center. Save yourself the trouble and cut off one side.

 You want to try to avoid cutting the vertical woven support strings. Since my line fell very close to these, I just pushed them over to the left with the back of my pencil before cutting. Then, carefully trim one slat at a time. At the bottom the slats are doubled up and harder to cut, but as you go up it will cut more easily.

At the top, where the slats are stapled to the wood support, the cutting is trickier. Here I used the utility knife to cut through them one at a time. After the slats are cut away, you will need to cut the wood support to accommodate the brackets.

Measure the existing slit to see how much further you need to extend it and draw a guide. Then, with your coping saw, cut the end of the wood support off to be flush with the slats you've already trimmed.

The last step is to cut out the slit you marked. It doesn't have to be pretty. Mine looked like this:

Although the cut isn't perfect, I highly recommend using a hand coping saw because you don't want to risk damaging the bamboo slats as you are cutting. This won't show after it is mounted. 

That's it—your blinds are ready to mount!

A custom look for half the cost! (And privacy for our guests—priceless.)

new patio door

Around this country it is not uncommon to have a week or more of bitter cold weather and snow, followed by warm Chinook winds that melt all the snow and warm things up. We finally had a week or so of typical January winter, and last week the winds that followed were particularly strong. But since our house is well protected by the eaves, the guys took advantage of the warm day and changed out our patio door. I was a little nervous watching them battle the heavy door on only a few feet of deck in crazy strong winds—but look! It's in!

The glass is so clean and clear—I just love it. See the bare ground outside? The snow melted fast.

I was a bit nervous after I saw the door. The outside has brown-ish cladding—which is great—but it wasn't supposed to be on the inside like you see here! I was relieved when Tom assured me the brown will be covered up with wood pieces. After those are attached the inside will be painted white and it will look very much like our old patio door. Except it SEALS. Tight.

A while back I mentioned I was looking to replace our exterior lights and was debating about what type of fixture to get. (What is it with me and lights, anyway?) Well, I went with none of those options and found something instead that was cheaper than all of them at $12:

It is small and unobtrusive. I'm happy not to be looking at the uglies anymore.

And while we are on the subject of doors, we have all 5 of our side doors installed. This is the one in the basement:

Looks nifty, no? Yeah, right. They look kind of ugly at the moment. We have to put trim around each of them (and in this case, some cork flooring) and paint them all up pretty. Which will take time. But again, they seal up nice and tight which is what we were going for.

It's amazing how many things we are crossing off our to-do list, and and how many things are adding to it at the same time!