painting light fixtures

One thing our house has plenty of is globe light fixtures. People seem to love 'em or hate 'em. (A recent commenter said they've just removed them all from their house). As for me, I don't mind them and they fit the house. We had 5 globe sconces in our hallway areas, 1 large one in the office, and 3 sconces outside. They were all brass finish, and I decided to update them by changing their color.

Before....... and after:


I used Rustoleum's Universal Metallic spray paint in oil-rubbed bronze. They will match the hardware we are eventually putting on all the doors in the house. I just love the contrast and think they look much more modern.

As a side note, sorry about the gross-looking walls. It is wallpaper glue and another project I'm working on.

In the photo above you can see a section of wall I have scrubbed next to a section I haven't. This job has been TEDIOUS as it requires a lot of elbow grease and water changes every 10 minutes. I've slowly been chipping away at it over the past couple of weeks. Although this wallpaper came down easy, I find the paper-backed type easier to remove because it doesn't leave this glue residue. After the glue is off we will have to do lots of sanding and patching before the walls can be painted.

Back to lights—

A funny story: As you know, one of the light fixtures I was considering was a giant drum shade. My toughest critic (Mom) wasn't sold on the size so I decided to mock it up with cardboard and paper and hang it from the kitchen ceiling. (Still not sold). Nevertheless, the mock-up came in handy:

I flipped it over and used it as a spray booth!

The photo above gives you a closer look at the finish. When the light shines on it the finish looks more bronze and metallic, but in shadow it looks darker. In any case, I would highly recommend this paint. It is a simple transformation and only required a good cleaning and light sanding before I applied 3 light coats of paint. By the way, slightly more than one can of paint covered all of my fixtures so it was a very inexpensive update.

The outdoor fixtures saw the biggest improvement. They were filthy and oxidized. A thorough cleaning and sanding was required and the paint job isn't perfect, but they look a thousand times better.

Unfortunately, this is a construction zone and there are sometimes casualties:

The fixture on the left was scratched so I had to touch it up (thus the wet paint)—no big deal—but the one on the right... well, I'm off to shop for a new globe. Hopefully it won't be too hard to find one that will fit. When we get them installed, and when we get our new front door installed (this week hopefully!) I will post photos.

The black stuff on the floor in the photo above is carpet glue. The hall and kitchen carpet is all scraped up and gone! Two layers of it. Yes! Soon cement board will be going down and then tile. If only the guys weren't off playing, I mean, hauling peas to the elevator.

getting rid of the gunk

Dad and Tom are taking a break from the house for the next several days to haul peas to an elevator we contracted to over 2 hours away. Not to worry; I have several days of progress to catch you up on while they are busy.

When you remodel you never know what problems you will uncover. Some of them create extra work, but in the end it feels really good to know what is hidden in your walls is clean and new. 

When the cabinets and soffits were all torn out, we were able to see structurally what we were dealing with. We knew ahead of time we were probably going to uncover this support beam right in the middle of the kitchen. 

Unfortunately the beam is about 12" high. If it had been smaller I may have covered it in better wood and stained it to make it a feature. But as it is, we are going to sheetrock it and paint it white (same as the ceiling). It intersects the island, but we can still put our island pendants on this side of the beam and center them over the whole island.

This next pictures shows the corner where the desk used to be. Removing it exposed an unfinished edge to the fireplace, but it shouldn't be too hard to cover it up with something.

The sheetrock in the kitchen was looking pretty nasty:

Yummy. Yep, that is mold behind the sink area.

In this wall a drain vent pipe broke through the sheetrock (and the cabinets) in two places. What do you think might enjoy access holes like this?

You guessed it—mice. The lower cupboard that had this pipe protruding into it often held evidence of mice droppings. Ewww, I know. A mouse once chewed a hole in the seal on my crock pot lid. That cupboard door never would shut properly either, and I actually once WITNESSED a mouse run inside of it. From that point on there was a trap set inside the cupboard, but I never actually caught one there.

Plenty of mouse chewing evidence behind all the cabinets—sorry friends. At this stage of a remodel the pictures aren't pretty.

Needless to say, the sheetrock came down:

Here my dad is figuring out how to relocate that vent pipe inside the wall.

The popcorn ceiling is gone!

We will be texturing the ceiling before we prime and paint.

They have also been cutting holes for new can lights.

This job wasn't fun. My dad is the one who climbed up in the dirty attic space to run the wiring. Attics in homes with shallow roofs like ours have very little space and lots of loose insulation. 

It wil all be worth it though—the old dining room lighting was much too dim and the light wasn't centered over the table. The old kitchen lighting was partly from soffit lighting (which we tore out) and partly from a too-bright overhead florescent light. The new cans (on dimmers) will be soft and bright and will supplement pendants over the island and the chandelier over the dining table. The old lighting holes will have to be patched. 

The plumbing and electrical work is almost done. Next on list will be sheetrock work and tiling! 


Eva—19 months old

I just realized it has been awhile since I've posted an Eva update. I missed her 18 month mark and now have let 19 months slip by too. This is what our precious Eva has been up to:

Here she is playing one of her favorite games. She loves things with lots of small pieces, and loves to scatter them everywhere. I feel like I'm constantly picking up toys and books. Time to learn the "clean up" song!

She has this adorable cheesy grin that is hard to capture on camera. Her sense of humor is really starting to shine.

Another favorite activity—drawing. Not long ago I showed you her artwork on one of our new doors. I do have to watch this one because she will walk up to any wall and start coloring. For some reason it is so much more tempting than paper! The vertical surface of this easel is perfect for her. By the way, did you notice we might have a lefty on our hands? I don't know why this surprises me so much, but she is the first one in our family.

She trucks up the stairs as she pleases, but is much more timid coming back down and usually prefers to be carried.

Therefore, the gate at the top of the stairs is more for the pets than for Eva. We like to keep the cat out of the basement since she has an affinity for sharpening her claws on and snagging our new carpet.

Eva loves to say "meow" to the cat and is quite gentle with both of our pets. 

Her hair is getting longer, isn't it? I bought some cute little barrettes for her, but she won't leave them in. She loves to have me put them in, but immediately takes them back out and hands them to me to put in again. I tire of that game after about 4 times and give up. 

She is still such a slow teether with only 8 teeth. Her eye teeth aren't in yet, but recently she has had some definite teething symptoms and I can feel a molar coming on. 

Eva's vocabulary increases everyday and she will mimic everything. I love that she still babbles in her own language quite a bit also. She knows EXACTLY what she is saying and says it with so much inflection and expression, but we just nod and say "really"? She just loves to holler "Abby", but she uses that name universally for both of her sisters. Sarah is just too hard to say!

I looked back at my last Eva post a bit more than 2 months ago and saw that it was when she finally started walking. Now it seems like she has been walking forever. I was concerned about her feet pointing out, but it seems to have corrected quite a bit. Her hip x-ray was good, so we will just continue to monitor it. Her pediatrician noticed a bit of a shake/tremor when we were there also. It is very subtle, but since we have noticed it a little bit too we are going to play it safe and meet with a neurologist to rule out any nerve/muscle related issues that could have affected her late walking and stance. We have to wait for availability with a doctor from another city that only comes once a quarter, so our appointment isn't until April. There seems to be no other developmental issues or reason for urgent concern, so we will wait!

These photos were taken over the course of one of our ordinary mornings. Every day I count my blessings and marvel at how great it is to spend this time with her at home since I didn't have that privelege with our other two. I don't get much done in the morning as I follow her around, but I try not to fret about it. We tend to spend a lot of time in the basement to stay out of the remodeling mess. After lunch time I put her down for a nice long afternoon nap, and that is when I can really go to town and get something done. Today it was painting light fixtures—more on that later. I'll be back to remodeling updates next time! 

FLOR inspiration

I'm tired of thinking about lighting so let's change the subject.

Today as I was drinking my lunch (yes drinking—the Pioneer Woman slim fast shake—which is tasty but ridiculously cold when it is minus 15 outside . . . shiver) I was flipping through the FLOR catalog that came to me in the mail this week. Whether or not you are in to their rug tiles, you can't deny their photo styling is fan-freaking-tastic. 

Hello, yummy Chesterfield and amazing red leather chair. That pop of red is so great against the warm neutrals. I would love to find a colorful vintage chair to mix in with my own blah brown living room furniture.

Hello, chair of my dreams.

Neutrals with contrast—my favorite look.

Oversized artwork in black and white.

Great color scheme!

Too bold for me and yet so cool.

I need to find this dresser for a bathroom vanity.


And last but not least, who doesn't love a good houndstooth?

All images from FLOR.com

lighting options :: round 2

I am agonizing over the lighting decision in my kitchen. Lighting is such a great opportunity to make a statement and add character. I want to LOVE my lights and not play it too safe.

I think I've narrowed it down to 2 options. Option 1:


2 of these Schoolhouse Electric pendants over the island, and this CB2 drum pendant over the dining table.

The drum pendant is huge; almost 3' in diameter, so it would really make a statement. (A nice alternative at 25" in diameter would be this one from West Elm, available in 3 colors including black.) Cons: The solid globe and shade would interrupt sight lines. The drum shade would be in front of our big view window.


Option 2:


2 of these Schoolhouse Electric pendants over the island, and this CB2 firefly pendant over the dining table.

Is this too globe-y? These wouldn't break up the sight lines as much. Cons: exposed bulbs.


About exposed bulbs. I have a few options. 


1. Clear incandescent bulb. About $1 each. Lasts for 1000-2500 hours. I'm not sure how much longer these will be sold in the U.S. Anyone know?

2. Enclosed CFL. About $8 each. Lasts for 8000 hours. I'm okay with these as long as they aren't slow on and have warm light.

3. LED bulb. About $40 each. Lasts for 25,000 hours. These are the bulbs of the future. I hope that means they will come down in price.

4. Plumen CFL. About $30 each. Lasts the same as a regular CFL (I think). 

5. The Edison bulb. $11-15 each. These look the coolest, no doubt. 


The point is, should I base my decision on lightbulb availability? Yes, its a factor, but it isn't insurmountable and the lightbulb market is changing as we speak.

More thoughts?

kitchen lighting options

Demo is still going strong at our house. In fact, I am sitting down at Mom's house with the kids to steer clear of the messy job of scraping popcorn ceilings.

Soon after the ceilings are done, we will be starting electrical work. I am going to be hearing "Oh architect!" (me), "what is the lighting plan?" So I'd better have it figured out.

First up is deciding what configuration to go with.

There is a beam that intersects the kitchen (shown in white) right above the island. It is 12" tall. I will have to figure out the best lighting placement around that. One option would be to hang 2 pendants each over the island and dining table. All the same? Different? The problem I see with this idea is that they won't line up.

Here is another view:

The table in this drawing looks nothing like mine (just there for placement!) and the lighting style isn't right either. Read on for that.

Another option would be to have pendants over the island and more of a chandelier type fixture over the table. This is the option I favor I think.

I should mention that I intend to have a smattering of can lights throughout. They will be positioned to illuminate my countertops.

If you follow me on Pinterest, you probably noticed I've been pinning a lot of light fixtures. You can click through that link to see more. Here I have narrowed down some of my favorites:

Island Pendant light options:

I've been a long time fan of these pendants from Pottery Barn. I even have a friend who has some to get rid of. Cons: They might be a bit traditional. I'm hoping to have some mid-century influence in my fixtures. Also, the glass gets dusty and looks like it would be hard to clean on the inside. The bulbs are exposed, so I would be spending more on either Edison bulbs or LED bulbs.

I also LOVE these simple pendants from Pottery Barn. They come on a track with either 2 or 3 lights. The trouble is, I would need to make sure the track would fit okay on one side of the beam and still center over the island. And again, they have exposed bulbs. I think you can buy Edison bulbs on Amazon for about $11 apiece. They don't last very long though. You can buy LED bulbs for around $40—which is a lot—but they will last longer than CFLs.

I also LOVE these globe lights from Schoolhouse Electric. In fact I love a LOT of their lighting. These are almost a perfect match to some of the lighting I already have (mine are brass, but I intend to paint them). I love the frosted glass globe—hides the bulb!—but they are also available in a clear glass globe which looks great as well.

Dining Room Chandelier/Pendant options:

The trouble with doing frosted globes in the kitchen is that I don't know what would match it in the dining room.

Schoolhouse Electric also has these satellite fixtures (a bit atomic, don't you think?) that require a special exposed bulb. They are a bit too pricey to do more than one.

If I went with a clear globe in the kitchen, the choices are easier:

The Pottery Barn Edison Chandelier. Again, exposed bulbs! And maybe a bit too trendy. It was on sale, but just now I'm discovering it is no longer available! Guess that decision was easy.

I could go with a simple drum shade. This one is from CB2.

This CB2 Firefly Pendant is in the top running. Again it has an exposed bulb, but if you look closely, they are showing it with CFLs!

I am also completely smitten with these pendants from CB2. They are larger than you might think (16" in diameter) and pricey if I buy two. I don't think my Mom is a fan.

One more just for fun. I'm not sure they are perfect for my house, but i think they are pretty great all the same. They are from Home Decorators Collection.


If you are still here after all of that, PLEASE PLEASE PLEASE offer your opinion. I am nowhere near making up my mind on this decision and I need to! Help?

more demolition

It is a bit challenging to keep the kids out of the mess . . .

I like to reserve Fridays for my Feng Shui Friday posts, but, well, this sort of chaos just isn't condusive to organization right now. I do plan to continue the Feng Shui Friday posts occasionally in the future! 

Off to buy lots of frozen meals and paper plates.

What.A.Mess.

Cooking dinner for my family is an adventure. My kitchen looks like this:

The fridge, sink, and dishwasher are still functional, but the only counter top is right around the sink. Everything is covered in dust and nails and the guys are working on removing the old cabinets.

In the laundry room, the new sink is now functional and my microwave is mounted here temporarily.

It is still a construction zone, but you can see the peppers I have prepped to make stuffed peppers for dinner. Yum. Worth the effort.

In the living room sits the dining room buffet and most of the contents of my kitchen. I have a small amount of space here to chop onions and make a fruit salad.

It takes 4 trips to get everything I need down to the basement where my stove is plugged in.

But once there I managed to brown the meat, cook the rice and vegetables, and bake the stuffed peppers.

Back upstairs we sat down for a lovely dinner (in the living room!) and we didn't even use paper plates (tempting).

Peeling off layers

And the demo begins.

I had the urge to peel off the wallpaper in the hallway. So I did.

It already feels better. Except this type of paper left a layer of adhesive on the walls that will take serious elbow grease to scrub off.

I am also moving out of my kitchen into our temporary kitchen (the laundry room), which looks like this:

Not kidding. Think we're crazy?

household chemical disposal

This is exciting stuff, my friends. This is what you come to my blog for, right?

Stage 1 of this kitchen remodel is to empty the kitchen and set up a temporary kitchen somewhere else in the house. Our temporary kitchen is going to be our laundry room. We are planning to replace the sink and faucet and add a countertop over the washer and dryer to make the space more usable. There is plenty of storage in the laundry room, but much of it was filled with old things that belonged to my Grandparents. Cleaning it out was a job I was putting off. 

After cleaning out the cupboards I was left with 2 trash bags, one donation box, 3 vacuum cleaners and parts, a bunch of old fabric (some of which I donated, and some of which I kept for my girls to be creative with—more on that it a minute). And this:

Piles of old household cleaners and chemicals. I kept a few usable things, but lets face it. I just don't need 15 bottles of various types of wood polish, 3 bottles of oven cleaner (mine is self clean), 5 different kinds of laundry soap (none of which are for high-efficiency washers), sketchy unlabeled cleaner bottles, etc. What I really need is room in my cupboards.

I set about trying to find out how to dispose of this. I got the major runaround and called about 8 people. The 5th or 6th person in Great Falls directed me to call a neighboring city even, and finally someone in Helena told me they would take it, but it would have to be solidified first. So, I have to dump every. single. bottle. out into kitty litter, double bag it all, and haul it to Helena. Or box it up and stuff it in a old barn somewhere and forget about it. Ha. 

Have any of you dealt with this challenge before? I have 2 boxes from the laundry room, one box from the garage, and another cupboard to clean out still. And who knows what is lurking in the shop. They don't make this easy. 

(On a happier note, we found a few fun things in my Grandma's old fabric drawer—some old retro-looking double knit fabrics, already cut into squares for a quilt, and another quilt front made out of old men's suiting. The suit quilt had no backing (it actually looks like the backing was removed and the front was just dry-cleaned, maybe with the intent of adding a new backing). The suit squares also had a few holes in them (moth-eaten?) but could be easily patched with no backing on the quilt. 

I would love to know the story behind this quilt. Was it made of my Grandpa's old suits? In any case, I may need to take up quilting and finish it. It would make an adorable quilt for a boy's room. (So in other words, since there are no little boys in this house I'll have to find a another recipient to appreciate it :)

I went shopping

My shopping forays to Great Falls are usually packed with necessary errands like grocery shopping and house project supply shopping. I rarely take the time to shop for fun things anymore, but this week I made an exception. I indulged in a quick visit to a downtown shop that had caught my eye awhile back—it is called Once Again Vintage. 

This shop is filled with mid-century era vintage house wares and clothing, so I will definitely be going back. This time I was charmed by a couple of pillows that just had to come home with me.

The owner sews them out of vintage upholstery fabric. My couches are fighting over these beauties.

Arrogant Mr. Hounds Tooth thinks every girl looks good on his arm (and he's right).

But Mr. Dark and Debonair in our living room upstairs has been feeling a bit drab lately and feels it is his turn to flirt with these Pretty Pops of Color. I tend to agree. But I might have to pay a visit back to Once Again and pick up a few more pillows, just to keep things fair.

the doors are in

Lest you think our holidays were full of gluttony, let me show you what happened between the over-eating, game-playing, and nap-taking (because I won't lie—there was plenty of that too).

Things have been getting lively around here! First of all, our garage door is in!

It is even operational! I am loving not having to get out of my car to heft the door open. I realize it looks a little bit odd right now with the 2-tone trim. I will probably wait until spring and warm days to paint exterior trim.

The days have been unseasonably warm for January, however. It is really weird. I'm not complaining, as it allowed us to get 3 of our 5 new side doors in.

These doors came primed and will need to painted brown along with the trim. Our garage is sealed up so much better now (the doors actually latch), which I'm sure we will appreciate with the typical Montana winter weather finally arrives.

I must take the opportunity to mention the visit we had from some special Utah friends who braved the 10 hour trip to come see us over New Year's weekend. I am kicking myself for not getting any photos of them to remember their visit by! Anyway, I'll tell you how well we treat our friends. Chris happens to be a Project Manager and professional door installer. We just happened to be working on doors while he was here so he willingly pitched in and helped install those doors in record time! We're sorry we put you to work, Chris, but we sure appreciated your help. And your visit! Love you two!

Probably the biggest improvement was the door between the garage and the house. Before it was just a hollow-core indoor door. Now it is solid and well-insulated.

I have a funny story to share about this door. This morning things got a bit quiet, so I went to see what Eva was up to and found a pencil in her hand. (Her left hand. We might have a lefty on our hands!) I didn't find her work of art though until I went to take a photo of this door:

My reaction was more amusement than annoyance, which would not have been the case if my 6-year-old had been the culprit. She has a reputation for this. But I had to laugh that Eva couldn't resist this white canvas. Fortunately the door has to be painted still, and the marks came off fairly easy with a Magic Eraser.

I have one more thing to share. If you scroll back up to the garage door photo, you might see a stack of something inside those windows. That is the pallets of tile and supplies we picked up yesterday! Yes, things are getting lively. If I can get the guys to actually stay home in between farm seminars and grain hauling, we might have more progress to share soon! Now, if you'll excuse me, I have kitchen cabinets and laundry room closets to clear out.

Episode 3: Christmas Joy is . . .

. . . connecting with the people we love!

Duh. But so true. Slowing down and focusing on family is simply the best part of Christmas. After I finally finished my Christmas cards, I put away my computer and all my kitchen planning stuff and just enjoyed the slow days. I even downloaded a book on my Kindle and finally read (The Help), something I don't take enough time to do any more. 

Speaking of Christmas cards, I ordered mine from Pinhole Press this year, and I couldn't have been more pleased with the quality of their printing. Their card stock is high quality also. I searched the net to find a 15% promo code to use also, which kept the price reasonable. They had these adorable photo return address labels which was the icing on the cake for me.


I was addressing these late at night and the lighting was poor. Forgive the poor picture quality.

I've kept up with the tradition of sending cards now for several years, and the best part? Getting everyone's cards in return! I just love the stack of photos and letters decorating my shelf! 

I delayed getting our family photo this year until it was too late to do it outside (comfortably.) So I came up with plan B and hung a sheet in our living room. It worked out.

Another Christmas tradition we are trying to continue is to build a real gingerbread house. Last year we made 2 smaller ones, so this year we had to change it up and make one BIG one.

We found out those are a little bit of work, and they need a little structural support until that icing dries (one or 2 walls may or may not have caved in, ahem. And our roof could have been a bit saggy and ours walls crooked. Adds charm.)

We even made windows out of melted life-savers. The whole project was very much a group effort. Even Tom got involved making the cardboard template. We had lots of help with the decorating. 

Thankfully. There was a little mishap during the construction phase. As I was rolling out the dough, my mom's marble rolling pin rolled off the floor and on to my foot. Fortunately it resulted in saving the floor from any cracked tiles. Ha. Unfortunately my foot did not fair so well. My mom had a boot from a recent broken toe, so I spent lots of time icing my foot and used the boot to hobble until Monday rolled around and I could get an x-ray. The x-ray revealed no broken bones, but I still am left with a very swollen and bruised foot. At least I can walk on it, and I have at least 2 pairs of shoes I can wear comfortably. The whole thing is a very inconvenient excuse not to exercise. (Bad timing coming off the holidays, you know. And I have an upcoming event to prepare that involves swimsuit wearing. No, not a pageant. More like a trip.)

Nevertheless, we completed the gingerbread house:

I suppose in some light it looks more like a haunted house. And now after a week of sitting around it looks even more haunted. They are tasty, you know. The porch posts are gone, a couple of windows have been smashed out. . .

We opened presents with my family Christmas Eve day.

Sarah was recovering from a little hernia surgery a couple of days prior, so her usual energy level was down a notch or two. Not for long, though.

The babies kept things lively enough. How much longer do we get to call them babies?

Board games are the favorite way to pass time during the holidays.

Lucky us, we got to celebrate again on Christmas day with Tom's family. We started out with a Christmas feast of rotisserie beef.

And then the much anticipated gift opening. This year Nanna started a new tradition with the Grandchildren of 3 gifts each representing gold, frankensense, and myrrh, and also one "love" gift. 

Somehow I ended up with the most pictures of Eva this year.

Her favorite gift was this little pillow pet. She rolled around on the floor with it for about 10 minutes and didn't much care about opening gifts after that.

Here are my two nephews in their new ski gear:

Really, they are smiling under those masks. :)

Our blessings have been bountiful again this year. I hope I can keep a huge spirit of thankfulness in my heart every day in this new year and treasure each and every moment as a gift. I have made no other resolutions, but I suppose above all that is my greatest goal.

Happy New Year to you and yours! Thanks to all of you for following our adventure on this blog. I treasure your comments and your friendship.

Episode 2: Christmas Joy is . . .

. . . Christmas Programs!


The girls' school has the best old auditorium. This Christmas Program was so adorable.

Abby was the narrator and did a fabulous job, never missing a line (and the rest of the time she mouthed every one else's lines :)

Sarah's group sang "I'm Gettin' Nothin' for Christmas" (among other songs) and most of the kids had their own little solo. Sarah sang "broke my daddy's coffee mug" load and clear and right on key. I was such a proud mom.

Aren't they cute in their little pajamas?

After the program, Santa came to give everyone a candycane.


During the entire program, Eva sat on her Grandpa's lap, occasionally yelling out "Abby!" and clapping her hands. Afterward Grandpa put her up on stage and she was quite thrilled to face everyone and smile. She had her moment with Santa also, but was mostly interested in the candycane. 

The girls had a great support group come to watch them. Thanks everyone for coming, especially Nanna and Papa all the way from Bozeman! 

Episode 1: Christmas Joy is . . .

. . . building Gingerbread Houses with the Kindergartners!


Before the break I spent an afternoon building gingerbread houses with the Kindergartners, using milk cartons and graham crackers. I love those kids. We made the real thing a few days later, which I'll share in an upcoming post.

Are you all enjoying your holiday? The Christmas spirit is still going strong at our house and we plan on soaking it up as much as possible before next Monday rolls around. I'll share some of our best bits over the next few days. 


kitchen finishes

Since we have finally made a decision on kitchen cabinets, I'm excited to show you what I am planning design-wise. If you want to read more about the cabinet shopping process, you can find that here. But if you want to skip to the good stuff, read on.

Now I'm aware opinions vary widely on finishes. If it isn't your thing, that's okay. But I do hope to land on a modern but fairly classic, timeless design.

All white kitchens are all the rage of course, and I love their light, bright spaces. I also love the warmth and texture of wood. So I am going to mix them. White on top for lots of brightness, and dark on the bottom for warmth and texture. Here are a few favorite kitchen photos I've collected:

I do so love this kitchen. It doesn't have dark lower cabinets, but so many elements I love. 

from Living Etc. via Desire to Inspire

Jessica Helgerson


The common theme is lots of contrast. As for my own kitchen:


1. Tile floors. Don't try to talk me out of this one. They are already ordered! :) I have lived with and loved tile floors and aside from the occasional broken dish, have never had a complaint. I plan to use a grout color that is either slightly lighter or slightly darker than the tile that will hide dirt well. This flooring will go in my entry, hallways, laundry room, and dining room as well as the kitchen.

2. This is the slate fireplace that everything must blend (and not compete) with.

3. The lower cabinets will be quarter-sawn oak in a dark walnut color. The style is a simple shaker.

4-7. The countertops are up for debate. All four choices shown are granite, though I haven't completely ruled out the alternatives. I have found granite incredibly easy to live with—durable, heat resistant, and easy to maintain. The options shown above are:


  • 4) Lennon granite: I like some parts of it better than others so I would want to hand-pick my slabs. It is busy enough that I don't want my entire kitchen done in this. Maybe just the island?
  • 5) Absolute Black Honed granite: I like the honed finish better than shiny, but it would still show smears and fingerprints. It is a classic choice, but I wonder if it provides too little contrast with the lower cabinets.
  • 6) Black Cambria leathered granite: Slightly bumpy but I do LOVE the overall natural look of leathered granite. I also like that it reads more as gray. 
  • 7) Pearl Green leathered granite: I'm not sure if I can get this option because I spotted it online, not in a shop. It might be pricey. The green undertones could look fabulous with our fireplace, and this color resembles soapstone, another material I love but have ruled out because of it's expense and tendency to scratch. 


Needless to say, we have lots of shopping around to do before settling on a countertop.

8. The few upper cabinets are the same style as the lower but painted a soft white. This keeps the upper part of the kitchen light and bright.

9. My backsplash choice will likely be white subway tile—that is if I can find one that is a soft enough white to go with my cabinets. I was thinking white grout, but seeing the example here I think I might enjoy a little contrast from a light gray grout.

10. I would like my light fixtures to bring contrast with a black finish. I do like the industrial look of these pendants, but I am still shopping around. I am undecided on cabinet hardware color. Stainless would coordinate with my appliances and contrast with the lower cabinets, while black would look smashing on the white cabinets and coordinate with my fixtures. What do you think? I'm leaning toward black. (I don't want to mix hardware finishes.)

11. Last but not least, my appliances, sinks, and faucets will all be stainless.

I would love to hear what you think! I will keep you updated as I shop around and make more decisions, but don't plan on seeing much until after the new year. I think I am going to step away from the computer for awhile and put off my kitchen-obsessing and decision-making until after the holidays. Except for maybe an occasional holiday-related post, you probably won't see me around the blog much for the next couple of weeks. So I will take this opportunity to wish you all a very Merry Christmas!

ordering cabinets

Guess what? We've made a decision and we are ordering kitchen cabinets today! I'm so excited and relieved to be moving forward on this piece of the puzzle.

Before I get to the finishes, I'll tell you a little about the cabinet shopping process. Brace yourself—this could be a long story.

The first guy (we'll call him Dude) I happened upon by accident as we were shopping for doors. I didn't know this place had a cabinet shop, but they told us their cabinet guy loved to visit the actual kitchens and help make the plan from scratch, so we made an appointment for him to come visit when the door guy came to make his measurements. When the Dude called me on the phone to schedule, the first thing he said to me was "I've been doing kitchens for 20 years and I'm really good." O.K. then. Well.

During his visit he did some measuring and came up with a preliminary design. We discussed a few things at the time, and then later I visited the cabinet shop with my mom to revise it some more. It was apparent to both of us then that he was a bit stubborn and didn't listen all that well. And he insisted he needed to make another visit to our house to measure again. (What? We live 55 miles out! Why didn't he measure correctly the first time?)

Instead I offered to measure for him, and I sent a nice little detailed drawing to him. The next time I heard from him he said "I got your measurements and its not gonna work." He told me that he really needed to come out again. But the next week he reported that he needed to spend a week at the hospital (?) and cancelled our appointment. Legitimate excuse, of course. But I took the opportunity to spend time making my own drawings so I could shop around.

My next appointment was with Mr. Big Box Store. I made an appointment with him, and when I arrived for my appointment he told me he was in the middle of a big expensive kitchen order and didn't really have time to meet with me. Humph. I had traveled 55 miles to be there, so I insisted we meet as planned, and he did go ahead and draw up a plan with me. His price was good but not significantly cheaper. I found out later it was the last day of a 10% off promotion that he didn't feel the need to tell me about.

My 3rd appointment was with a gentleman I'll just call Nice Guy at a local shop. Our appointment went smoothly, he helped me refine a few details on my plan, and educated me in the process. I left with a written quote (unlike with the other two) and a detailed plan. 

Seems like an obvious decision, right?

A twist—the Dude advertised a 20% off promotion. That is too significant to ignore. So I waited for Dude to call me, then gave up and finally called him. Then I waited several more days for him to finally meet with me. I was tired of waiting by then but I waited several more days to get his final price. Which was good. Very good.

Meanwhile, Mr. Big Box called and said they would be having a 15% off promotion. He also Big Box would chew up any Small Box and would beat any price. Sorry, Dude, but I want to keep Small Box in business. For one, I already knew the Dude would beat his price significantly, and he had better cabinets. For another, Mr. Big Box informed me he had lost our plan. Two hours with him unsaved and down the tube. I wasn't about to spend 2 more hours with him, so I ruled Mr. Big Box out.

When I got tired of waiting for the Dude to set his final price, I decided to take what I knew back to Nice Guy to see if he would drop his price at all. He did... just a little...but not enough. The Dude still beat his price by over $2000. So now you see, this made the decision very difficult. What would you do?

Ultimately, we have made the decision to go Mr. Nice Guy. For timely service (confidence that he will get our order right) and better style and color options. In the end there were too many compromises with the Dude and this is a piece of the kitchen where regrets are NOT GOOD. Not to mention the fact that the Dude insisted on measuring again before he would order. Who knows how long that would take.

So, in summary, shopping around is exhausting and you might as well go to Mr. Nice Guy in the first place. If you are in the market for some cabinets and would like me to dish the dirt on who these people really are, I send you a private message.

So sorry if I lost you back there. The fun stuff is up next!

kitchen layout plans

When it came to deciding on a kitchen layout, I just couldn't leave it to the kitchen designers. (I'm a control freak!) When meeting with cabinet people I needed to have good solid measurements anyway, so decided to make my own drawings. I even went as far as to decide what I would put in every drawer and cupboard. I met with 3 different kitchen designers to price cabinets and all three told me I made their job much easier!

It wasn't without a lot of time and effort, however. I made my drawings in Google SketchUp (free!) and it took me a solid day of watching tutorial videos to figure out how to do it. It is fun and sometimes a little frustrating! My drawings aren't perfect—when downloading cabinets (from the 3-D warehouse where you can find just about anything) I couldn't always find the perfect cabinet sizes (most notably the oven cabinet is too short in my drawing). I'm also missing a few details. But you'll get the gist. 

Here is the overhead view:

First of all, I didn't detail the dining room and living room with window and furniture. But here you can see we are planning to tile the kitchen and dining room and hallways, and eventually lay wood in the living room. The main layout change you can see here is that we are removing the peninsula and adding an island, mainly to get rid of the corner sink.

The main sink and dishwasher will move into the island, which is perfect for access to our dining room table. We are sliding the refrigerator over a bit to the left to accommodate double ovens. Near where the old sink was we will put a prep sink. Replacing the current electric range will be a 36" gas rangetop with griddle. We won't have any upper cabinets along that wall. Instead we will have an chimney hood and open shelving for just the everyday dishes (which is right across from the dishwasher). The lower cabinets will house lots of deep drawers.

This is looking into the kitchen to the east. Having no upper cabinets and soffit on the east wall will open up this space so much!

Before, similar view:

Looking to the north, before:

And the north view, as planned:

Removing the peninsula and upper cabinets will also open things up. This view shows one challenge with our layout. To have the ideal amount of space between the island and perimeter cabinets (42 inches) we are little short between the island and the fireplace. This angle makes it look a little smaller than it really is, so I'll show you another view:

We have 2'8" between the island overhang and the fireplace ledge (the size of a standard doorway) and visually a bit more since it is open above the fireplace ledge and under the counter overhang. We figured that we can live with this arrangement, or, if worse comes to worse, eventually tear out the fireplace ledge to open things up. (My dad is not keen on that idea, however).

Also, the island overhang is only 6", not really enough for bar stools. I wanted to have extra counter behind my sink, however. The upper cabinets beyond the island will all be the same height and will have a simple crown molding along the top so they will go clear to the ceiling. Of course, there is really a ceiling, not blue sky! :)

If I had a ceiling in my actual drawing, however, I couldn't show you this view to the south:

This shows you how close the sink and dishwasher is to the dining area.

Looking to the west:

This corner, where the desk is currently, will house a shallow pantry (so I can see everything! I'm always losing things in the back of my 24" depth pantry cupboard.) It probably won't look exactly like this because we are going to custom build it. I'm looking for some creative ideas, unique doors, etc. Any thoughts?

Beyond it is the area where I am going to put a desk. We are going to reuse the old desk, add a new door, and custom build the upper cabinet to match. These I will paint a different color (undecided) so we won't have to worry about matching finishes exactly to the kitchen.

Desk and niche areas, before:


There you have it. I must say, it is intimidating to show you something I have put a ton of thought into and open it up for critique at this point. I'm scared that you will find something terrible I didn't consider. But, I think I can handle it. Critique away!


What's wrong with my kitchen, anyway?

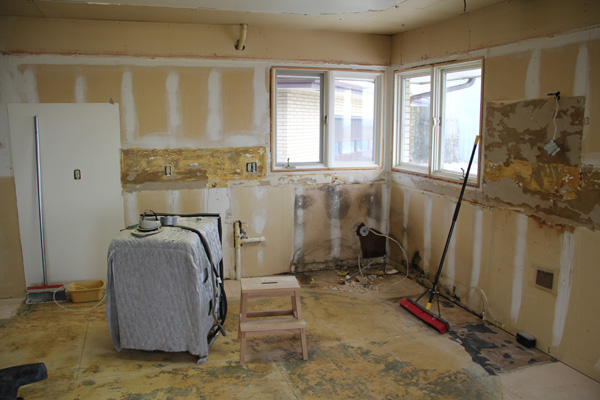
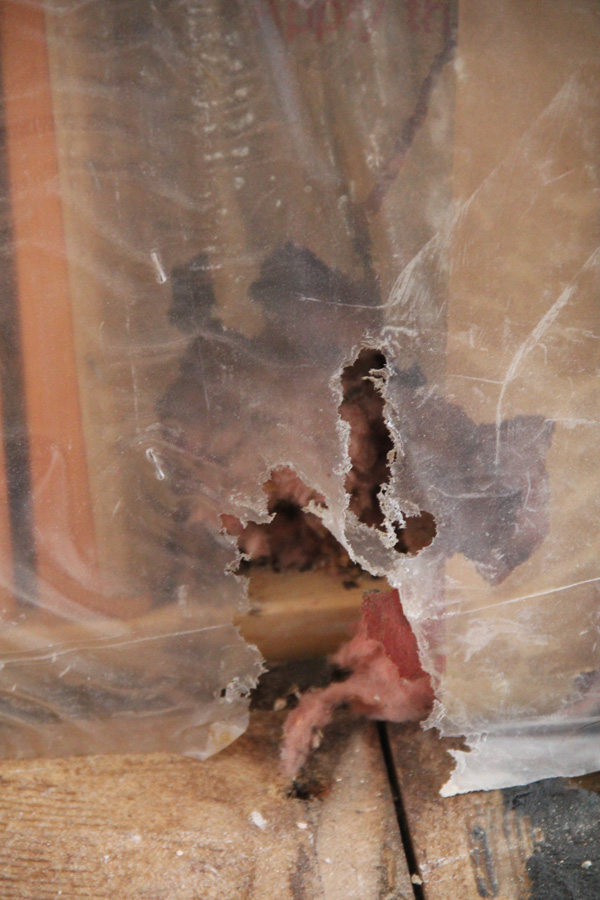
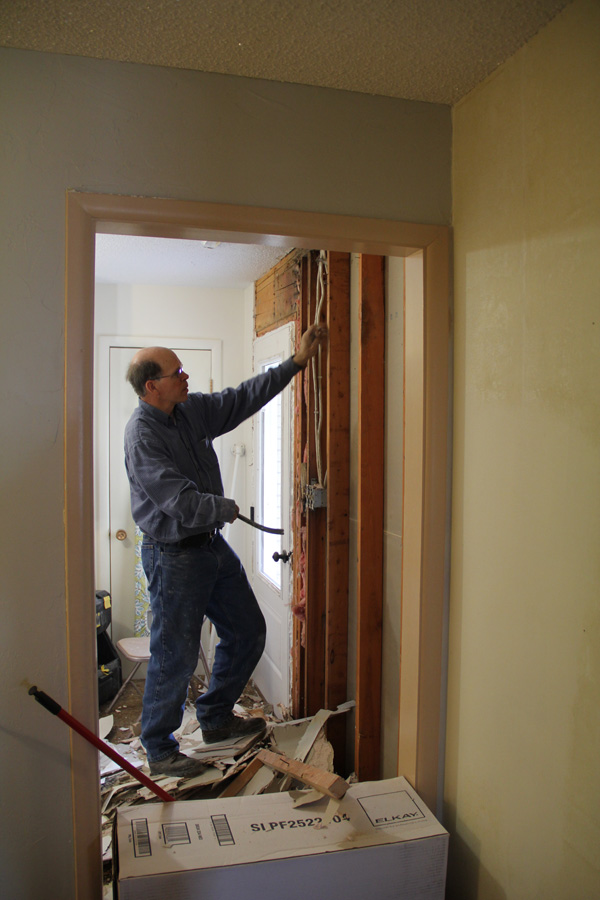
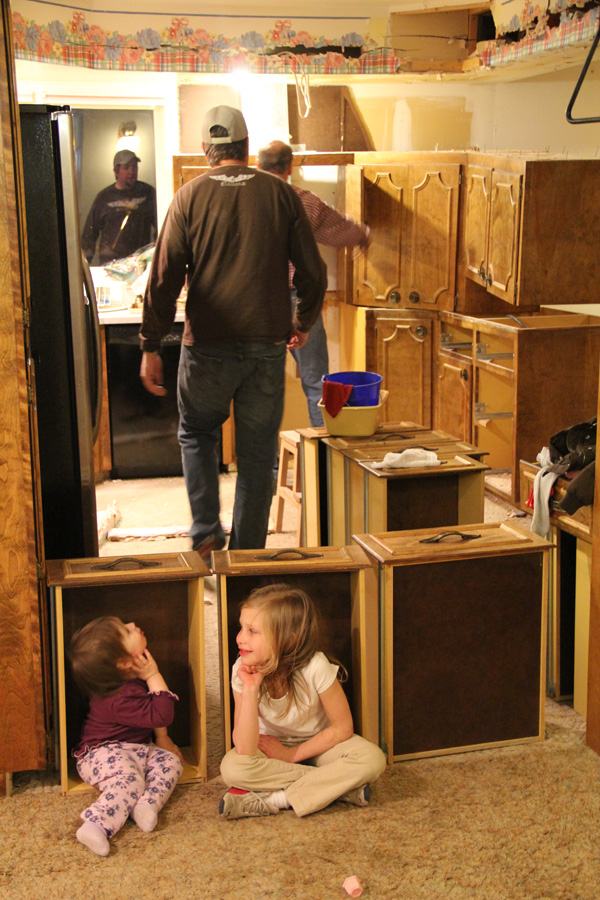
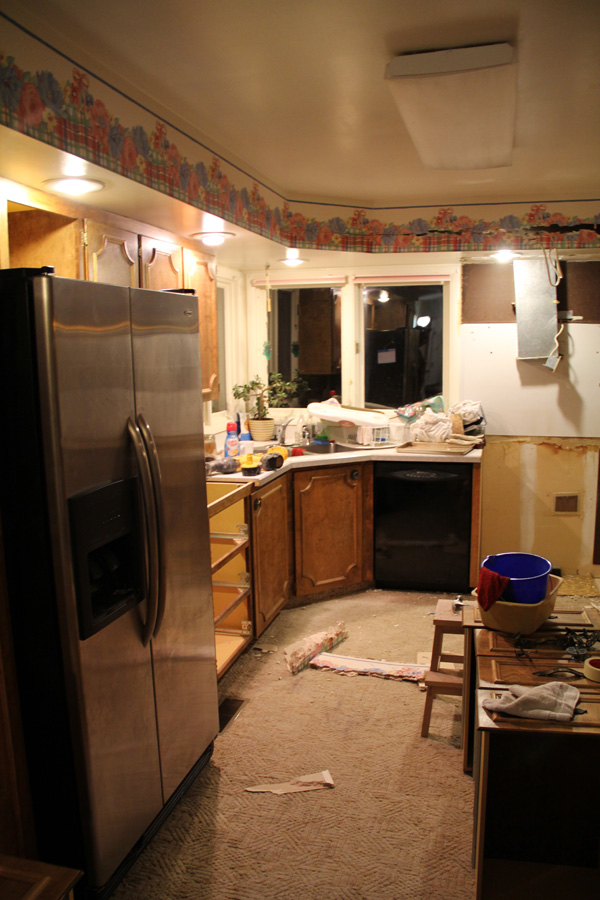
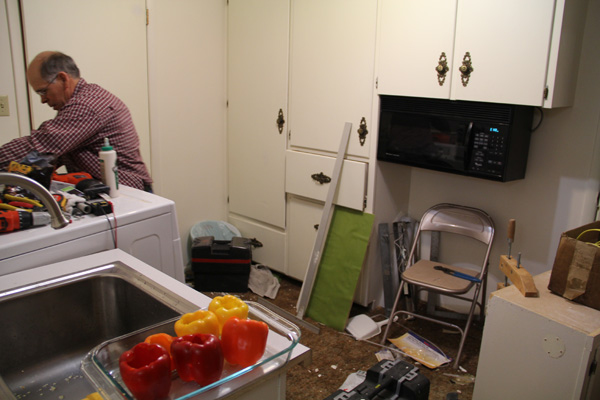
So by now you have probably heard about our upcoming kitchen remodel, and you may have asked the question, "What is wrong with the kitchen you have?" Well, nothing, really, as long as you love original 70's decor and stepping over each other a bit while cooking. But listen. There is no question this kitchen needs a few updates. So if we are going to dig in, we are going to fix a few things. This kitchen sees a lot of action, especially during busy summers, holidays, and harvest time, so making it efficient and a pleasant place to spend a lot of time is a priority for us.
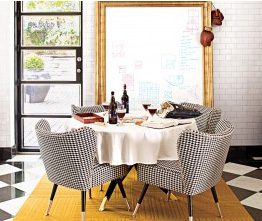
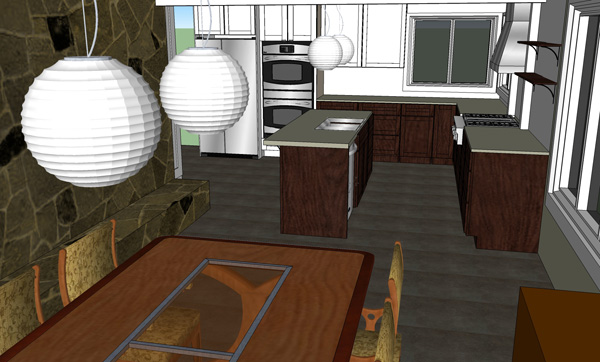
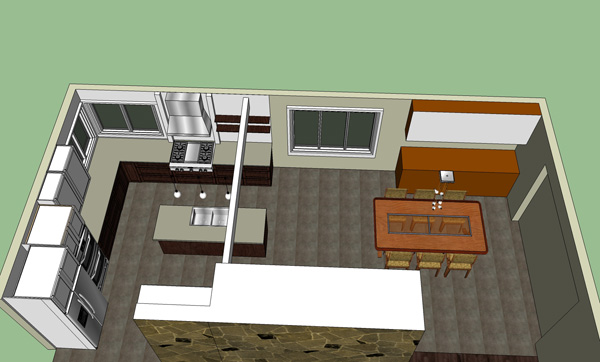
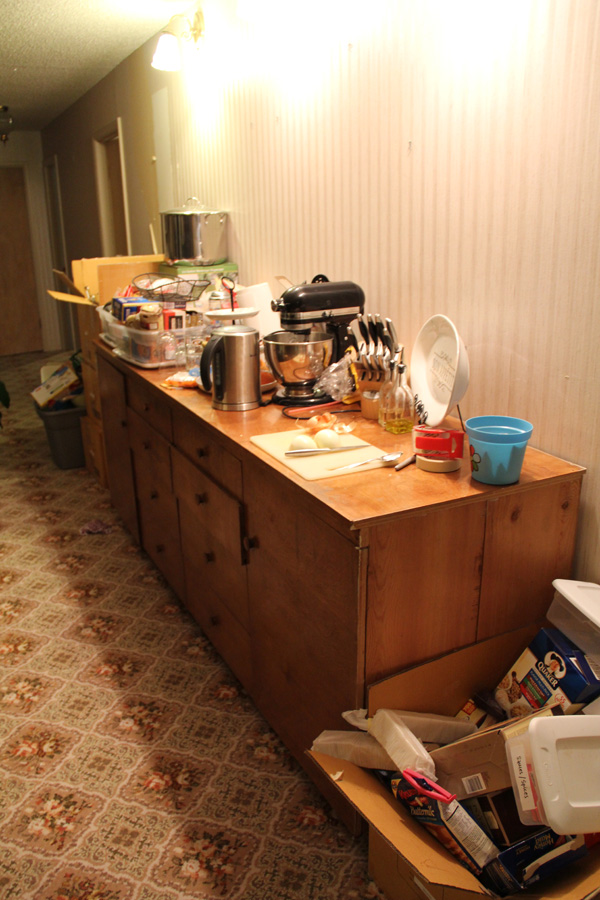
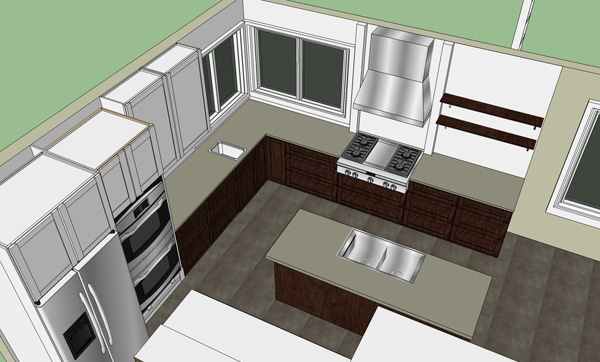
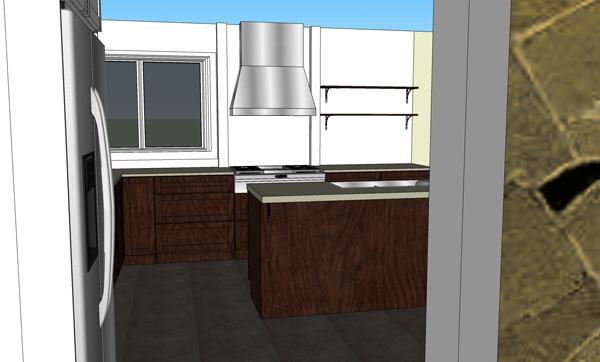
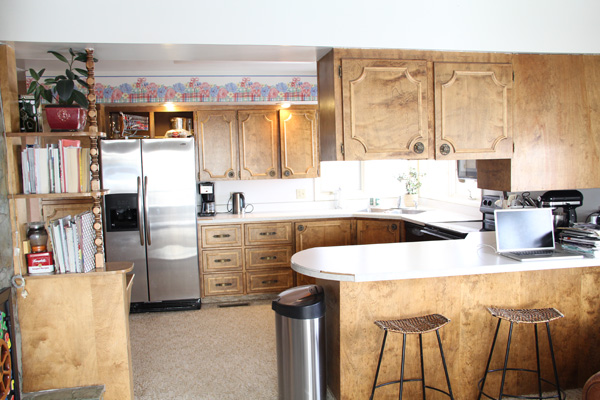
(the kitchen today)

Okay, but really. What is wrong with this kitchen?

Let's start with the very worst:

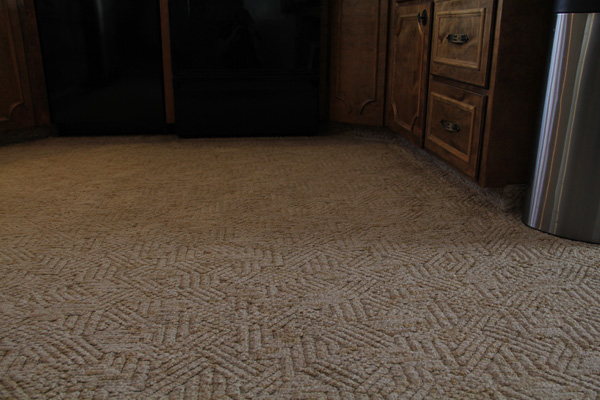
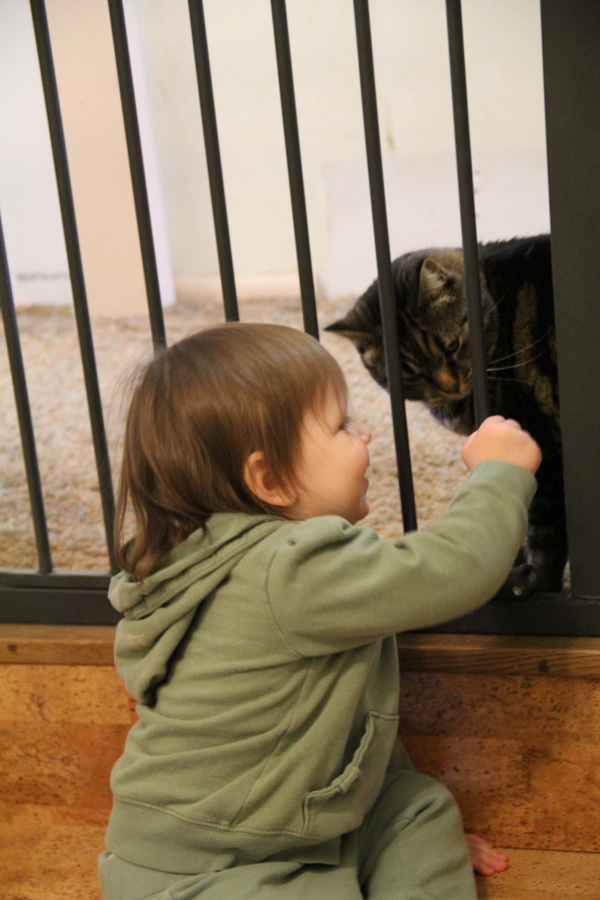
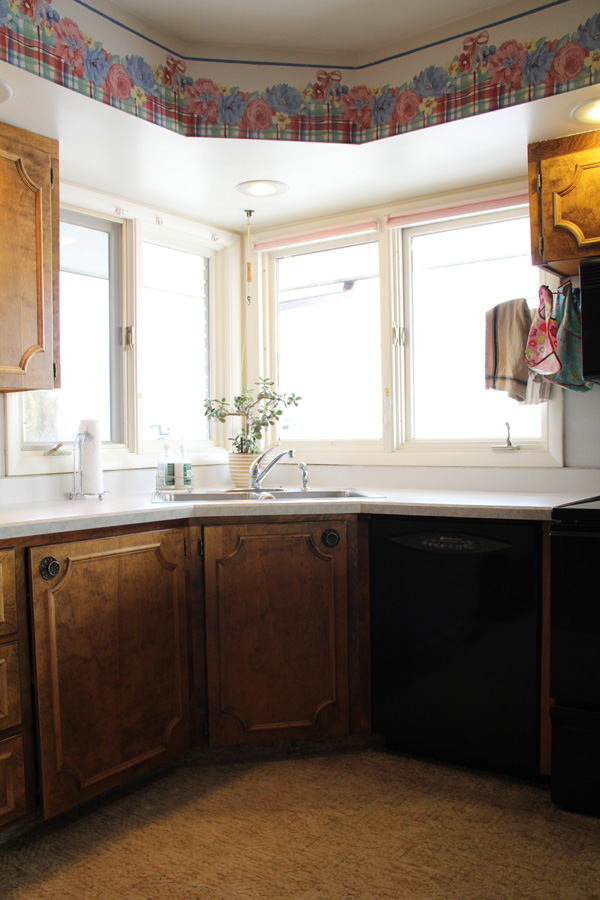
Yes, that is carpet in the kitchen. And I probably don't need to say any more. Admittedly, it doesn't look so bad in this photo. But trust me. It is dirty, grimy, and old. And a really bad idea in a kitchen. How it doesn't have spaghetti sauce stains in it, I have no idea. We shampooed a big soy sauce stain out of it when we first moved here. Rumor has it my Grandma liked warm floors because she liked to walk around in her bare feet. I feel gross if my bare feet touch this floor. And I am even more grossed out that my baby girl learned to crawl on this floor.

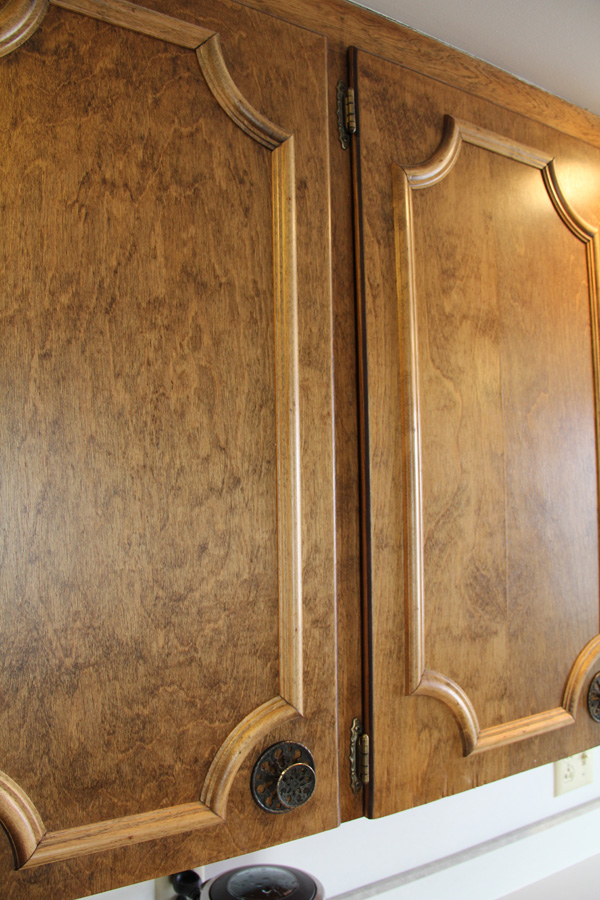
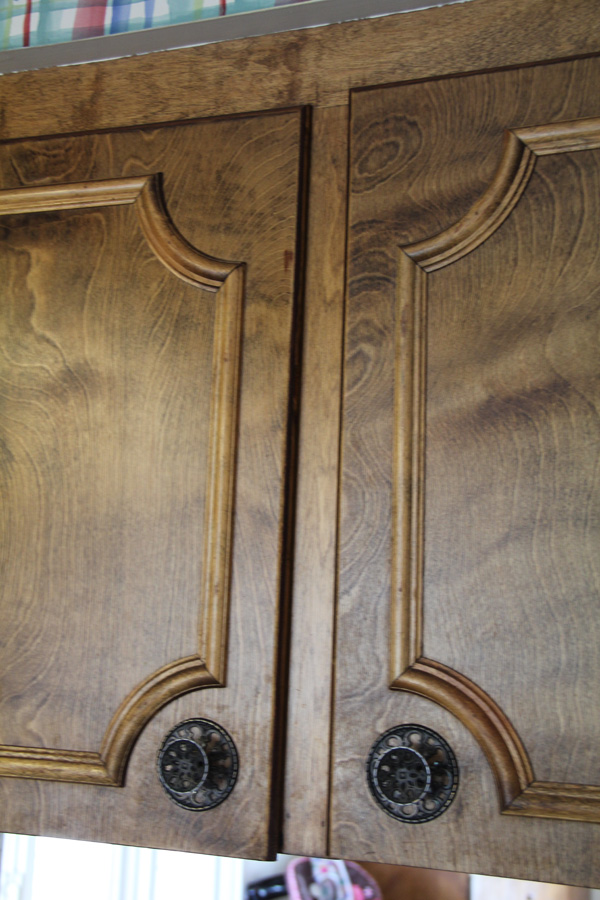
Next, the cabinets. Orangy stain and ornate hardware aren't my cup of tea. I prefer a clean, modern style.

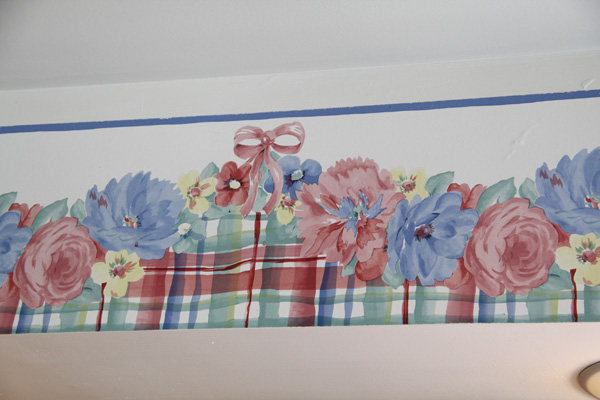
The floral wallpaper border is rather dated. (I already removed the matching floral valances.)

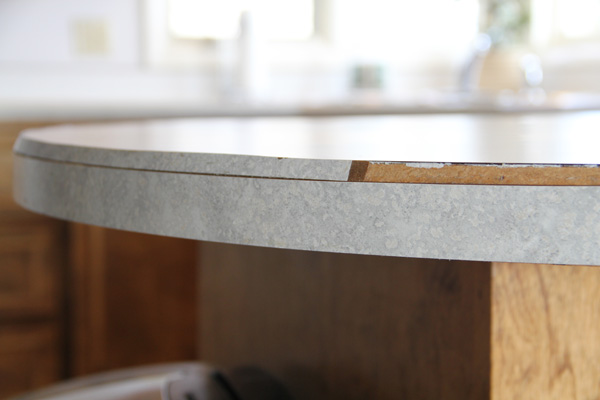
The white laminate countertops aren't so offensive, but they have seen better days. 


OK, fine. Then why not paint the cabinets, replace the flooring, update the countertops and remove that wallpaper already?

I have been tempted to tear into that wallpaper on more than one occasion and do some quick and cheap updates like this. The truth is, that solution only glosses over the functionality issues. 

For instance:

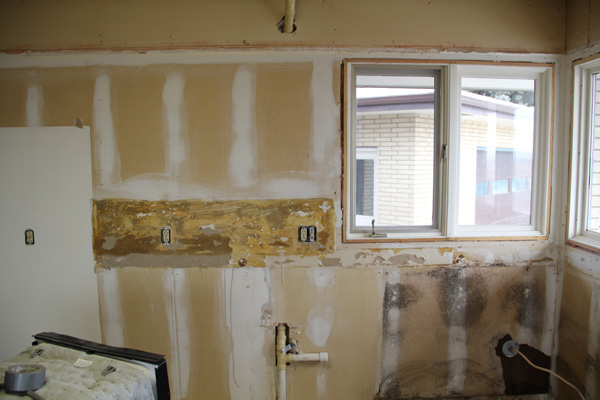
The corner sink. Great in concept, poor in execution. I've seen corner sinks that work okay, but it is never ideal for more than one person working at the sink. And in this case it is even worse because the dishwasher is right next to the sink. That means, when the dishwasher door is down, there is barely room for you to stand and load the dishwasher. When you need to open the sink cupboard to get dishwasher soap or turn on the disposal, you must close the dishwasher door first. This arrangement could definitely be improved.

Funny story: My dad thought we should build the cabinets for this kitchen. It seemed to take some convincing to talk him out of it. I wasn't so much afraid of the quality as I was the amount of work, but I do think there are some advantages to having a "factory finish". Well, the other night we were talking about things my Grandma would have done differently if she'd have had the final say (as opposed to my Grandpa.) "Like what?", we asked. After some thought my dad said, "Well, for one, Grandma didn't want the contractor to build the cabinets. She wanted to buy them". We all stopped for a minute and then cracked up as the irony of that sunk in. Maybe my Grandma will finally get what she really wanted in the first place... ?

(I should mention that these cabinets are not built as traditional individual units and could not be easily reconfigured.)

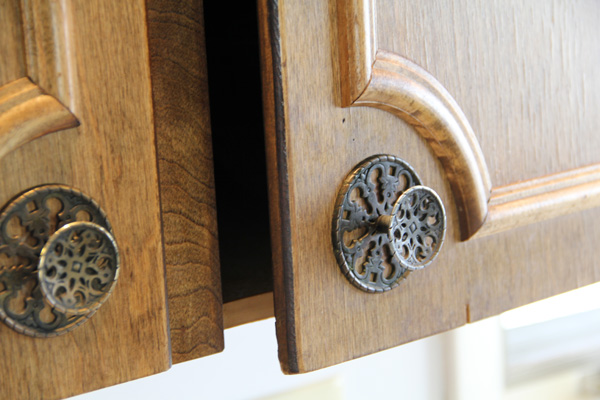
As you can see above, the cabinets do have some quality issues. The wood isn't the best quality and the doors are thin.

The doors have started to look a little uneven and skewed.

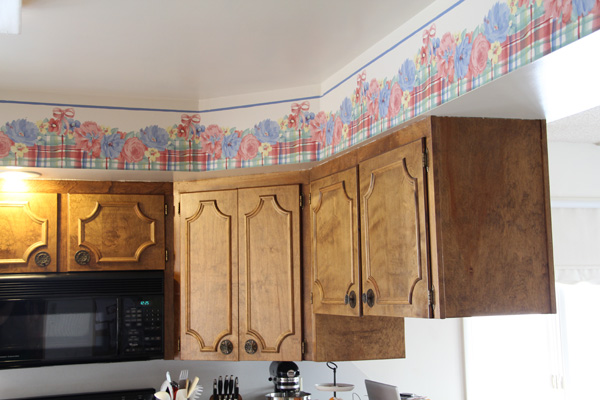
The cabinets are all hung below a soffit (which has can lighting—very nice). However, my Grandma was petite. I am not. To me, the soffit is wasted space. 

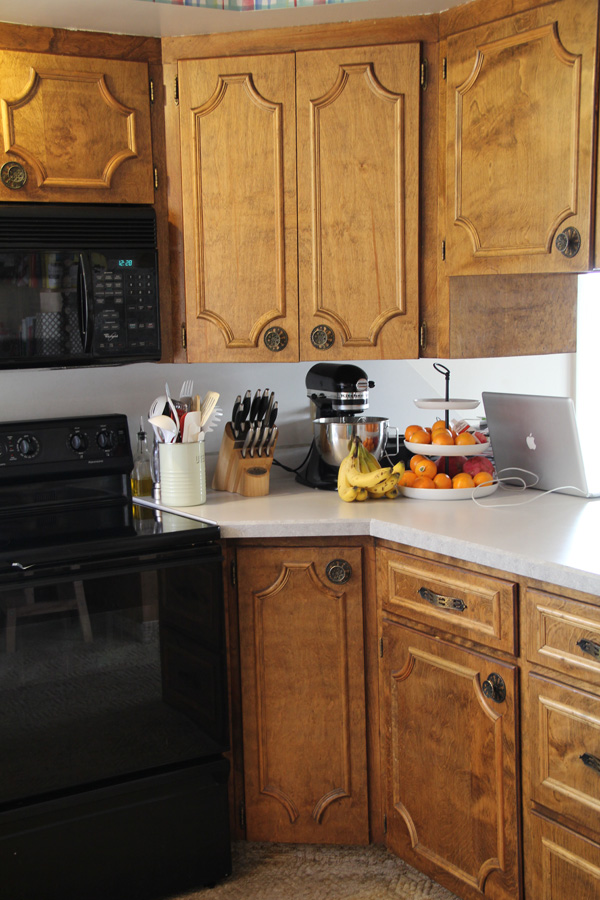
The soffit also causes some of the cabinets to hang very low. For example, the corner cabinet in the photo above is very hard to work around and I have to scoot my mixer out a ways to be able to lift it up.

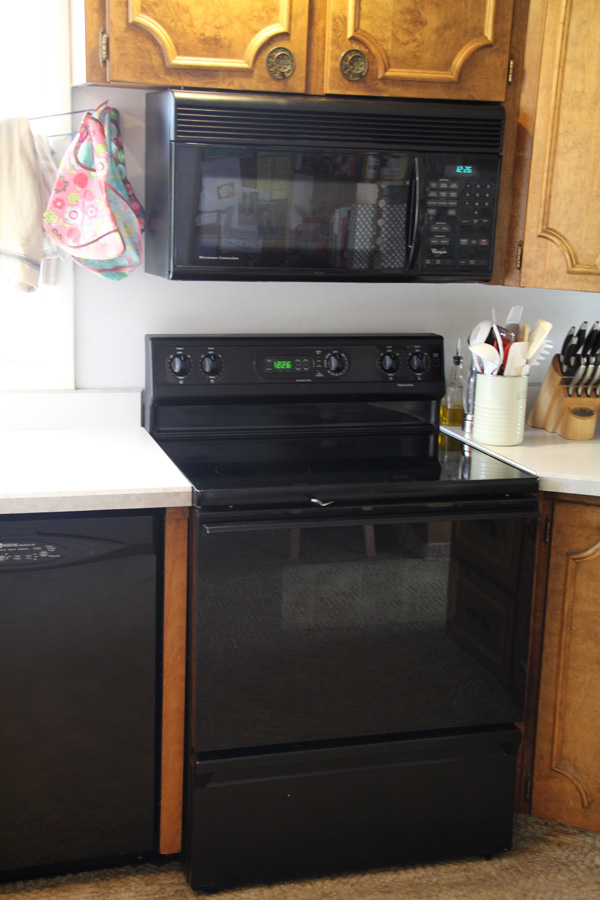
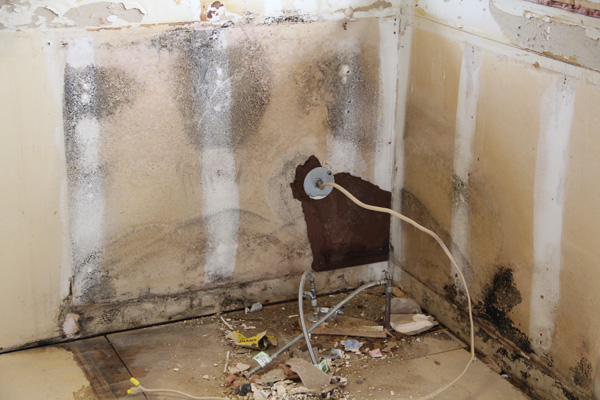
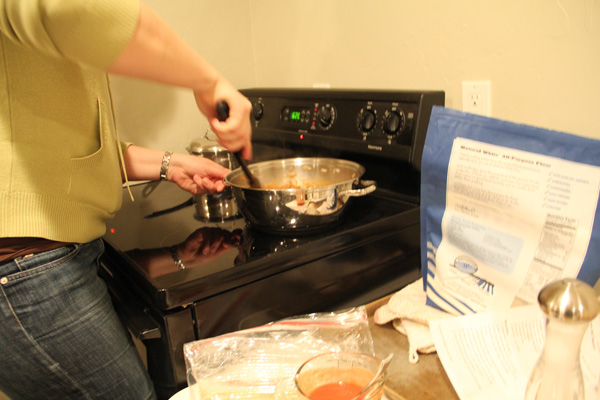
The appliances aren't original and the black is not terrible at all. Something I've longed for, however—is double ovens. This kitchen can use that kind of capacity. And something else—I didn't mind a glass top electric stove until I started using it for awhile. But over time I got frustrated with the slow response when turning things down to a simmer. I was always boiling things over. And then another problem surfaced. When I boiled things over the liquid would cause the pot to slide all over, and then I would have to try to clean it up by wiping a scorching hot burner. I'm not knocking your electric stove if you love it. But we don't get along as well as I did with my gas stove in Utah.

There is one more pet peeve I could cover:

We have this desk area in the corner of the kitchen.

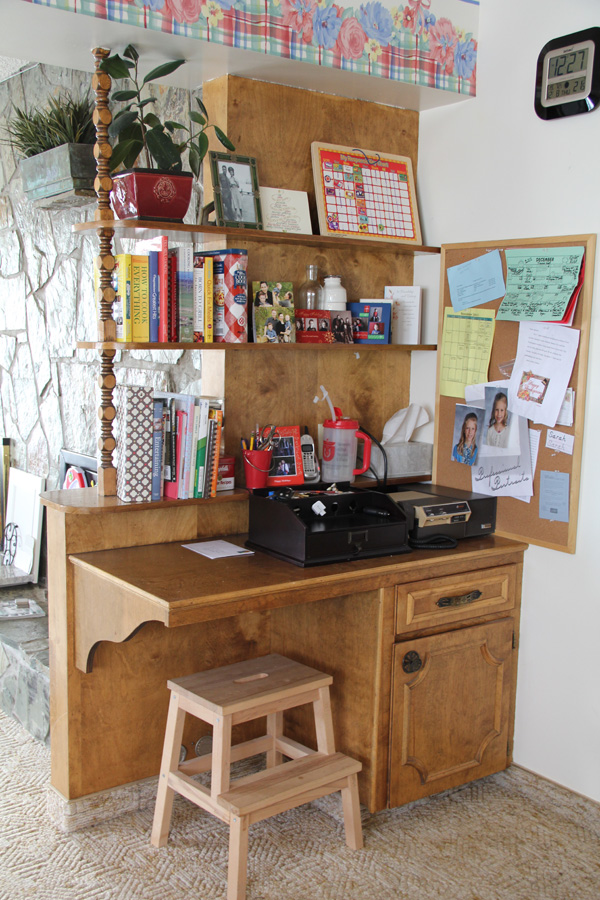
It is mostly open storage and always cluttered, possibly because of a lack of effective storage. It currently holds my cookbooks, a few photos, Christmas cards from the early birds, a charging station, a CB radio (for farm communication—some of our land is out of cell phone service), a bulletin board for school calendars and such (that I never bothered to actually hang on the wall), and usually a pile of mail. All this means I don't actually use this area as a desk. Instead my laptop sits on the kitchen counter (as seen in the first photo in this post.)

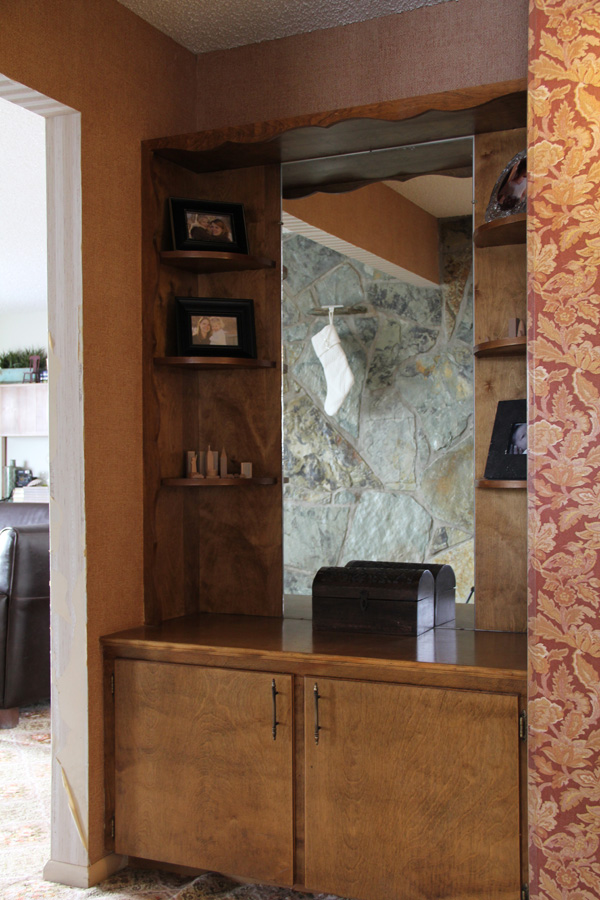
And right around the corner, we have this little niche that is not as useful as it could be:

See where I'm going with this?

I don't want you to come away from this thinking I am whining and ungrateful. That is not the case. But I think sharing the issues will help you understand our thought process behind our new design. 

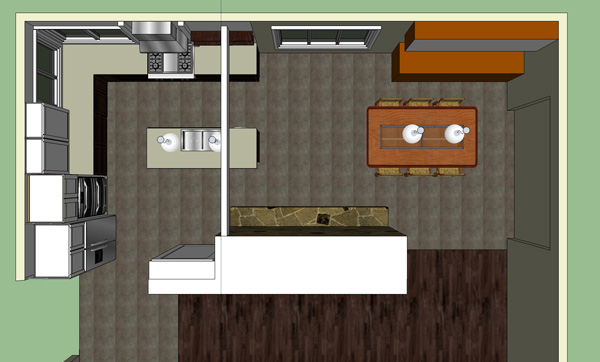
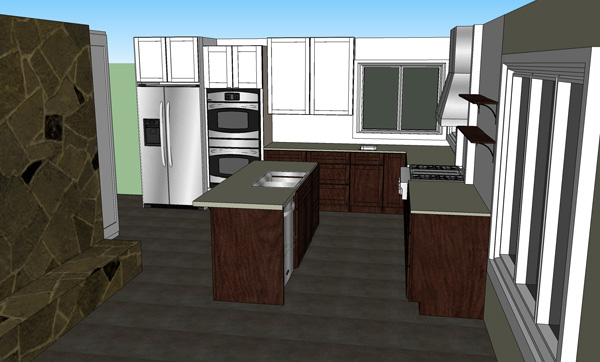
Tomorrow I will share more of that with you—the new kitchen layout. Until then, I'm curious. What would you do if this kitchen was yours? Live with it? Update it cosmetically and live with the rest? Or rearrange? Obviously budget factors in to these decisions, and we are very budget conscious—no spending 50 grand on this renovation. We are doing some pretty exhaustive comparison shopping (20% off cabinets!) and have some creative ideas for reusing materials, which I will share with you another day. We are going to DIY quite a few things as well (laying tile, building a pantry cabinet, installing our cabinets, and doing our own electrical and plumbing work-thanks to my dad's expertise.)  With any luck we will have a new kitchen before the spring farm work kicks in! 

Today I am . . .

. . . ashamed I've neglected my blog for nearly two weeks. That might not seem like a big deal to you, but to me it is important to give you a reason to keep visiting!

. . . excited that my new garage door arrived yesterday and soon I won't have to open and close it manually.

. . . anxious for the rest of the doors we ordered to come in. And not-so-anxious to paint those doors and trim. But very interested in seeing what those doors will do for reducing our heat bill!

. . . proud to have finished a nagging item on my to-do list—staining the basement bathroom cabinets.

. . . grateful to have a living room large enough to use as a work space (after giving up on the cramped, dark storage room and moving to the garage, then giving up on the dirty, cold, and dark garage and finally finishing the job in the house in front of the big living room window.)

. . . very relieved we didn't have to deconstruct the cabinets to get them into the bathroom. We were worried for bit. We tried every angle we could think of and finally gave up, saying "Dad better be smarter than we are or we have a problem." Well, of course Dad is smarter than we are, and he proved it by suggesting an angle we hadn't thought of. Fortunately, it worked. Barely.


The picture above left is of Tom trying to take the door off on the neighboring room in hopes it would give us enough clearance. Above right is one of the cabinets in place. Please forgive the poor picture quality. I'll take better photos once we do a little touch-up, install the backsplash, and accessorize. This cabinet seemed a bit imposing after living with it wide open, but I have a few ideas to remedy that. 

Moving on.

. . . happy that I have decided to keep going as a Stampin' Up! demonstrator as I just held another successful stamp class. I forget how much fun it is to stamp until I spend an afternoon creating. These are the cards we made (Mom made the one on the left):

. . . hoping I can get my Christmas cards together soon. Feeling so behind!

. . . looking forward to the girls' Christmas program tonight. Abby is the narrator!

. . . overwhelmed with the process of preparing for a kitchen remodel. So many details. I'm going make next week kitchen week on the blog and will start sharing our plans. 

. . . thankful for so many blessings.

Thanks for visiting and not giving up on me!