Eva turns 3!

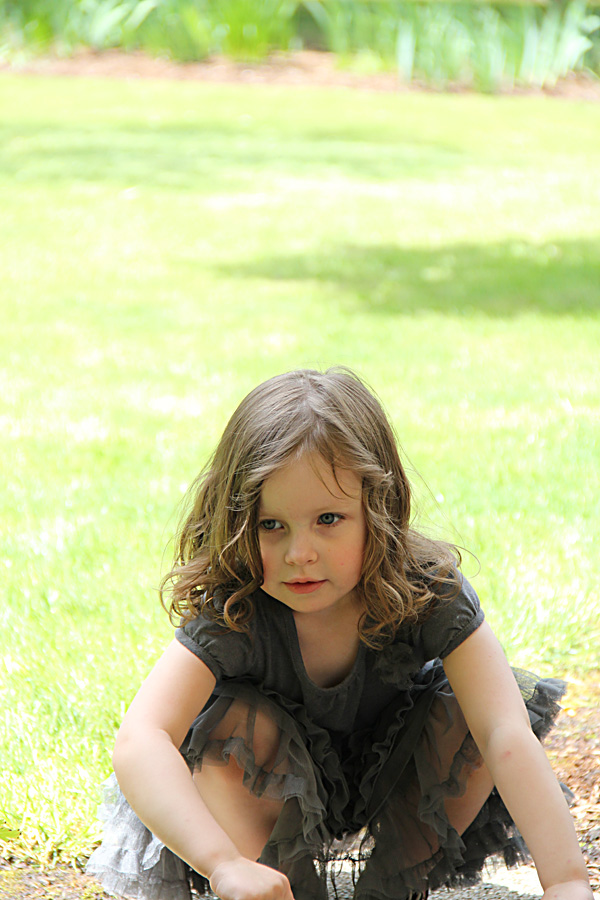
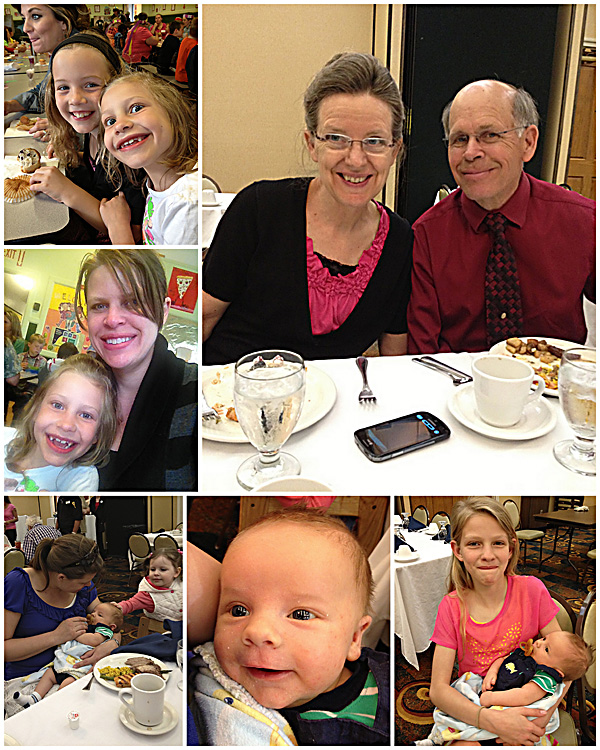
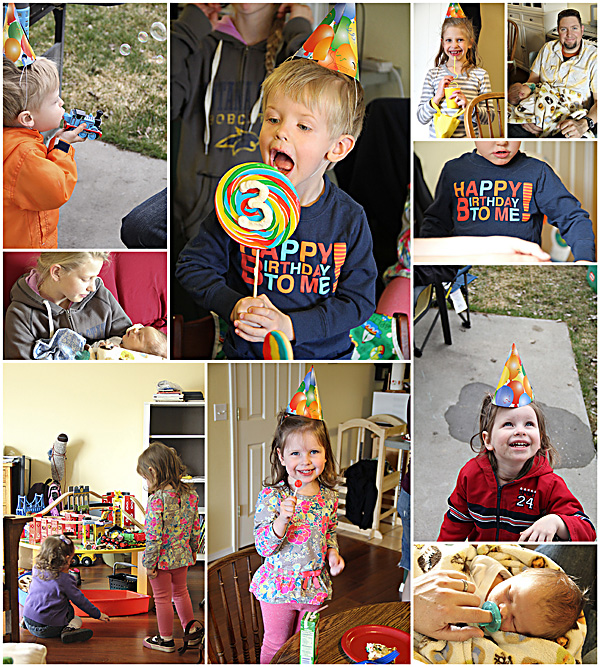
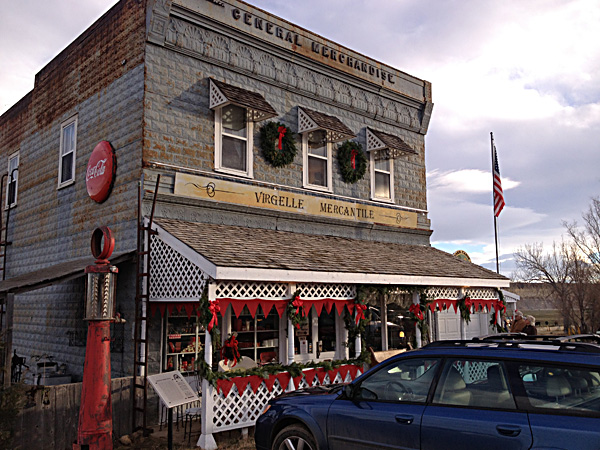
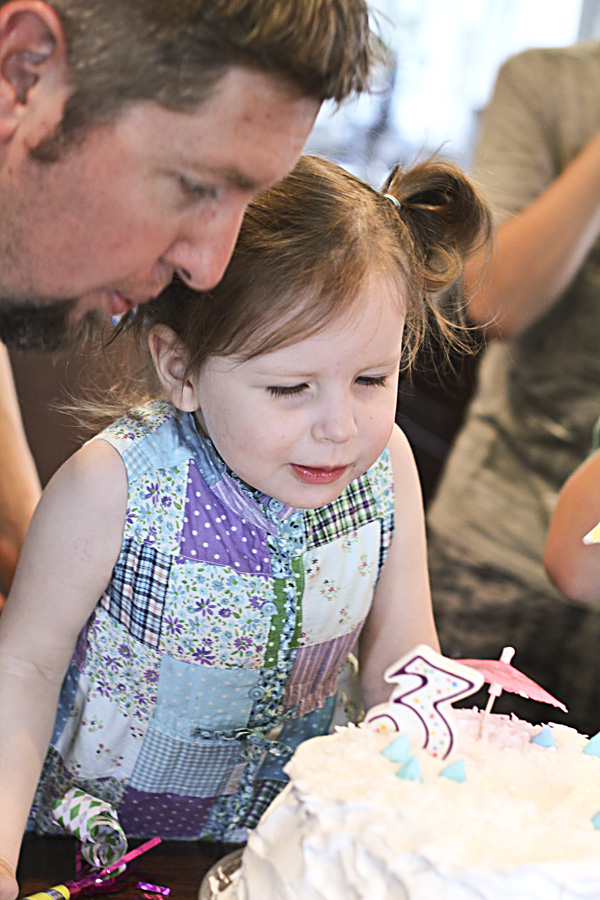
Almost a month has passed but our little Eva turned 3 on June 11! Those of you who know us or who have read this blog for awhile are familiar with that crazy string of major life events that started with a surprise (and tumultuous) pregnancy, Eva's miraculously healthy arrival, and our move to Montana immediately after. Eva's birthday's will always mark the anniversary our our big move also, and it seems very hard to believe that 3 years have already passed!

These days Eva is more fun that ever and we are so blessed to have her as part of our family. She is funny and intelligent, if not a bit sassy, but we love her personality. Have I mentioned that we finally boarded the potty train? We tackled it before our big Memorial weekend trip and I'm happy to report she is doing fantastic with it. None too soon since I have plans for her to attend preschool in the fall.

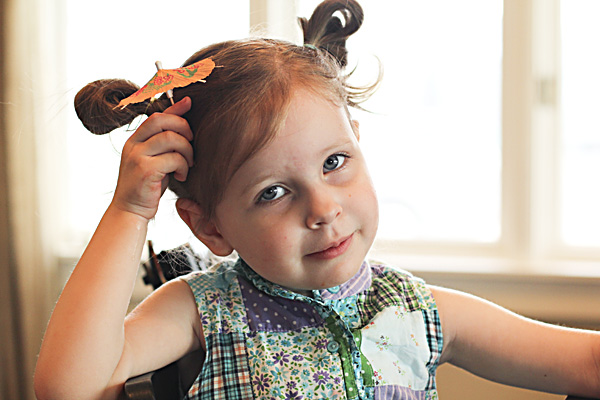
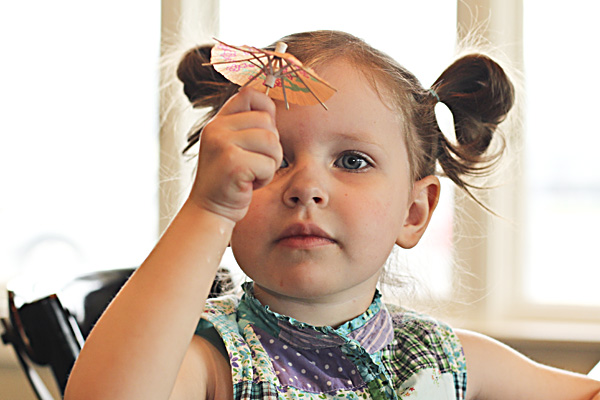
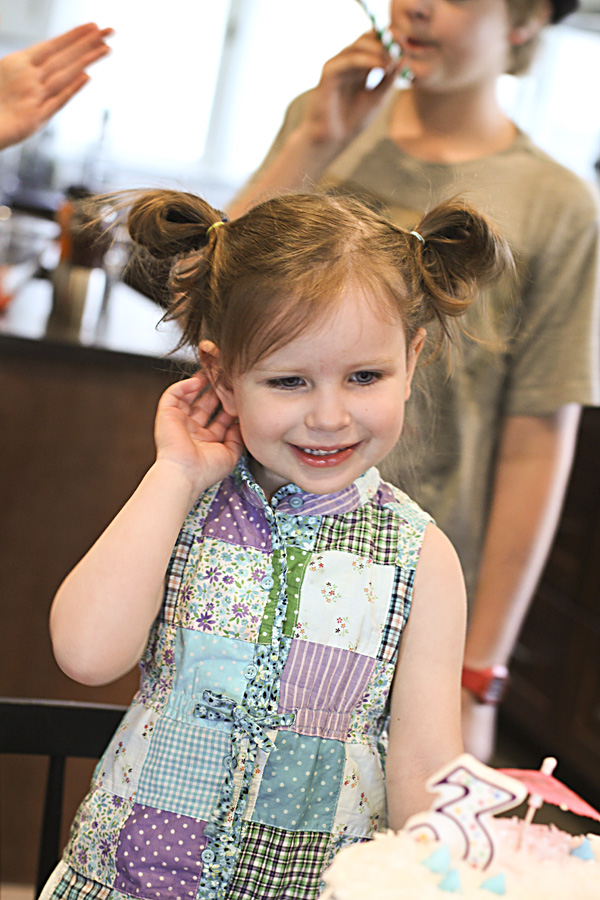
When I asked her what kind of birthday cake she wanted she simply said "blue". So I came up with the theme idea myself, stemming from her love of umbrellas. She is often seen sporting an umbrella and saying "I not Eva, I Mary Poppins!". 

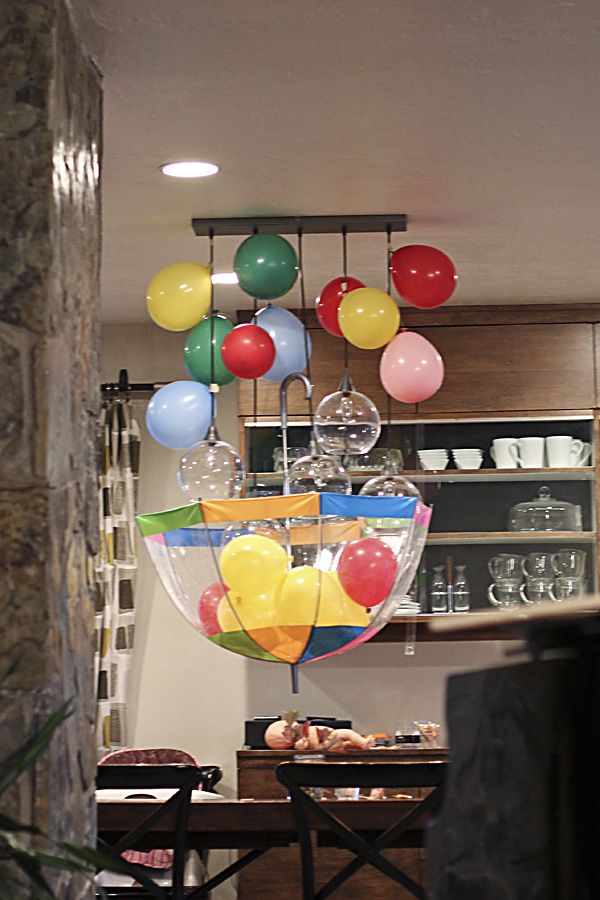
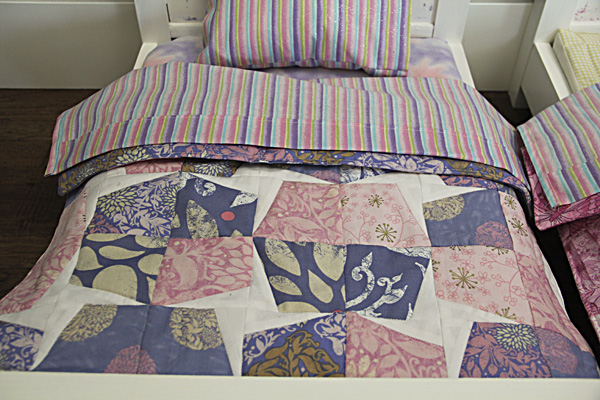
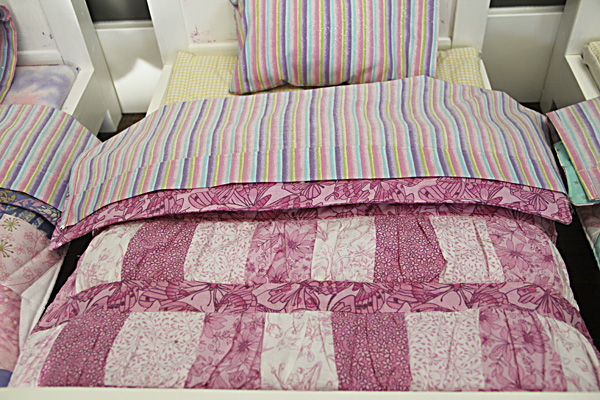
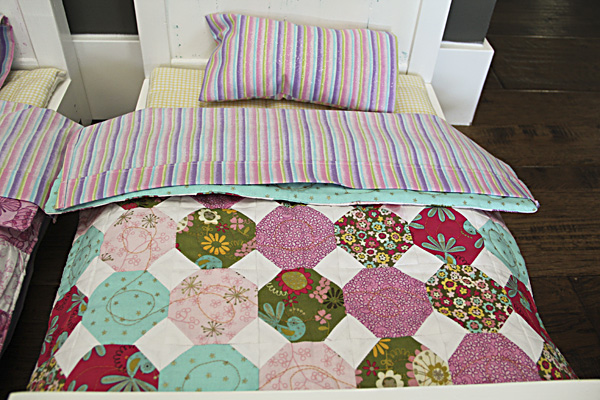
I almost forgot to take a picture of the decorations so this one is a bit of an afterthought!

A recipe for "cloud cake" was floating around Pinterest so I thought that went nicely with the theme.

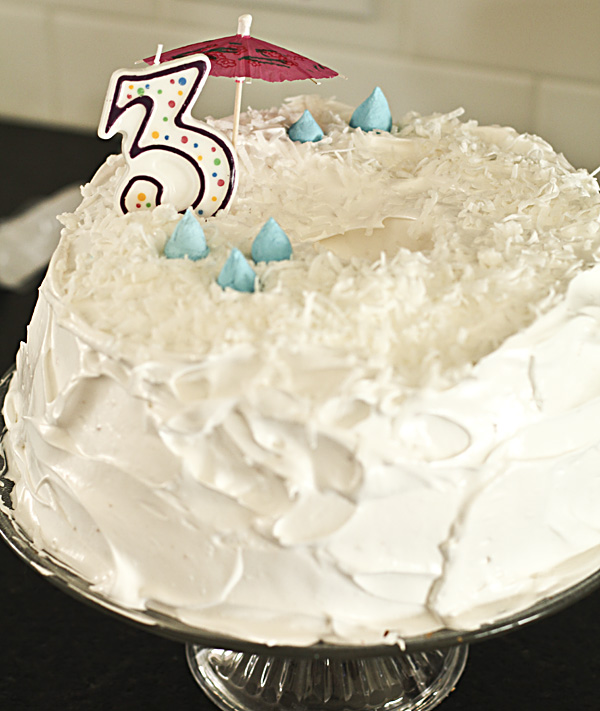
It wasn't my best decorating work, but at least it tasted good. It was basically a from-scratch angel food cake with coconut on top and I'm sure I could have made an equally good cake from a box in half the time. I'll never learn. 

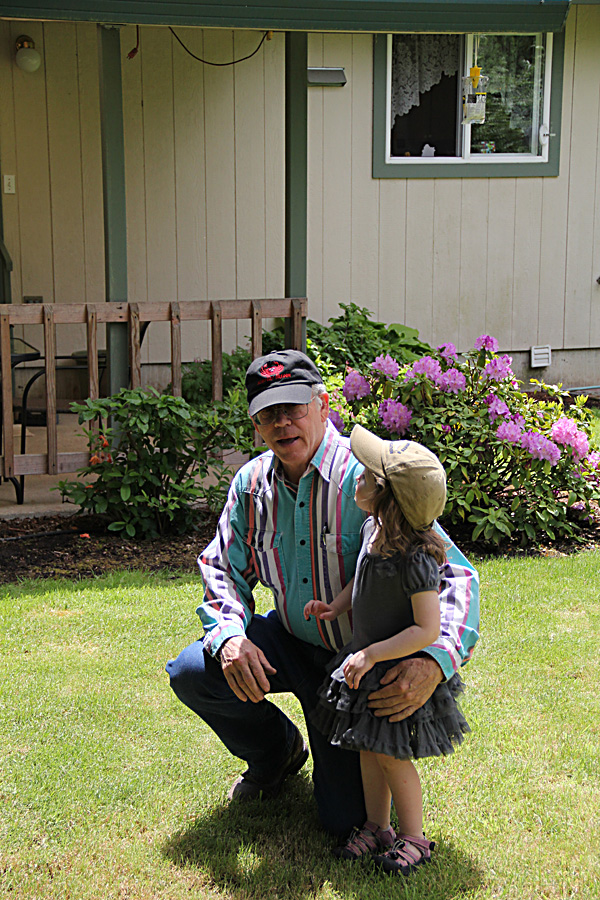
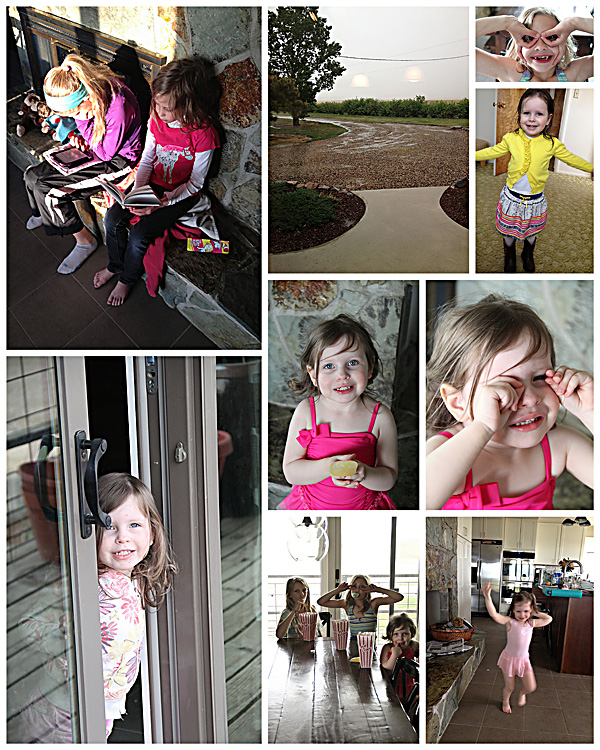
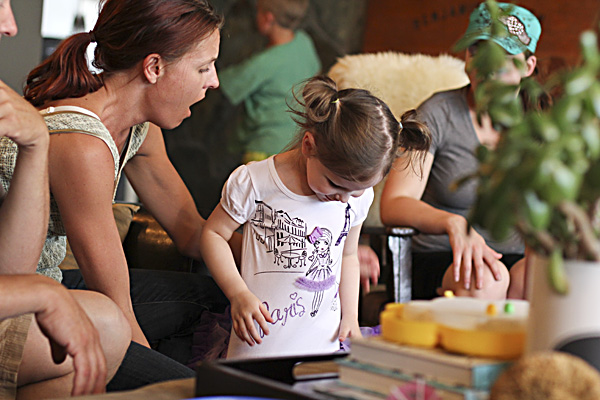
Eva is funny—it has always taken her quite awhile to warm up to people. She is just now finally coming out of her shell a bit. It also can take her some time to warm up to things. We have given her new books, clothes, etc. and have gotten the response "I don't need it!" Only after a few days will it turn into her favorite toy. I wasn't sure how she would react to her new birthday presents so I warned everyone in advance.

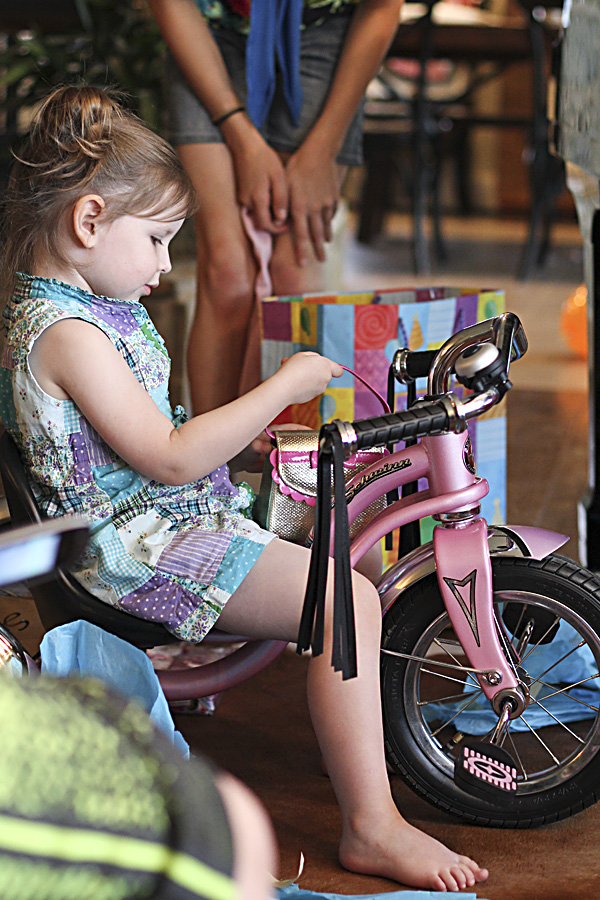
We bought her a new trike and she had no trouble warming up to it. She sat right down on it while she opened the rest of her gifts.

When she opened this new dress from Nana she had to try it on immediately and model it. And never take it off.

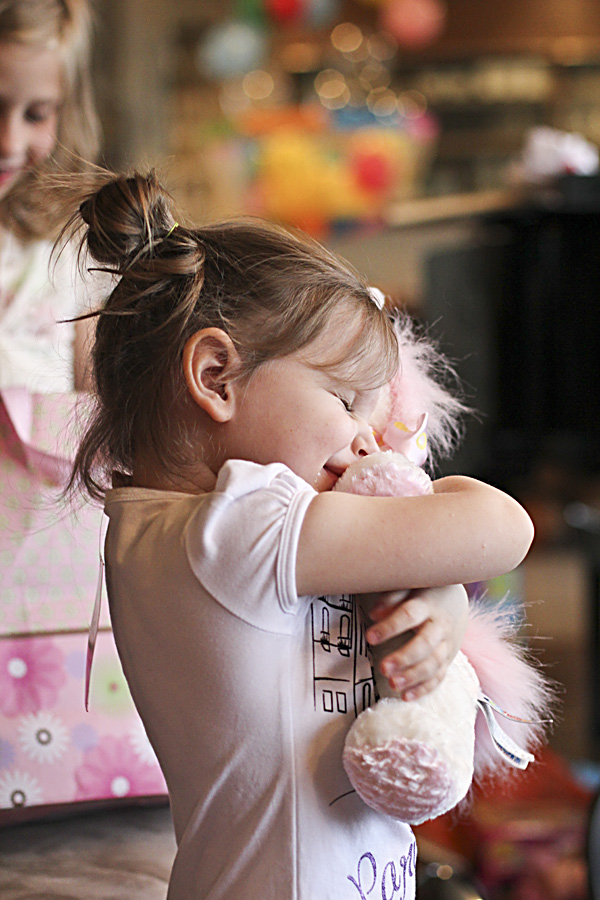
And I loved her reaction here:

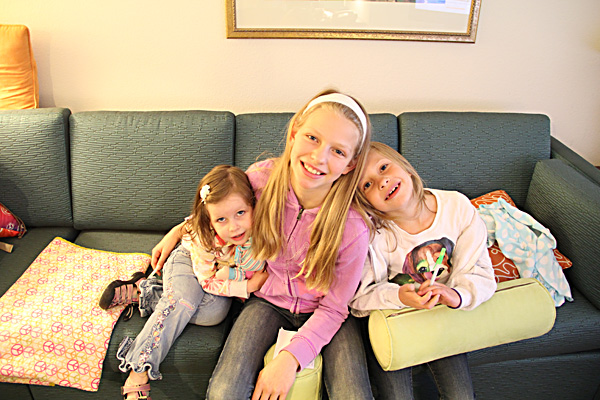
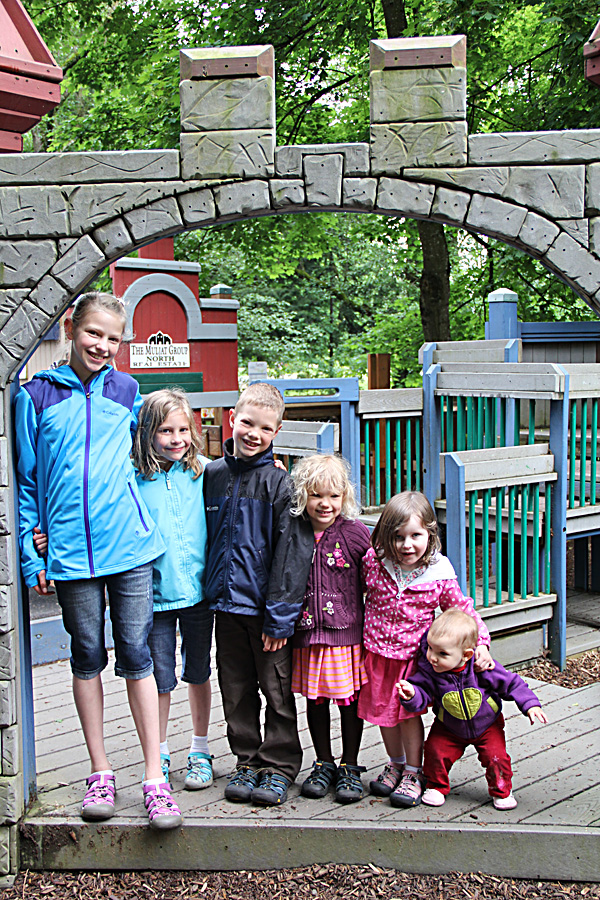
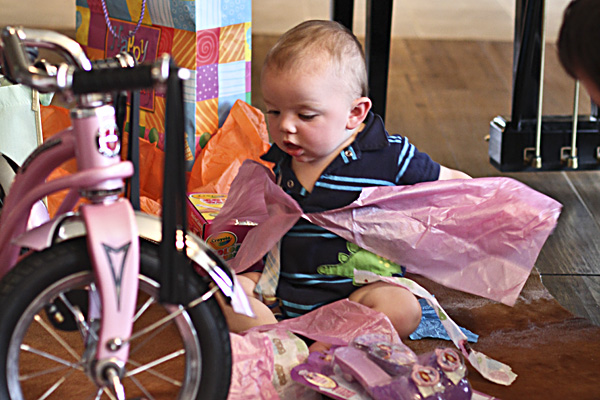
But her cousin Colter figured out that the tissue paper was the best gift of the night.

And then she was off.

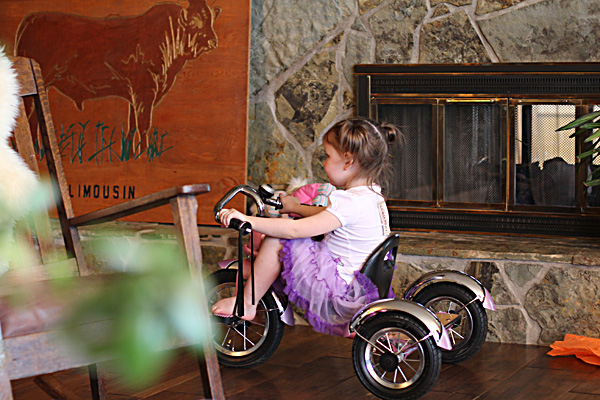
With a few lessons from teacher Roxie she has been riding her trike like a pro. We have been keeping it inside for now, until the point she gets so crazy that I'll have to touch up and repaint every wall. So far she hasn't been too destructive. One of the benefits of having girls! ;)

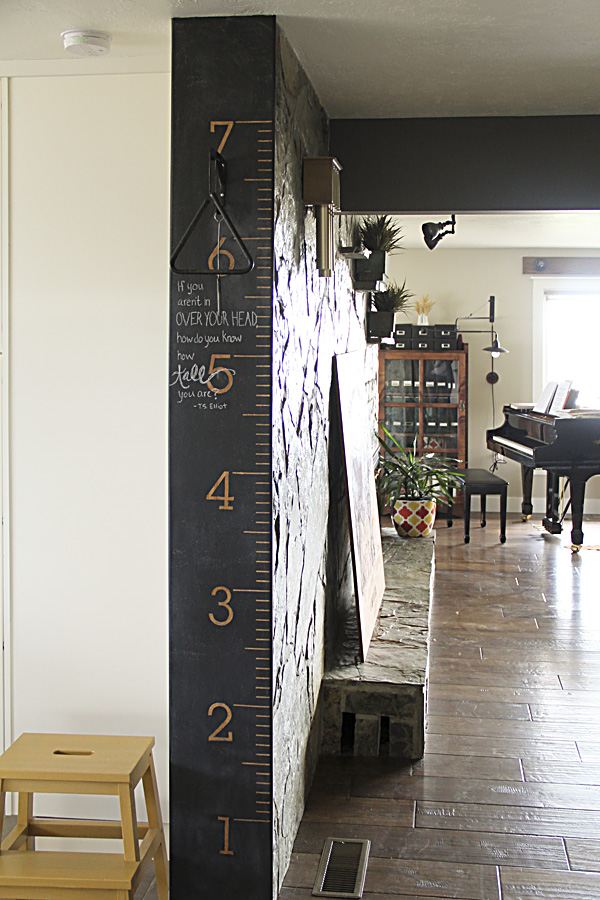
There is one more Eva-ism I have to document. When you ask her how old she is she will hold up 3 fingers and say "This is "W!". If you try to tell her "no, it's 3!" She will argue with you. She has some sign language videos she watches in the car, and she is absolutely right about this. Three fingers (in the middle) as we typically hold them up is the sign for W. The sign for 3 uses the thumb and first 2 fingers. No problem. Except now when she is counting something with three things she will say "W" instead of 3. Ha!

Happy Birthday Eva! We love you!

road trip

Hopefully you all had a happy Fourth! Today just finally sharing a few photos from our Memorial weekend trip to the Northwest. Beautiful country and I would happily go back every year if I could. This time we only had a few short days so before you could say "Schools out for the summer" we packed the car to the gills and headed out.

After a long day on the road we were happy to arrive at our Seattle hotel. While Tom and I have seen Seattle a number of times, we thought the girls would enjoy a little time to look around.

Our hotel had a nice little view of the space needle, which is as close as we got.


Looking down at the street from our room Sarah said "This just doesn't feel right". Only 3 years on the farm and our girls were feeling a bit lost and overwhelmed in the city!


The next day we wondered down through Pike's Market and down to the wharf.


We passed on most of the usual tourist activites after seeing the price to ride up the space needle and the lines at the acquarium. We chose instead to enjoy this new attraction:


Who wouldn't want to ride a giant Ferris Wheel on the waterfront! It was a nice long ride and the spectacular views were well worth the short wait in line.


Sarah was pretty terrified at first. 


But after a bit she settled in and enjoyed the ride.


After our morning on the wharf we stopped for a bit of shopping (oh, I could have shopped all day with the stores they had) and dinner with a cousin we headed up to Lynden to our main desitination—to visit Tom's brother's family. 

We did have a minor detour around the freeway bridge that collapsed on our route the day before our trip. Crazy. But oy, did we enjoy the scenery on our way!


Once there it rained, rained, rained (not surpirsingly) so the kids just enjoyed each other's company playing around the house.

When the rain let up we headed out to the coast community of Fairhaven. They had a festival going on, so the town was busy busy, but we parked and walked down along the waterfront.


Watching the train go under the bridge beneath them. An awesome sight to see that power rumble underneath your feet! 


Sweetest cousin Sofia. I want to bottle her brown eyes and dimples.


And such a lovable boy, Eli is. He and Sarah are sporting matching toothless grins. But Eli wins in the adorable freckle department. We enjoyed so much hearing him play the piano as he is doing amazingly well for his age! Natural talent.


Speaking of talent, Petra has more than enough to spare in the kitchen. Yum. 

And baby Lucie showed off her new talent for us—walking everywhere!


There was a kayak race along the path we walked. We enjoyed watching and encouraging them as they neared the finish after rowing all the way from Vancouver, B.C.! 

The next morning we played at their neighborhood park. Lynden was an impressively well-manicured Dutch community. This city park alone was just amazing. They are quite fortunate to have it just a short bike ride from their house.


Clark cousins lined up by age!

We ended our visit there much too soon, but nevertheless headed 7 hours south to Lebanon, OR (south of Portland) to visit my aunt and uncle. The extra miles were well worth it!

The girls got acquainted with another cousin.

And they had a blast playing in Aunt Marilyn's beautiful yard.

Eva took a liking to Uncle Bob. Maybe he reminded her just a little bit of her Grandpa Rog? Tom had a great time joining Bob for a tour where he works at the airport.

We sure miss having Bob and Marilyn around the farm, so it was well worth the detour to spend the night with them!


One final stop on the drive home to see Multnomah Falls. 


Always worth the stop, even though it was cool and wet. 

Turns out we brought the cool wet weather home with us to enjoy for the next several days. The rain was badly needed on the farm. So, like I said before, we would happily make this trip to the Northwest every year, especially if we can lasso those rain clouds and haul them home with us!

May Life in Photos

Now that it is July (what?) it seems like a good time to talk about what we did in May, right? Ack! My intention has been to do these Life in Photos updates at the end of every month, but life has a way of pushing forward like a train engine and never stopping for us to catch up. School let out right before Memorial weekend and instead of having lazy summer days we have only been busier. 

I hate it when I have to neglect this here blog so I will do my very best to catch up. So. May.

The Missoula Children's Theatre comes to our town every other year. It is such a great opportunity for the kids. They spend every night preparing for week and then put on a fantastic production. This year it was the "Secret Garden"—Abby played a goose and Sarah a flower. 


Abby has taken quite an interest in basketball this year—which is great considering her height. She has really developed in her coordination and understanding of the game. She participated in a couple of 3-on-3 tournaments this year, both of which her team won. She also won a lay-up contest! The photos above are of her little team (all fourth graders). Both Abby and Sarah have done some basketball camps since school got out as well. We are happy to invest in this interest because it is a well supported sport in our small community!


Just some random life photos... the kids don't stop growing and changing, especially little Eva! She is such a joy to have in our family. I will post about her 3rd birthday here soon! The photo (top middle) was the first rain we got in a good long time. The state of things was getting concerning until the clouds opened up around Memorial weekend and didn't stop until we had several inches of rain. Sooo wonderful!


On Mother's Day we enjoyed a lunch buffet and some cuddling time with my newest nephew, Henry. He is a total peach. Top left: Every year the K-2 grades do a Muffins for Moms performance. So much fun! This is Sarah with her little buddy Casha.


And how about a pet update? This is our "puppy" Benton who just keeps a-growin' (even since these were taken) and still insists on sitting on my lap. Ha. When we get home from somewhere and open the car door he will wiggle his way ALL the way on to my lap to greet me. He likes to ride around the farm with us too, but if we let him into the cab he always ends up on my lap. It's a little ridiculous trying to drive when I can barely see around him. I do enjoy how much of a love bug he is (the reason we wanted this breed) and he is starting to outgrow some of his puppy annoying-ness. Mia, our sweet older female, is so patient with him, as evidenced by the photos above. Sometimes his exuberance is not easy to take (who wants to be chewed on all the time?)

Now lets talk about those weathered deck boards and chicken wire railing, shall we? Projects everywhere. 

I'll be back soon with more updates (I hope). Still to come: our trip to Washington over Memorial weekend, Abby's dance recital, and Eva's 3rd birthday!!! I've had a few other projects up my sleeve I hope to share about soon also. So please don't abandon me and my sporadic posts. I love having you to share my adventures with!

entry progress

Hello and happy Thursday to you! Our girls finished up with their school year before the long weekend, so we decided to take the opportunity to get away. Last night we returned from a 6-day, 2000-mile road trip to the west coast! I would love to have all my photos downloaded to share, but before I spend the time to do that I need to get caught up on the unpacking and piles of laundry that await. I prepared this post before we left, so I will leave you with this for now and will be back next week with more. 

Remember what our entry way used to look like? It featured this slate planter. The dirt didn't exactly smell fresh and I was always afraid the cat would use it as a catbox. We were glad to get it out of there as there were a couple of rotten floor boards underneath. (We saved the rocks to use for a future outdoor project). 

The hallway looked like this:

And now it looks like this:

I've have been spending some time painting doors and trim recently, so it is nice to finally be able to show you the changes in this area! The biggest thing we did in the entry hall (besides replacing all the doors and windows) was to remove the closets and cupboards that were there before. Now we have a "landing strip" for our gear as we go in and out. Admittedly having this all out in the open isn't always fantastic. It does get stacked pretty deep with coats, backpacks, and shoes, but it sure beats the piles of stuff on the floor. Kids just won't take the time to put everything away in closets.

This is where I did the rest of the stenciling that I mentioned in my previous post. For shelving we actually purchased an IKEA Expedit unit. Everyone in the family has a basket to hold their sunglasses, gloves, etc. My dad built a shelf to go across the top. Then we simply added a strip of baseboard molding to attach the hooks to. We have purchased oak boards to build a bench, which I will stain to match our kitchen cabinets and shelves. The bench here isn't quite tall enough or wide enough, but it works as a place holder until we can build one. 

It is so nice to have freshly painted trim and doors and new windows. The fridge is a bit of an eye sore, but we love having an extra fridge and this is a pretty convenient place to have it. 

We replaced the front door quite awhile ago. This is what it looked like before, after we had started demo.

The old door wasn't in very good shape and didn't seal well. The side windows were even worse- they weren't even double-pane insulated glass. They were basically very scratched-up plexi glass held in place with wood stops, and had lots of dirt and condensation between the panes. We couldn't find a stock door/window unit to fit the space, so we ended up buying the door and glass separately. It meant we had to do quite a bit of trimming around them to make them look nice, but it is finally done. And painted!

I wanted the front door to have weight and presence, even though it is mostly glass, so I painted it Behr Black Bean. It is an off-black with green undertone. A glass door like this certainly isn't for everyone, and it wouldn't be for me either if we lived in town, but out here we don't have to be too concerned about privacy. I like to have the light stream in and it is great to have the view out to where the guys are working. If I ever feel like I need more privacy I might explore the options of frosted window film.

While the inside looks finished, the outside—not so much. I have a lots of scraping and sanding to do before I paint it (and ALL the exterior trim) dark brown. 

Now if I can just keep this little guy from jumping up and smearing all my glass.... :)

I have lived with my new entry rugs for awhile now, and I must say that I love them.

They are indoor/outdoor rugs from Dash & Albert (purchased from Wayfair, but they don't seem to have this pattern right now). They have a huge selection of patterns to choose from, and they are fantastic for an entry because they clean so easily. I usually just vacuum over them, but when I'm mopping I often run my mop over them as well. You can even take them outside and hose them off. 

Little by little... progress is made! It is so gratifying to look at before/after pictures like this and see how many things we have transformed! It's like playing the game "How many differences can you count?"


measuring up

I've seen various versions of Growth Chart rulers floating around Pinterest, including this cute one in the photo above from here. Most of them are done on a piece of wood that can be taken down and moved with you. Smart. 

But I had a built-in piece of wood that seemed perfect for the job, and after all, we don't plan to move. It needed a make-over anyway. The wood end cap on our fireplace was stained a lighter color and didn't match our new cabinet color.

A perfect spot for a growth chart!

I didn't take any in-process photos because I wasn't completely sure it would work out. And it certainly isn't perfect. I decided to do a reverse effect and let the wood show through where the numbers are. To do this I printed the numbers out on a full sheet of label stock and cut them out with an X-acto knife. I cut strips out of the same label sheet with a paper cutter, and then cut them to length. First I sanded the board really well, then I then carefully measured and stuck the labels to the board.

In case you are wondering, yes, it is accurate—at least to about 1/8", which is close enough for measuring height. I measured very carefully! :)

After my labels were in place, I painted 3 or 4 coats of chalkboard paint. This is where I erred. I should have primed in addition to the sanding. I had bubbles in my paint. This may or may not have happened anyway, I'm not sure, but it was very apparent afterwards when I rubbed chalk over it to season it. By then it was too late to sand and recoat because I had removed all of the stickers.

The other problem is that the stickers didn't come off very easily and paint bled under them in places. If you look closely my lines aren't perfect. But life is too short to worry about perfection. Good enough. 

After taking these photos I decided to clean all the chalk off, which makes the bubbles much less apparent. I still like the matte black finish, even if it doesn't function as a chalkboard. I mark the heights in pencil anyway because I don't want them to rub off. The pencil marks are a little hard to see on the dark color, but that's okay with me too because it stays looking clean.

I only wish I'd done this sooner! Abby is already 5'2" at 10 years old. Crazy. It will be interesting to see if the other two are even close. So far the tallest mark is at 6'3" (my brother). Any taller and my little dinner bell interferes with the measuring... but oh well, the dinner bell has been here forever and it will stay for nostalgia sake!

Beyond the growth chart is a little niche leading into the living room. It used to look like this:

Crazy, huh? We still plan to put a desk/command center here for me to use for cookbooks, my laptop, and school paraphernalia. I'd like to have my dad help custom build it to look something like this with little niches and closed storage, but he is a busy man and I might get impatient and find a solution I can piece together with stuff I can buy. Depends on which comes first—time or money. 

In the meantime, the wall was in rough shape from removing the mirror that was glued to the sheetrock, so I decided to stencil it using this stencil from Cutting Edge Stencils. The process was quite easy and it was less expensive than the Woods wallpaper I love. The main reason I bought the stencil was for an area in my entry that I will show you in an upcoming post. That area I painted with dark over light, but since I already had this spot painted dark gray, I stenciled light over dark and it turned out just fine. I used regular latex wall paint and a foam roller. I would definitely try this technique again—much easier than hanging wallpaper! 

oops, I did it again

And this time there might have been a little blood involved.

Not really. But it's a good story. Read on.

So, I have a bit of a Craig's List habit. Looking through my previous thrifting posts I'm realizing that there are quite a few things I haven't even told you about. Hiding the evidence? Uh oh—classic addiction symptom. Actually, too many of my Craig's List finds sit around in storage until I give them enough TLC to be proud of them. Maybe I'll do another post to show you the ones collecting dust. But for now, the newest acquisitions are sitting proudly in my living room exactly as-is:

Bam: a pair of 50's mid-century upholstered chairs.

I knew I eventually wanted a set of statement chairs—my leather sofas are functional but boring—to round out the seating in our large living room. I figured it would be a down-the-road investment since I had more pressing matters in mind (a rug). But when these beauties popped up, I couldn't resist. 

I spotted the ad on Wednesday last week and immediately responded, "I want to buy these! If I pay full asking price, will you save them until I can come get them?" I did a little research, and the brand (Tomlinson) appeared to be an American company. I figured they were probably worth quite a bit more than the $200 asking price. 

But I didn't hear back.... and didn't hear back.... and figured I'd lost out on them. However, that Saturday morning I noticed the ad was still up and decided to e-mail again. This time I received a phone call right back. She said she had received an offer but it was for less than she wanted, so if I came and got them that day, I could have them. So we packed up immediately and headed in to get them.

This is where the story gets interesting. Later I received this text on my phone:

"Joellyn, this is Kristi [my cousin]. I was going to buy the chairs you are buying today. She said she sold them to a lady from Ft. Benton and I knew it had to be you! Aren't they amazing? I can't wait to see what u do with them. And if u decide u don't like them, call me! :)"


O.K., small world. I had a good chuckle over the coincidence, but then I just felt terrible. Even more so after I found out that the seller had actually accepted Kristi's offer and she was on her way to pick them up when she called to say she had a better offer! I assure you, I did not know this when I picked up the chairs. And she did make me pay full price. But that was pretty sneaky business on her part.

Luckily Kristi is a cool person and very gracious about the whole deal. ;)  Later she texted me asking me if I was planning to have them reupholstered. She said,

"I thought they'd be so cool with black and white pillows. Like those ones from Ikea."

Which I happen to own. 

"Wow! Well even if u don't like those pillows on it u better post a pic so I can see how they look :)"

Least I can do. Turns out, I do like them with the pillows. The original backs on the chairs are made of a hard (almost crunchy) foam. Replacing them with the pillows makes them much more comfortable.


My initial intent was that these would make a great reupholstery project. I could picture them in a burnt orange tweed of sorts. Something with attitude and a vintage vibe. However, the upholstery is in great condition considering its age, and for now I am quite happy to live with them as is and enjoy the happy orange pop of color. 


If you are curious, the info I have indicates these chairs are from Tomlinson Furniture Company, the Sophisticate Line, and this is the Casual Chair No. 4648. Tomlinson started in 1901 in North Carolina.

life in photos—March/April

I haven't been very regular with posting lately, but not because life has been dull. Life is made up of little moments that add up to a whole lot of busy

I like the weekly/monthly photo dumps others have been doing. It seems like a good way to share those little moments that in themselves don't seem to warrant an entire post. Here is my version to catch up you up on our life happenings:

Clockwise from top left: The girls in their Easter outfits from Grandma ~ Eva counting peas with daddy to determine germination rate (spring seeding has started!) ~ A visit from Ash and Annie and celebrating Ash's birthday with a chocolate cherry cake ~ A rare (but funny!) grumpy face from Brandon. He wasn't feeling so well, but mommy makes it all better ~ Kitty Zoe sunning in the living room ~ Eva enjoying lunch


We were able to make a super quick trip to help my nephew Oliver celebrate his 3rd birthday and meet our new adorable nephew Henry! He is darling, calm, and content. I could have held him all day long.

Last but not least, a phone photo dump. Clockwise from top left: Henry's knuckle dimples ~ My phone is full of shopping photos. Anyone else do this? Makes me laugh. I'm always shopping alone and taking photos to show my family later. This month was all about shoes- Tom's boots, Abby's basketball shoes (she is playing in some 3-on-3 tourneys) and Converse for Sarah in hopes that she can't wear through the rubber toes! ~ I finally hung some adorable animal prints in Eva's room that I purchased on Etsy ages ago. The girls rooms are tops on the list of priorities to re-do. Blue carpet be gone! ~ A ski meetup with the Dykstras and our last ski trip of the year. Halfway between us. So much fun! ~ Eva is my littel buddy and I love that I get to spend my days with her ~ stamp class ~ Sarah sign painting for Cheerleading ~ Abby won the county spelling bee for 3rd and 4th graders! So proud.

baby bumpers

I got a raised eyebrow from the cashier at the dollar store when I came through to buy just one pool noodle. But one was all I needed.


Voila~ counter bumpers! Eva has reached the perfect height to crack her head on the edges of our kitchen counters. One collision too many sent me looking for a solution. I know this won't make any fashion statements, but that's what makes this great—I can just pop them on and off. 

March madness

Thought I would drop in for a quick hello.

Sorry I've been absent for awhile. It's been a blah "blah-g" lately. Oh well, it seems to go in phases like that for me.

I just found out today that Google Reader is going away! I'm not happy about that. Blogs have completely replaced magazines for me as a means for inspiration, and I need a good way to keep them organized and easily accessible. Do any of you use an aggregator for blogs? If so, what do you recommend?

In other news, the rental apartment project Tom has been helping my parents with is wrapping up.... just in time for spring farm work to kick into high gear. It doesn't leave time to tackle any big projects in our house, unfortunately, but instead of despairing I've been trying to focus on smaller bite-size projects we can chip away at. And projects I can tackle on my own. I even have a "punch list" going of things to finish up- all color coded and prioritized.

My dad took one look at the list and said "good luck!", which is a good indication of where his mind is headed. I'm vowing not to be discouraged. But why does the last 5% of projects drag on forever? Hopefully I'll have some progress to share with you soon. In the meantime, I'm trying to fit in lots of spring cleaning. I even detailed the inside of my car. Which is saying something, believe me.

In one last random note, I ran across these cool creations made from vintage saris. I especially like the camel for some reason. It would look fabulous in an ethnic inspired room! From here while it lasts.

busted up

Funny story–

We have been trying to ski as much as possible since its an outdoor family activity we can do in the winter when Tom isn't so busy. While Eva is young I stay behind much of the time, and when I do go I've been renting equipment, figuring I'd invest in some when I'm able to go more often.

Tom and I recently discovered our old (we're talking 20-year-old equipment from high school) ski gear in my Dad's shop—gear we'd thought we'd ditched when we left college but Dad saw fit to rescue. Of course, they are old straight skis that nobody uses anymore, but I thought my boots would be worth a try. I tried them on and they felt pretty good, despite the fact that was 3 kids ago and my feet have grown.

So last Saturday I decided to give them a test drive on the slopes. But as we were gearing up, a piece of the boot broke off, taking a couple of buckles with it. I shrugged and trudged off to the rental shop, a little disappointed that I wasn't going to be able to save money on boots after all.

After the day was over and I turned in my equipment, I slipped the old boots back on while I waited for Tom to pull the car up. While I waited I looked down and noticed the left boot had a crack in it also. Then I took a few steps to the car and the entire front of the boot popped off. I took a few more steps and the right boot did the same thing!

They literally busted up into pieces within seconds until I was left with this:

Now picture me feeling all put together in my new name brand ski pants and then watching my ancient brittle boots literally fall apart before my eyes. It took my pride down a few notches.

But then we had a good laugh over the pieces. At least it didn't happen on the slope!

cheers for Sarah

Every parent with more than one child must be blessed with the wisdom of more than one parenting method. In other words, every kid is different and what works for one will not necessarily work for another.

Anyone with me? Such is the case for my #2. The Middle Child.

I am learning that she needs a little extra "cheering on"; lots of positive encouragement. Sarah has a little trouble with focusing—I've heard this from each of her teachers and coaches. She isn't being naughty, she just gets distracted in her own little la-la land. She often has to be told several times to do something, which can be frustrating from a parent's (or teacher's) point of view. It is hard not to resort to yelling, but when I get frustrated her behavior only declines. When she gets discouraged, she shuts down.

Case in point—we are trying to teach her to ski. She is quite good at it, but only when she wants to be. If she falls once, all of the sudden she is falling all the time. She hates being told what to do to improve her skiing. Since we really want to make it a family activity that we all enjoy doing together, we are really trying to encourage her to love it. So carefully and patiently we follow her down the hill at her pace with lots of praise and cheering on. When she is up she is up!

She has a few little quirks as evidence of her anxiety for approval... she tends to chew on things (fingernails, pencils, shirt sleeves) so we have been working on those habits with the advice of an occupational therapist that visits the school. So far she has recommend a stress ball and a bracelet that is safe to chew on.

Don't get me wrong. Sarah definitely has talents worth celebrating and encouraging. She is doing well in school, despite her lack of focus. She is good at math and reads very well. She has a contagious smile. She has a beautiful voice and natural musicality. I'm hoping she will overcome her fear of what people think and try out for singing solos in her class programs because she is absolutely capable. We are going to start her with piano lessons soon.

Most times she follows in the shadows of her older sister and does the same activities, but Abby (to whom everything comes very easily) can be a tough act to follow. I'm starting to consider ways for Sarah to express her own individuality. Abby became obsessed with gymnastics and wanted so badly to enroll in dance this year. It was expensive, so when Sarah didn't seem passionate about it we decided only to enroll Abby. Instead, we found Sarah's opportunity in a little cheerleading program they started offering at the school this year.

So we have been cheering on our little cheerleader!

They had a performance during half-time of the last Varsity girls basketball game. She did awesome, and she really enjoyed the attention afterwards (flowers from her coach and lots of praise from the crowd and family who came to cheer her on.) It was fun to see her beam.

And seriously, what could be cuter than a line of little cheerleaders?

Afterwards, when she thought no one was paying attention to her, she and her friend used the drum platform to practice their skills and mimic the high-school cheerleaders. Of course, everyone was watching her. ;) At least, I was along through my telephoto lens.

I made the mistake of suggesting that—while cheering was super cute at her age—her mom might rather she didn't make a career out of it. Maybe she could instead play basketball when she is older. Oops, crushed her little heart... maybe we will just let her forget this conversation. (Even if I secretly hope her priorities change when she gets older. No offense to the cheerleaders I have known and respected for their talent and very hard work! We just happen to be a family who likes basketball.)

Here is her performance :

(I apologize for the poor video quality. Clearly I need some help learning how to use/focus my DSLR video! Casey and Scott, where are you when I need you? I miss the days when I could walk around the corner at the office and pick your brilliant brains.)

One more story about Sarah—remember the days in Kindergarten and First Grade when you got to be "Star of the Week" and line leader and such? I remember it well. Sarah's turn was this past week and we were asked to bring in photos of her from each year so they could see how she has grown. I haven't printed very many photos so I went through my hard drive to pick some out. This was the selection:

What a cutie. It was pretty fun to see them all lined up year by year. (All photos are mine except years 2 and 3 which are credited to the aforementioned Casey and Scott).

Ages ago I put together a scrapbook of Abby's first year. Its filled with first-baby photos and documents 3 baby showers I was blessed with. Of course I intended to do one for each of my kids, but this is the last scrapbook I've done. (Sad, but true!) Sarah often says to me, "Mom, why don't I have a baby book? You love Abby more than me!" And she loves to point out the pictures of those showers and say "Mom, why didn't I have a shower? No one loves me!" Of course, now that I've given you some background on her behavior, you understand her dramatics. But these photos have reminded me how badly I need to celebrate the life of my sensitive middle daughter and get a book made already. It would mean the world to her.

Pride is dangerous but self-worth is invaluable. It is a fine line, isn't it?

living room additions

I feel like I haven't had much exciting blog material lately—not much in the way of house projects happening at the moment. But I did make a couple of purchases for our living room recently.

One was this wall lamp from Restoration Hardware. I needed a light for my piano, and their conveniently timed lighting sale allowed me to score one for 25% off. This is my second lighting purchase from RH. I buy very little from them because most things seem outrageously expensive. But comparatively their lighting is surprisingly affordable. Of course I've been able to catch a sale on both purchases, but still, a pleasant surprise. Am I the only one noticing that?

I also took advantage of a sale on blinds for the windows. Necessary but slightly painful (window treatments are insanely expensive!), so hopefully they will last for-ev-ah. 

My choice was a subtle but effective solar roller shade from myblinds by Hunter Douglass via Home Depot.


My windows don't get washed too often in the winter. The light was shining just right to show you just how dirty they are...

... but really I just wanted to show you the imprint of the poor rather-large bird (23" span) that hit our window. We weren't home when it happened and the bird was nowhere to be found when we got home (the dogs were in the back) so I assume it survived? Just glad our window didn't break.

Happy Valentine's Day!

Feng Shui Friday—pantry organization

It's been a long time since I've posted a Feng Shui Friday post. Never fear, my organizin' heart still yearns for order and peace, even if actually getting there takes me a lifetime to attain.

I thought I would show you my pantry cupboard today—not because it is so amazing, but because I did actually put quite a bit of thought into how to organize it.

Remember this? On the left, the pantry of my dreams. On the right, the reality (I lived with this metal shelf in the corner for quite awhile before we purchased the pantry cabinet we have now). 

image: Emerson Fry


The pantry space I had to work with was pretty small. O.K., some small home and apartment dwellers would consider this ample, but my previous home had an entire closet devoted to a pantry. So to me it was downsizing. Before the remodel we had a slightly narrower cupboard, but it was 24 inches deep and everything would get lost in the recesses. I hated having to dig for everything. 

There are some pretty impressive pantry options with fancy pull-out racks and such. It seemed to me though that those racks took up a lot of extra space. Plus they were expensive. My original plan was to have 12" inch deep storage here, to alleviate the digging. Then I thought 18" would work better to accommodate some appliances. When I priced 18" cabinets, however, they turned out to be more expensive because essentially I would be buying a 24" deep cabinet and cutting it down. So, I decided to go for the deeper cabinet and just try to be smart about the organization.

Here are my pantry organization rules:

1. Everything has to have "street side property"—meaning, I have to be able to see everything in my pantry. I use the depth for storing multiples behind, and for overstock. If the space behind is wasted, so be it. For example, behind the cereal containers on the top shelf and store the extra boxes and bags of cereal. Behind the grains I have ice cream buckets filled with extra. (The peas, lentils and wheat are straight off the farm! Some of the others I buy in bulk). The canned food might only have 1 or 2 in the row and others go all the way to the back.

2. I have to use every inch of vertical space possible. I actually set everything up as tight as I could and then purchased an extra shelf to fill the void. Therefore, everything is organized according to height.

3. Decanting into uniform containers may seem like a pain, but it really helps the visibility issue. I also like that it gives everything a tidier appearance.

4. The smaller and irregular shaped items go into bins. The green bins hold my onions and garlic, pudding and jello mixes, and a variety of granola bars and fruit cups for kids snacks. I fill them as full as I can and stock the extras behind. The plastic bins on the row below hold rice (left), pasta (middle), and potatoes and squash (right). The bins act like drawers. Grouping these items really helps me to see how much I have on hand.

5. Finally, label everything! (I haven't gotten to this step yet, clearly. I wanted to test my system and leave time for a little rearranging before I committed with labels.) This can seem a little obsessive, but the biggest reason for this is restocking. A, it helps my family put things away in the right spot. B, I can see when I am out of something. If there is an empty spot, I automatically know what to add to my shopping list.

painted yellow

Wow, yesterday was an exciting day around here! Our kitchen was featured on Apartment Therapy which sent the traffic here on our blog sky-rocketing. I admit to being a bit nervous about it since AT readers can be a tough crowd, but the comments were all extremely positive and gracious. It was fun to get all of that positive affirmation on a project we worked really hard on! I shared all the comments with dad and Tom also, and we were all floating a bit high on life. Thank you! 

Now I think every other person in the world owns one of these Bekvam step stools from IKEA (peaking around the corner, above right). They come unfinished and look pretty hot naked, if I do say so myself. However, after getting heavy use during our various remodels, ours was looking a little hammered and was wearing a coat of shoe grease and paint splatters. Since we use it often in the kitchen I decided to give it a little makeover so it would blend into the decor.

I picked a swatch of the shelf and bought a quart of paint: Behr Donegal Tweed. Great name, great color. When I got it home I was thrilled with how well it picked up the yellow in my curtains. I bought a flat finish that would have looked great as is, but for some reason I had pictured it more as a wash, so I watered it down and painted a very thin coat over the stool, then finished it off with a few coats of Poly-Acrylic finish. I think now I would have liked the flat finish of a solid coat of paint better, but I think this finish will wear better.

I then used a scrap of oak from a previous project and had Dad cut me a little shelf for my hallway. I used the same paint wash treatment and hung it up with some maps I'd once had mounted and laminated.

It makes the perfect ledge for my London and New York wooden cities in a bag (from Muji)!

It has taken me a long time to get things put up on the walls in this house (they all needed to be painted first!) but sometimes it is these finishing touches that are the most fun.

Now for this awesome Donegal Tweed color. I need to find something else to slather it on. Quick!  

kitchen sources

I promised a source list for our kitchen, so I'd better get on with it. As much for my own sake as anyone's. Let me know if I've missed anything that you might be curious about! (I've included more photos for reference. List at the bottom).

The basics:


Appliances: 


  • Refrigerator: Amana, Home Depot (Purchased in 2010 when we moved in—not replaced with remodel. If/when it dies I will consider getting one without water and ice through the door. It always looks messy.)
  • Double Wall Ovens: Kenmore Elite, Sears  (The great thing about Sears is their discounts. Wait for the right time and you can get a great deal. We got almost 1/2 off!)
  • Vent Hood: Cavalier, Overstock.com
  • Cooktop: Kitchenaid, Sears (exactly like the more expensive Jenn-Air model. And again, Sears discounts apply!)
  • Dishwasher: Maytag (not replaced; a basic model that works great and will live forever I think. If it dies we will replace it with a stainless model probably.)
  • Microwave: Sharp Microwave Drawer, Sears


Lighting:


Furniture and decor:


kitchen before and after

I can't believe we are nearing a year in our new kitchen. We love it as much as ever, of course. Last time I posted about it we still had a pretty large list of projects to check off: trim work and painting, installing the open shelves, buying and installing a pantry cabinet, buying and installing a light over the island, and more. Slowly through the year we checked most of those things off the the list and I've been waiting... waiting... to call the whole thing "done" so I could post final photos. There are actually still a few little items to complete which I will point out to you, but I finally decided—good enough!

So off we go.

Maybe I shouldn't even point it out, but one of things on our list to finish is the tile above the left window. We ran out of mastic adhesive the first time around, and it seems like a great effort to get it all out to do such a small section. We might get around to it when we tackle another tile job in a bathroom or laundry room. For now it almost passes as intentional.

The shelves and light are new since I last showed you!

The pantry cabinet is also new. It beats the metal shelf that I lived with for awhile. Actually, this cabinet was mostly paid for with a credit from the cabinet company. Their color samples misrepresented the color and our cabinets turned out lighter than expected. They offered to refinish the doors, but the ends and frames wouldn't have matched so we opted for a credit instead.

You also get a sneak peak of some stenciling I did beyond it. Just a teaser!

We finished off the crown above the cabinets (a bit tricky since the space was pretty small) and painted all the window trim. I also bought new inexpensive bar stools.

The sideboard and china cupboard in the dining room were original, but I refinished them. I would love to remove the kick base and add feet to it someday. I sewed the curtains myself, and I don't think I've shown them to you yet either! I layered them with some woven panels I already owned.

I removed the doors from the firebox (my dad originally made them for my Grandma, but they just didn't work with my scheme (sorry Dad). I am planning to paint the inside a dark gray color, but actually the white doesn't bother me so much either. We have a little more fireplace to do also—namely fixing the propane valve so we can actually use it (!) and patching some mortar.


Here is an up-close look at the open shelves. I. love. them. Not only was it a good solution to a difficult space (there is a support beam above them that would have made an upper cabinet almost impossible), it keeps the kitchen very open and gives us really easy access to our every-day dishes. Right across from the dishwasher, no less. The supports are long steel bars that go through the shelves and into the studs in the wall. We predrilled holes for them before we tiled. (By "we" I mean my dad.) We used oak planks seamed together to make a solid wood shelf. I then stained and finished them as close as possible to the cabinet color. We added some hooks to the bottom to hang mugs.

Here is one last view:

I'll be back soon with more photos and a source list. Until then, if you want to learn more about our kitchen journey, you can follow the posts below:

What's wrong with my kitchen, anyway?
kitchen layout plans

ordering cabinets
kitchen finishes
What.A.Mess.
more demolition
kitchen lighting options
lighting options :: round 2
getting rid of the gunk
best laid plans
progress report—tile, cabinets, and stress
progress report—cabinets installed
we're cookin' now!
dining room hutch—before and after
kitchen backsplash and hood
kitchen organization

finally lounging

I am super excited to share today's post with you. I wrote about this chair only about... 6 months ago. In September I had a surge of productivity when I took the chair apart and completed the wood re-finishing. Then the pieces banged around in my storage room while I waited for my mom to have time to help me with the upholstery. On a cold and snowy Saturday a couple of weeks ago I was antsy to tackle a project. I left the kids with Tom for the day and plowed through the snow to my mom's house where I could tackle this project once and for all—without distraction, under the watchful eye of my mom and using her more advanced sewing machine. I'd like to say that was the end of the story, but it took a few more days before I could finally call it finished. I'm nothing if not persistent, though, so I can finally show you the finished product!

The back:

There she is! And I'm pretty proud of it despite its imperfections.

I must say this was no small challenge for me. It took time to disassemble, remove hundreds of staples, and carefully label and bag each piece of hardware. I took photos along the way to help me with reassembly—something I was glad for when I finally got around to it 6 months later. It was another time investment to refinish (sanding very carefully so as not to damage the thin veneer, then applying the stain and 3 coats of Poly acrylic finish, sanding between every coat). I spent another long day sewing hoping so much to finish it in one day. That night I gave up in frustration, feeling like I would never get it right. (I am, after all, a complete novice in re-upholstery). I spent a little time researching other redos online and discovered I might have been the only person crazy enough to attempt sewing the welting directly to the cushions before attaching them to the wood. Most people stapled their cushion fabric, then glued or stapled the welting separately. Easier, for sure, but my way was the way it was constructed originally. The problem was that the old leather was stretched out and made an imperfect pattern. Easing and gathering the stiff vinyl around the edges was really challenging. The result is very imperfect and there are plenty of puckers, but I think in the long run the construction will be stronger. 

A few days later with fresh and rested eyes I spent one more long afternoon stapling hundreds more staples into the flimsy wood frames (rather exhausting) and then screwing each piece back together. Even that part of the job took longer than expected, but it was so very exciting to watch it come back together!


Had this been an original Eames lounge and not a knock-off, I would have been inclined to use real leather. As it was, the only $$ I had into this project were for a few small supplies: buttons, welting, needles, and upholstery thread. The chair was free (my Grandpa's chair, cast off to the back recesses of the storage room in our house), and the vinyl was something my mom and dad had on hand and donated for the cause. 


I intended to make my own buttons, but it didn't take long to figure out the stiff vinyl and cheap button frames from the fabric store would have made a lousy combination. At the last minute we took the vinyl to an upholstery shop and had buttons made for us. It cost all of $5. Obviously well worth it! 

After seeing how inexpensive and easy the buttons were, Tom thought I was crazy for not exploring the option of professional upholstery to begin with. Maybe it would have been affordable—inside 2 or 3 hundred bucks perhaps. And the result certainly would have been better. However, despite the number of hours it took me (a lot), I still am glad I attempted it myself. It might not be logical, but it gives me a feeling of accomplishment and leaves me with something to be proud of.


You might enjoy seeing a few photos of the process, although, I didn't take any of the sewing and reassembly. My hands were too busy to pick up the camera!

Taking it apart (Each piece was built with an inner and outer bent plywood shell):

The back of the ottoman with the outer shell removed, showing how the cushions were stapled onto the fabric:

The leather removed:

And the cushion foam and inner plywood shell. (I reused all the old foam):

All the pieces lined up:

Checking to see if I had enough vinyl. This was before I removed all the welting. I then laid each piece flat, taped it to the vinyl, and cut around them. Each piece of welting had to be cut to the exact same length, so after they were removed I stretched them out and re-cut new strips.

The pieces laid out in the garage for re-finishing:

Now that it is done, I've heard a few say "This was always my favorite chair" or "I forgot how comfortable this chair was!" (Rumor has it the knock-offs are actually more comfortable than the real ones. This one reclines—the originals only swivel.) As such, I sort of want to move it upstairs to a place we can enjoy it often. For now, it resides downstairs.

The bright white vinyl isn't totally ideal with my living room furniture, however. And it looks pretty hot downstairs with my hounds tooth sofa:


So for now we are trekking downstairs for a change of scenery during our evening lounging.

doll beds

As you know, I made doll beds for the girls for Christmas, using this Ana White plan. 

To buy a true American Girl doll bed would cost anywhere from $70-$125. I spent about $30 in supplies to build all 3. (I would have used scrap wood for even less money, but since I needed to make 3 I didn't think I could find enough scrap pieces in consistent sizes. The wood I bought was cheap pine and I had to work around knots, bows, and other imperfections. What can I say? I was going for cheap and the rustic farmhouse look fit the bill.

I bought sample paint jars from Walmart and intended to paint all 3 beds a different color, but it was apparent that one jar wasn't going to be enough. I didn't want to spend more money on paint, so instead I painted the beds with white trim paint and then tried painting the insets on the headboard and footboard with the colored paint. In the end I didn't like the contrast, so I painted over the color and then sanded it off so the color would show through. At least this allows them to be able to tell their beds apart.

I waited to post better pictures because the icing on the cake was the quilts their aunt Amy made for them. Each quilt is pieced to match their beds and personalities.

Abby's is a purple pinwheel pattern,

Sarah's is pink and ruffled,

And Eva's has colorful dots and coordinates with her bedroom quilt. I love them all. Thanks Aunt Amy!

They look adorable all lined up in a row, but mostly they live in their own rooms with the girls. Eva's is in her little play tent, and Abby's is set up like a little bedroom with picture frames and knick-knacks. 


It was a fun project, and was pretty easy if you can make friends with a few power tools! I managed to not cut off any fingers so our friendship is in tact.


Meet Benton

I had a request for more puppy pictures, and I am here to deliver.


Tom grew up with a line of Golden Retrievers, each with some derivative of the name Ben. (Bently, Bennigan, Benvolio, etc.) When we first started thinking about a puppy, we looked at a litter of labs and almost put our money down on a Chocolate one. The girls wanted to name him "Chip." In the end though, we just couldn't do it. It didn't feel right. The parents weren't the best looking dogs I'd ever seen and their living conditions weren't ideal. Then, on a whim, I decided to look up Golden Retriever breeders in our state and happened upon a male that was available just before Christmas. Bingo.

I wouldn't say it was the easiest (or cheapest) decision to make, until we saw his picture. Cue, "awww". We were sunk. We kept him a secret from the kids, and then right before Christmas we made the 3 hour drive to get him, telling the girls "Daddy wants to look at some equipment for the farm." They were clueless until Dad came out of the house carrying our new puppy and I said "surprise!"

Tom had him named before we picked him up. His registered name is "Benton Gold", in the tradition of Bens (he's the 7th) and in honor of our hometown. Mostly we just call him Ben. Our next one will be "Benry the VIII." :)


If there is a next one. I grumble a little about how much work a puppy is and about him chewing on everyone's socks and my cowhide rug. Good thing puppies are adorable. It makes it easy to fall in love. Hopefully the puppy stage is short-lived and I will forget all about the work. 

We were hoping for a companion for Mia, our older dog who has very nervous and anxious behaviors. So far she isn't terribly impressed, and so far Ben spends more time inside away from her. Even so, having another dog around seems to make her relax. Normally she refuses to ride in the car, but yesterday as I loaded Ben in his kennel to visit the vet for shots, Mia jumped in right beside him without hesitation. I'll be anxious to see how else her behavior changes once Ben starts to spend more time outside with her. I'm hoping she will be less nervous around new people and will learn to use a pet door into the garage. 

Tom was ADAMANT about getting a boy puppy—you know—to help even the score. After we picked him up he took the girls to the store to shop for supplies. Everything they picked out, from his colar to his toys, was blue. :)

We are trying to "crate train" him. The goal is to get him into a schedule where we sleeps and naps in his crate (even eats in his crate) and goes outside immediately after to relieve himself. So far it is working really well. He hasn't been perfect, but I've been pleasantly surprised (knock on wood) how few messes we've had to clean up. The thing is, he is a very social dog and he prefers just to nap at our feet wherever we happen to be. He sleeps well in his crate at night as long as we put his crate right beside our bed.

That is a very thorough introduction–now wish me luck!


Before the year turns

I'm not one to go nuts over Christmas traditions and generally like to keep things low key and simple. It is one of the only holidays I actually make an effort to decorate for though. It just seems like a little festivity and a few twinkling lights really cheer things up when it is cold outside and the days are so short.


Sometimes I find it hard to decorate around the unfinished projects. Our front door is still unpainted and not fully trimmed out, but I finally added a wreath anyway. There is always a pile of boots in the entry- especially now that the puppy needs accompanied outside to do his business several times a day.

I reuse the same decorations every year, but I'll add to it if I see something that catches my eye. This year we made a crude little star from some leftover trim scraps and wrapped a few lights around it. I also bought this pretty pine plant off of our local Facebook yard sale site for $10. It will stay all year, but looks especially nice for the winter!

I found this adorable pair of vintage children's wooden skiis to add to my collection this year also. They were a steal ($5) at a holiday antique show.

There is a darling little place called Virgelle (named for its founders Vigil and Ella) on the Missouri River that opens only about twice a year to sell their wares. They are open as a bed and breakfast in the warmer months. It was a bit of a muddy trek to get there, but well worth the drive.

I could have easily dropped a few more pennies there if I'd had the pennies to drop. Our new puppy sort of ate a hole in my pocket.

I love getting everyone's Christmas cards in the mail this time of year. As usual I display them in this vintage card carousel. This was our Christmas card this year:

I mentioned before that I let my kids decorate this year. It was fun for them and stress free for me.

They filled this bowl with silver pine cones and garland, and I loved it. You can see that I hung some art on the wall in our living room. I've had these New York prints and really like them, but had intended to use them somewhere else until I saw how nice the metallic frames looked against the gray walls. I would like to find a pair of mirrors to flank them since there is a lot of wall left on either side.

I like playing Christmas songs this time of year. This year the girls were asked to carol at the local nursing home with the 4-H club, and I got to accompany them on the piano. It was a grand time and was especially fun to see the joy on the faces of the tenants!

Simple white stockings hung by the chimney with care.

And a simple neutral tree.

My favorite twiggy reindeer appear every year also, even though I can't seem to find a glue to fix the wound they endured a couple of years ago...

I hope you enjoyed the tour of our holiday home before it all gets packed away for another year. Happy Holidays! :)